Introduction to Google Cloud Platform
Part 0: Choose a Google account
In this tutorial, you will use a Google account to sign up for Google Cloud Platform (GCP). You will also join a Google Group with this account, which will give you access to certain GCP resources.
Choose an @gmail.com Google account you will use. Important: It must be an @gmail.com Google account.
You have several options:
- You can use a personal Google account that you already have
- You can create a new personal Google account by signing up for one here
- If you have a non-
@gmail.comgoogle account (perhaps through your university), it won’t work for GCP unless the domain admin has enabled creation of GCP resources by your account. For example,@temple.eduGCP accounts will not be able to create projects on GCP. If this is the case, use a personal Google account.
Regardless, whenever you use GCP, be sure that you are accessing the platform while signed in to the correct Google account. Otherwise, you may be confused to not see expected projects or to get “access denied” messages.
Part 1: Purchase the lab virtual machine access package
To get access to the Google Cloud Platform virtual machines created for the labs on this site, visit the storefront and follow instructions there to purchase access to the “lab virtual machine access package”. During the purchase process, you will specify a @gmail.com Google account that you want to use to access GCP for this class. Purchasing access will give your that @gmail.com email address access to certain Kali GCP images used for this class.
Part 2: Sign up for Google Cloud Platform (GCP)
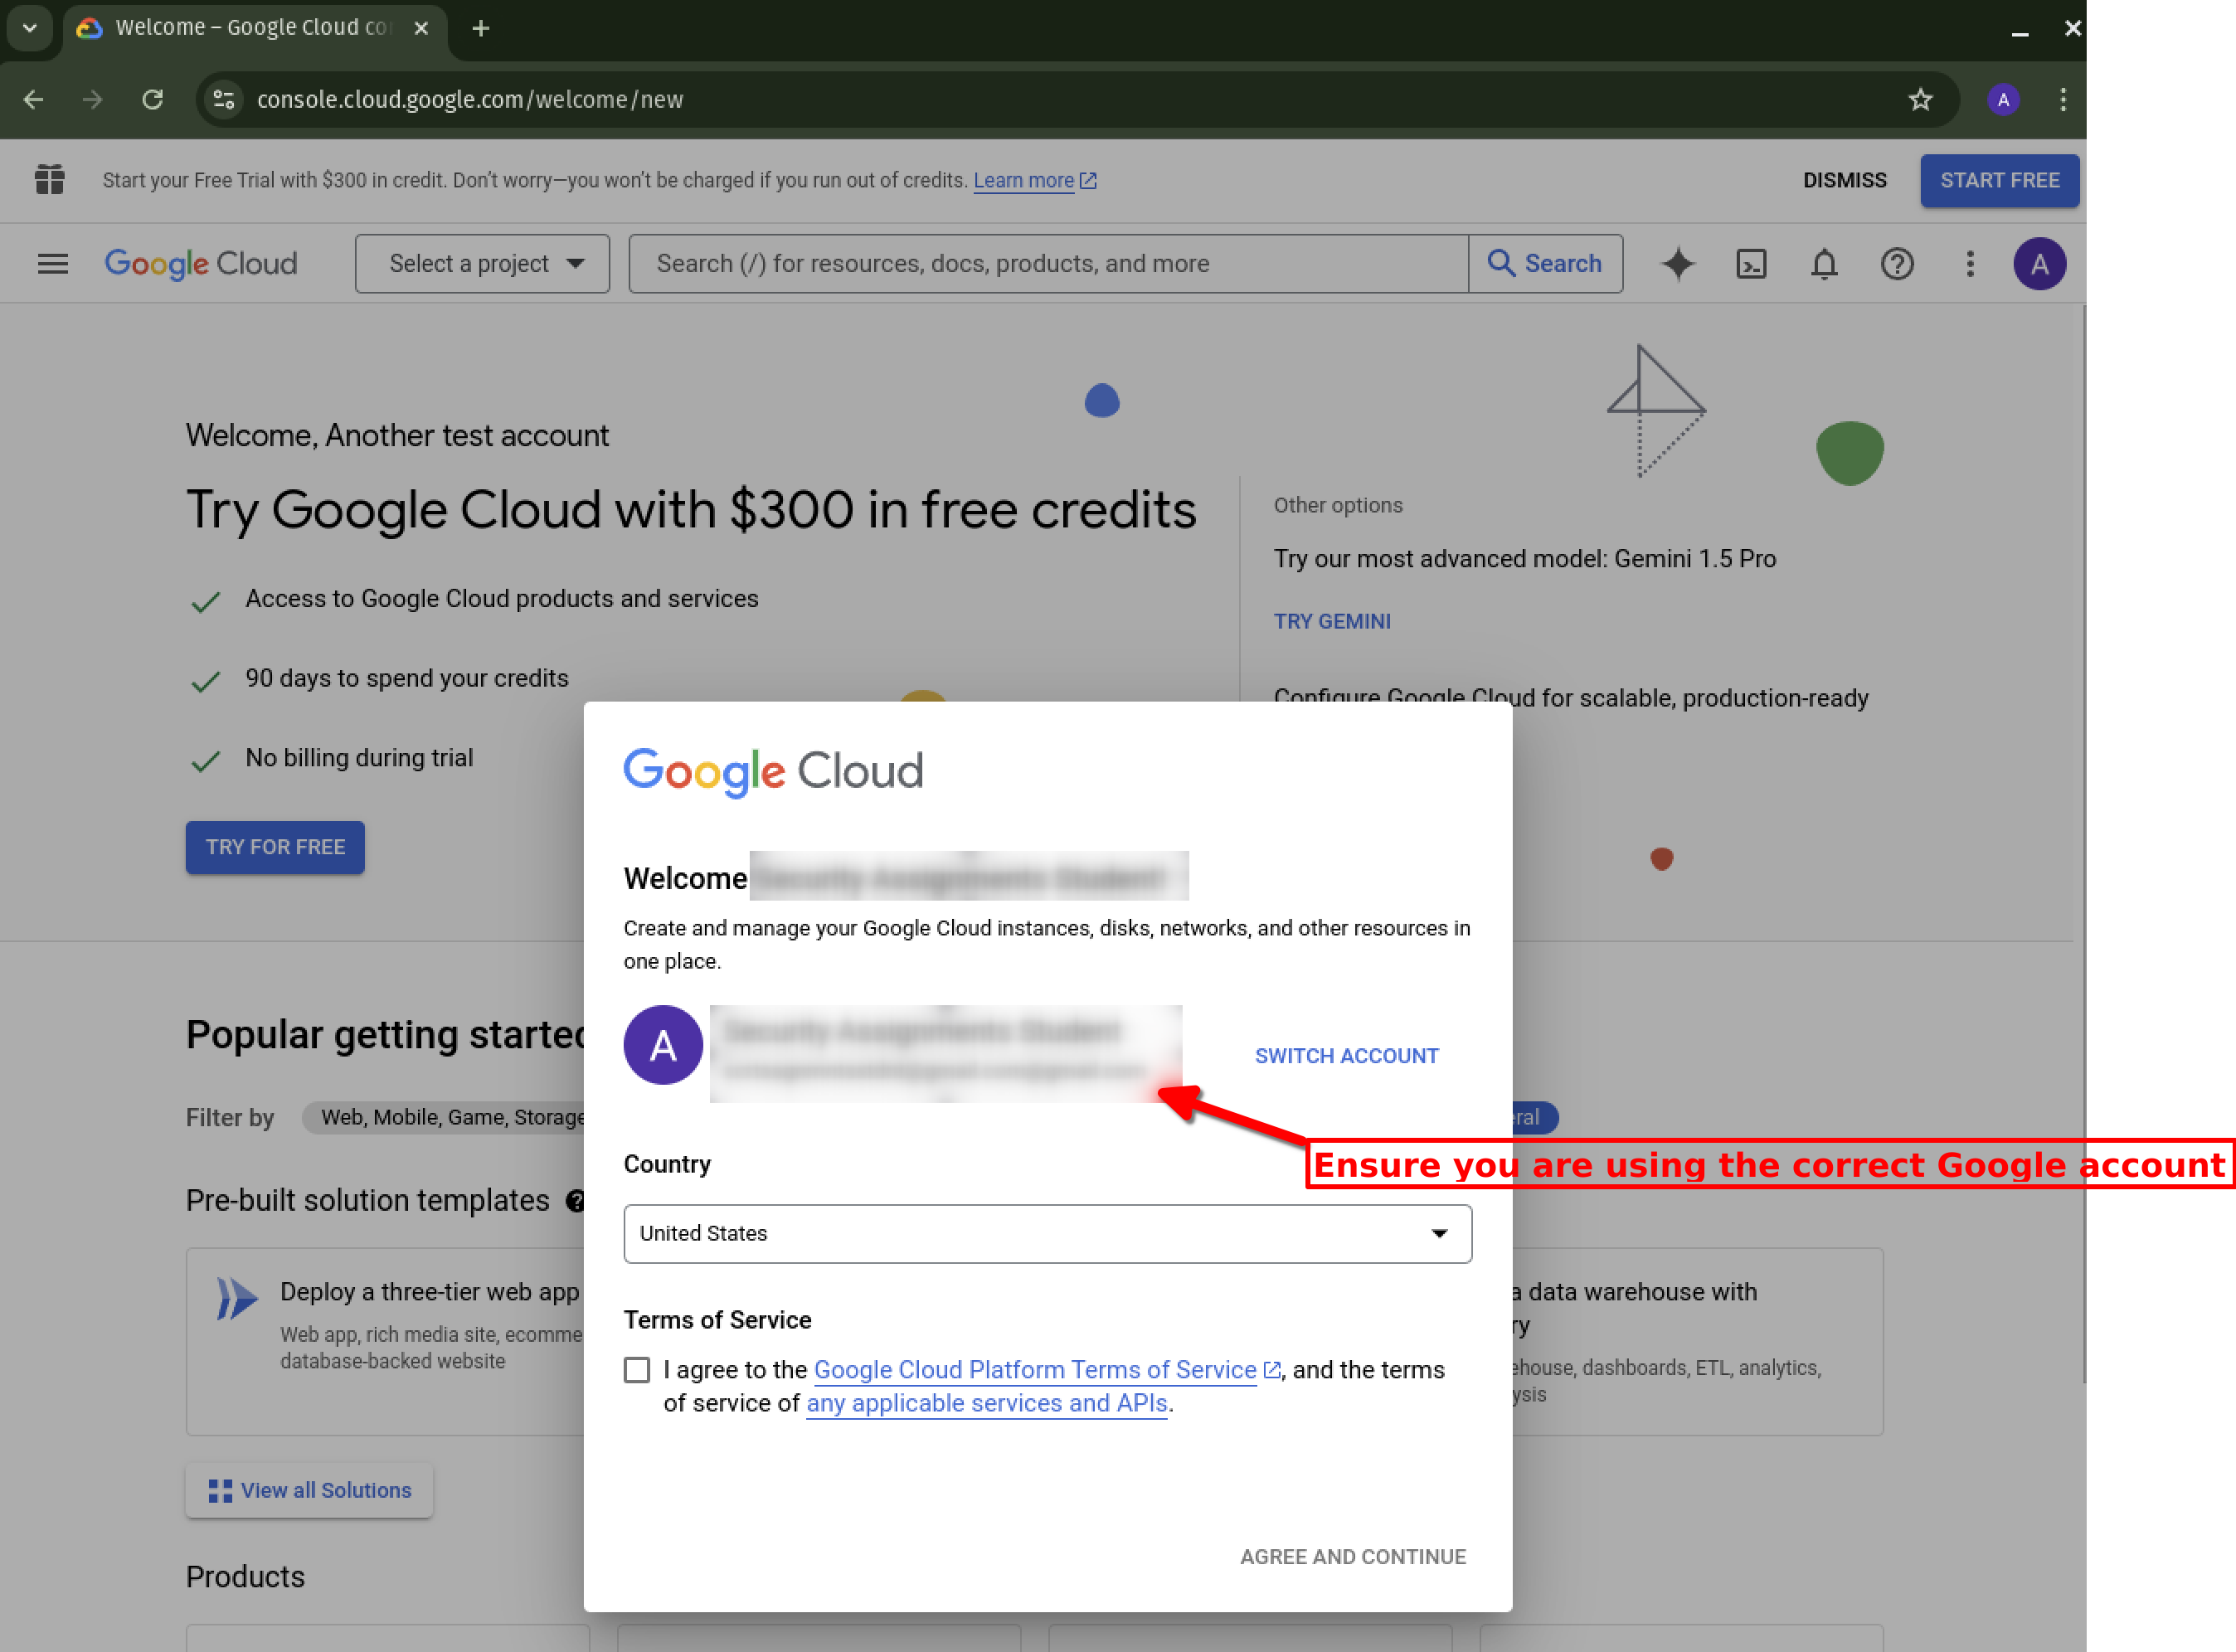
Important: Do the following while signed in to the Google account for which you purchased class material access.
- Visit https://console.cloud.google.com. Click “Try for Free”.
- Check that you are signed in to Google with your correct account.
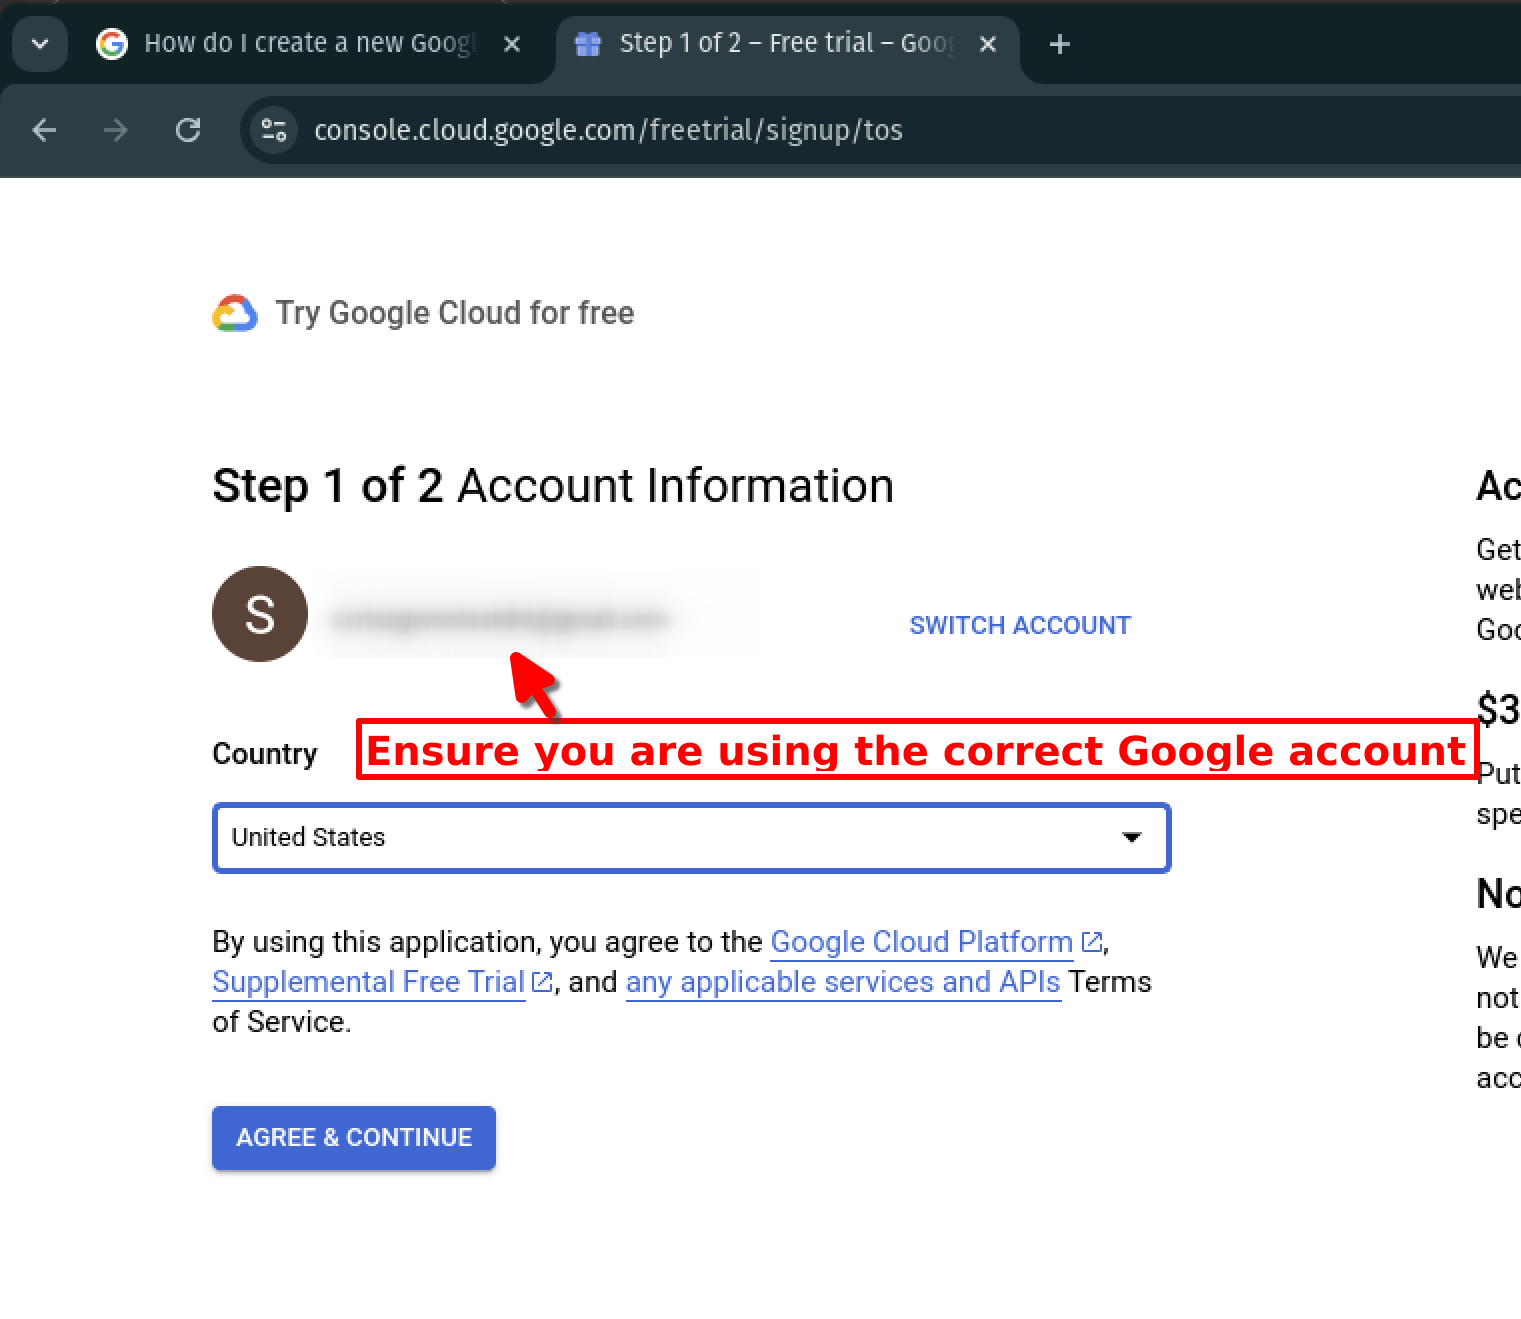
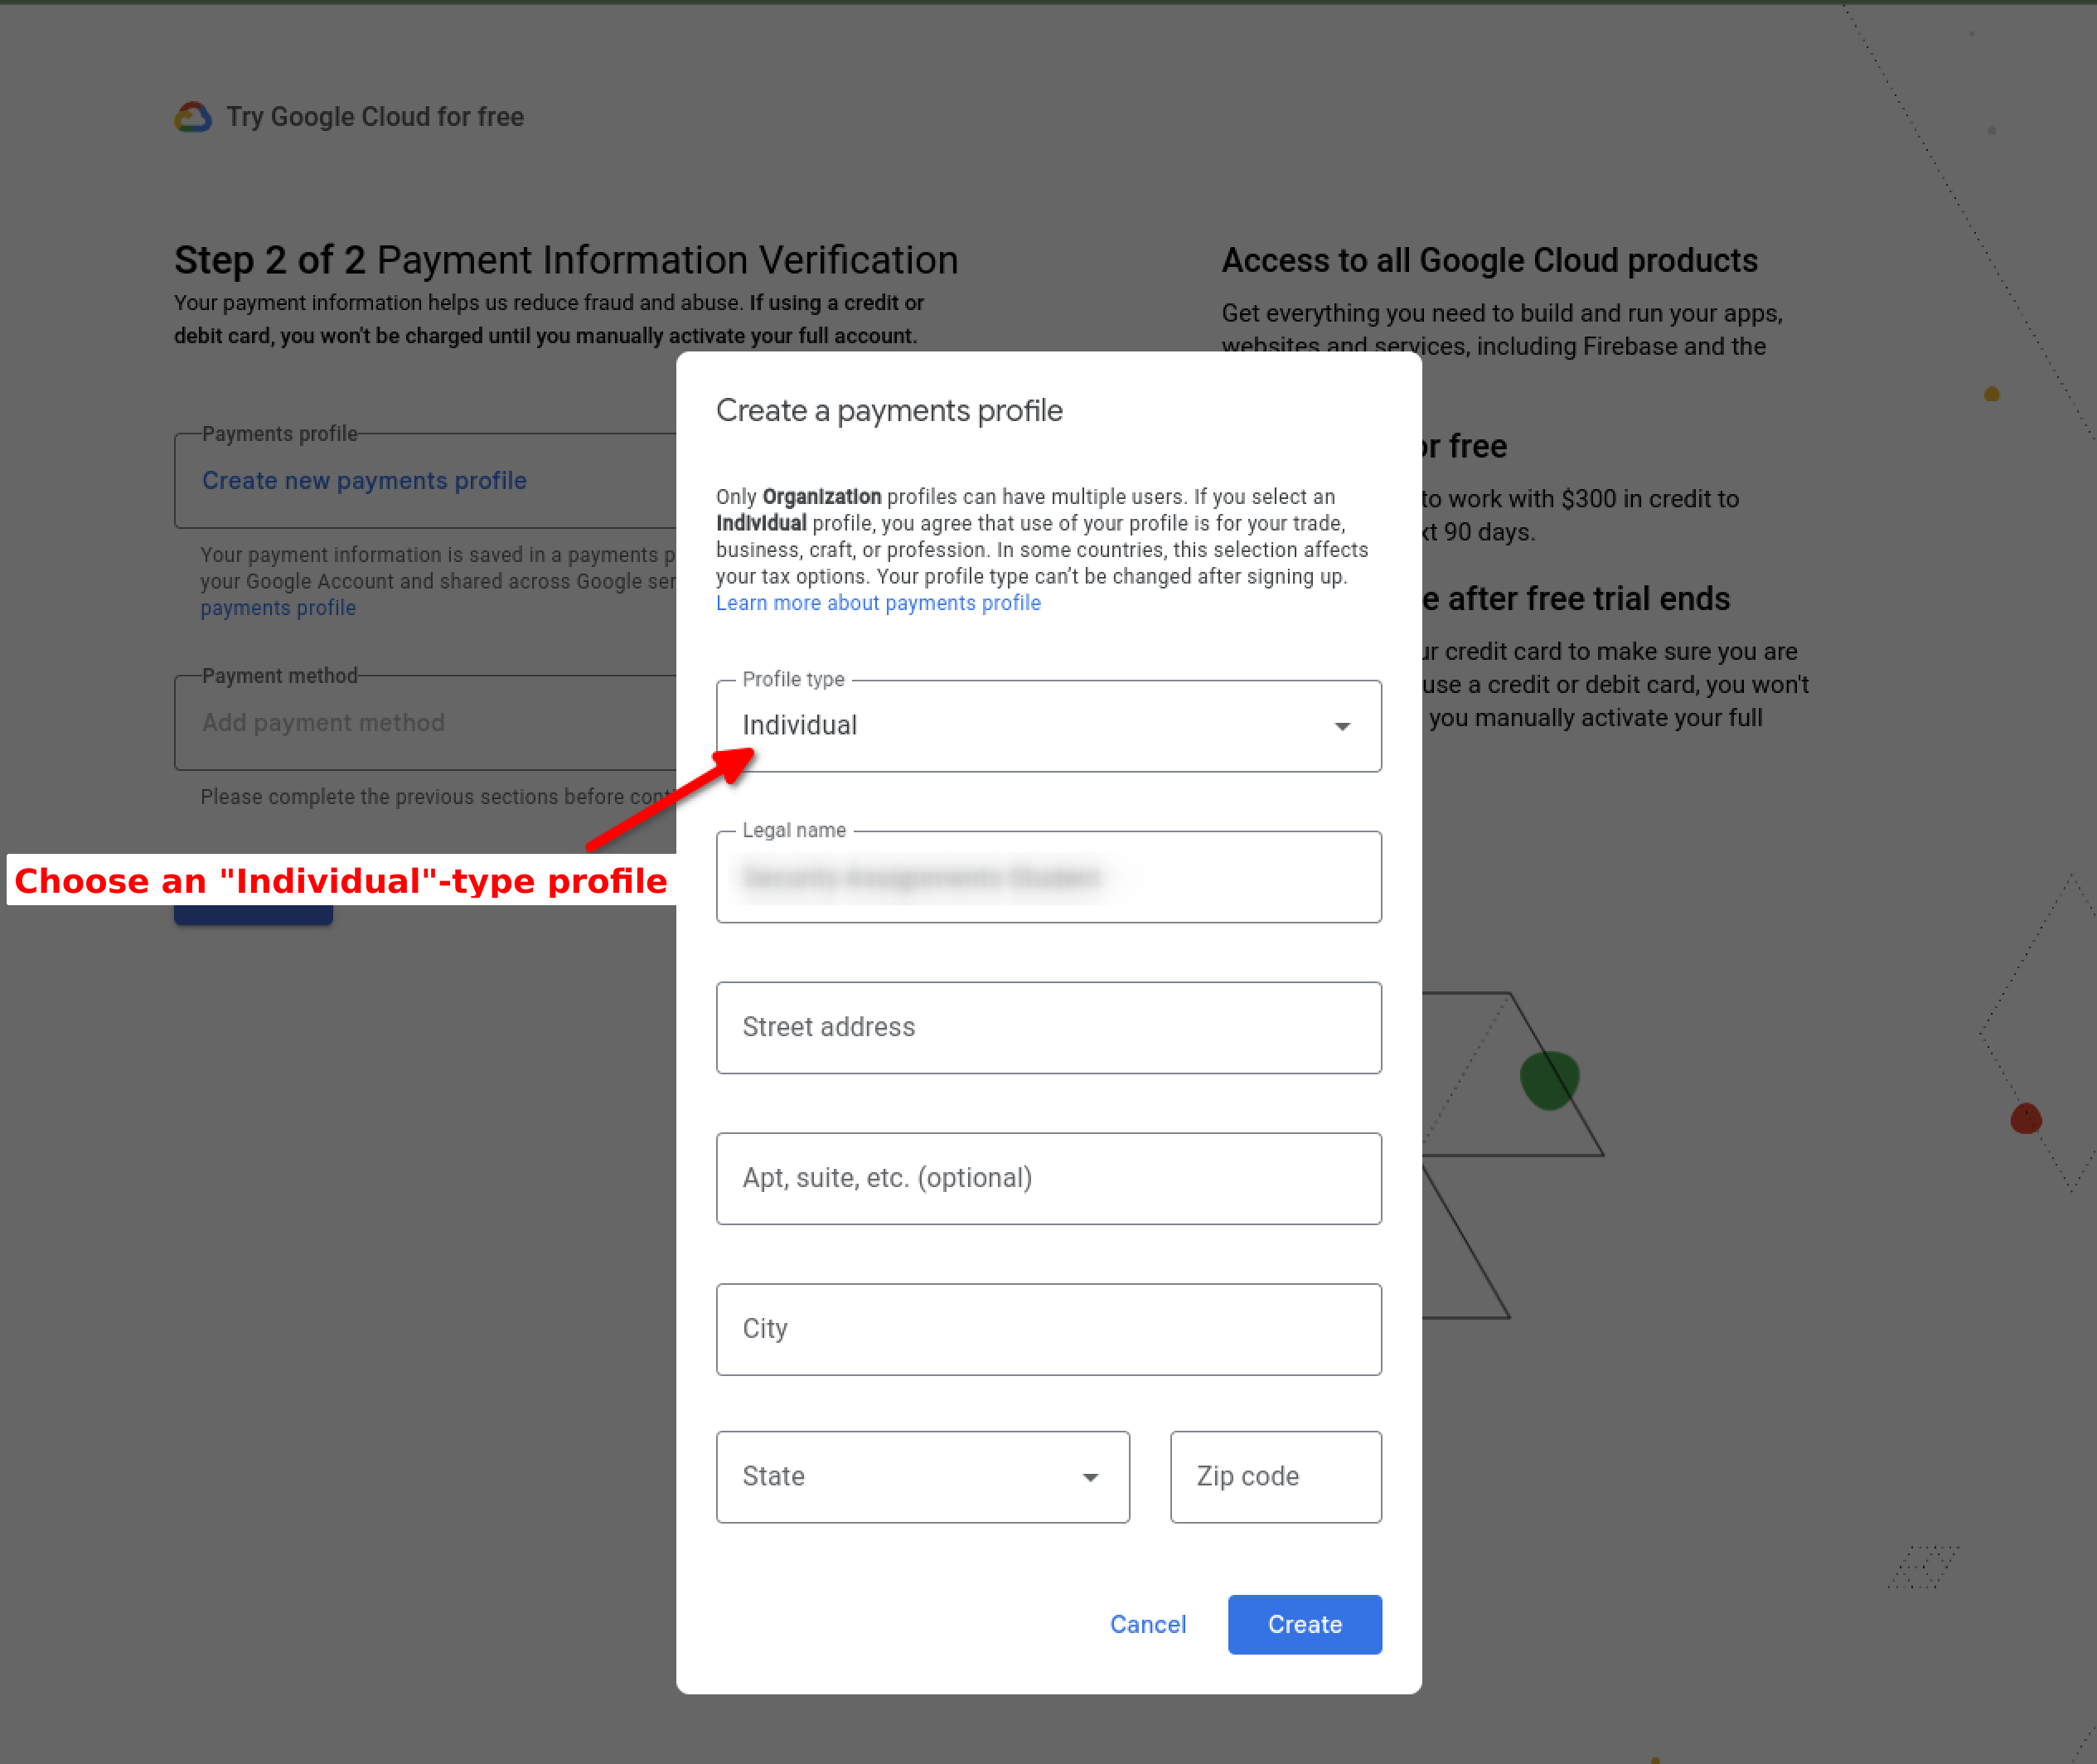
- Step 1 of 2:
- Ensure once again that you are signed in with the Google
@gmail.comaccount you want to use with GCP. - Agree to the terms of service.
- Ensure once again that you are signed in with the Google
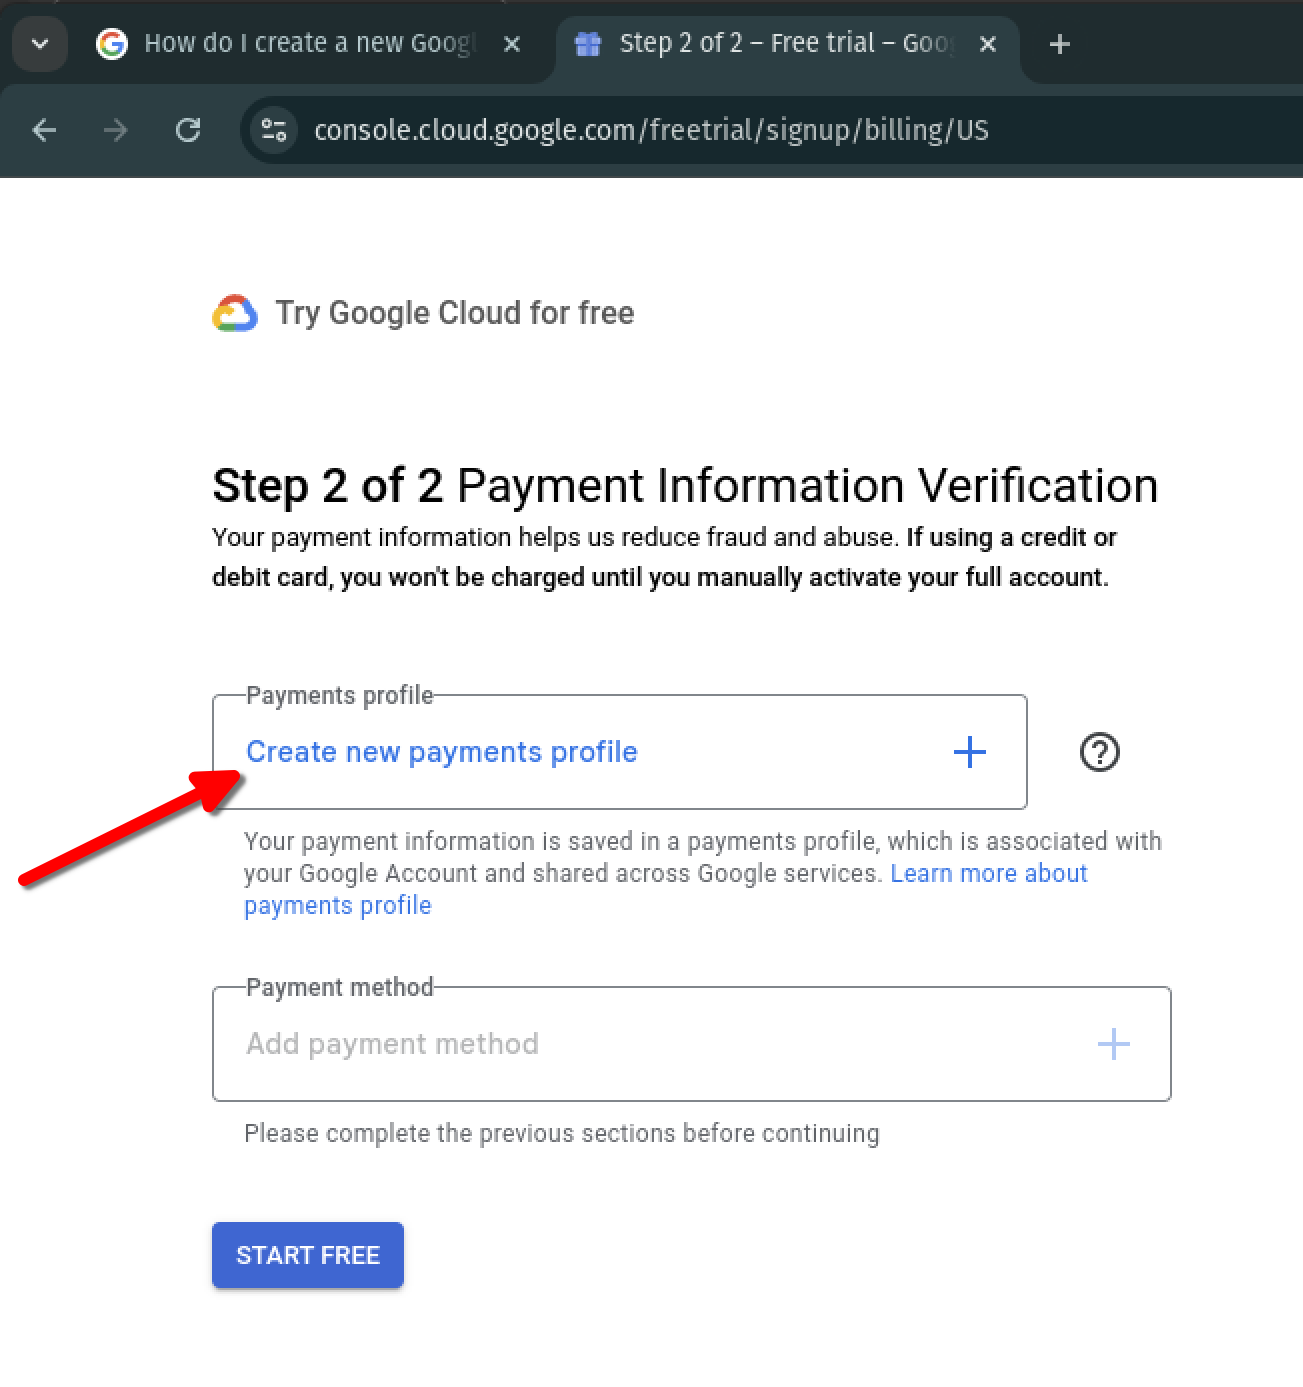
- Step 2 of 2: Choose “Account type” > “Individual”. Complete the sign-up form. Provide a credit card.
- Click “Start my free trial”.

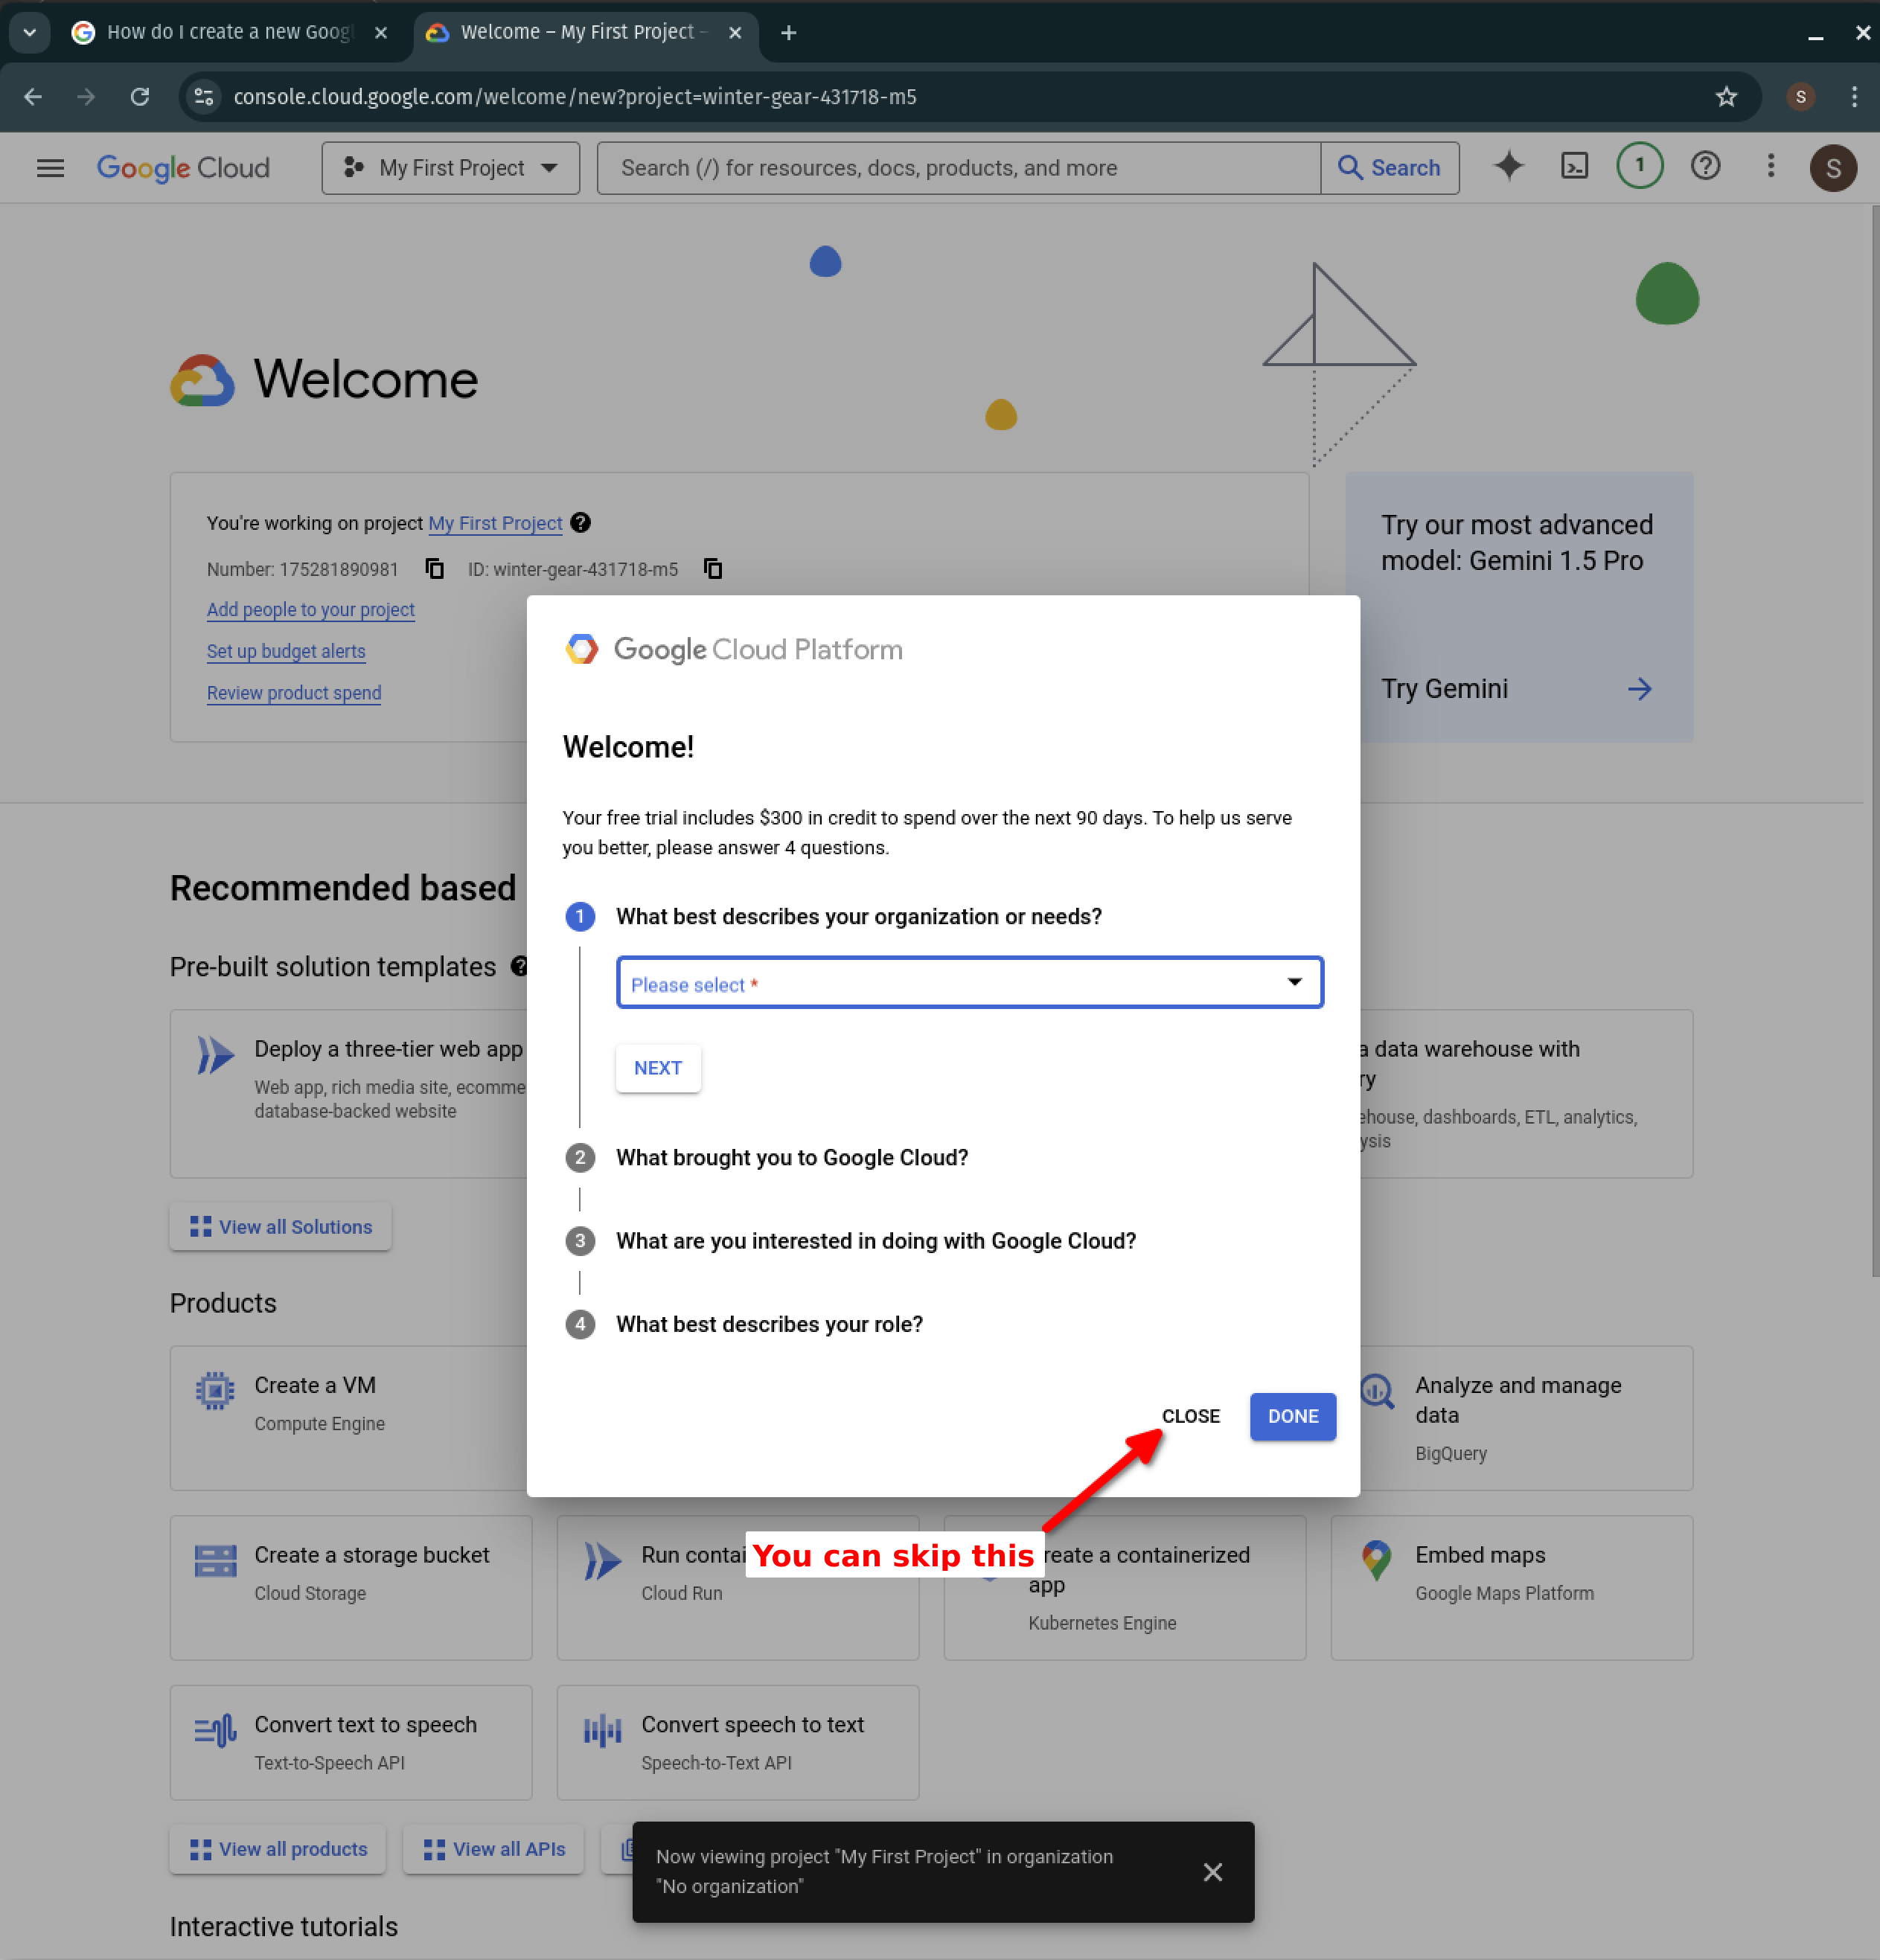
Part 3: Create a new project and launch a new Kali Linux instance
Ensure before beginning this step that you have completed parts 1 and 2, after which you should have a GCP account with access to the course lab GCP materials. Then, do the following on https://console.cloud.google.com:
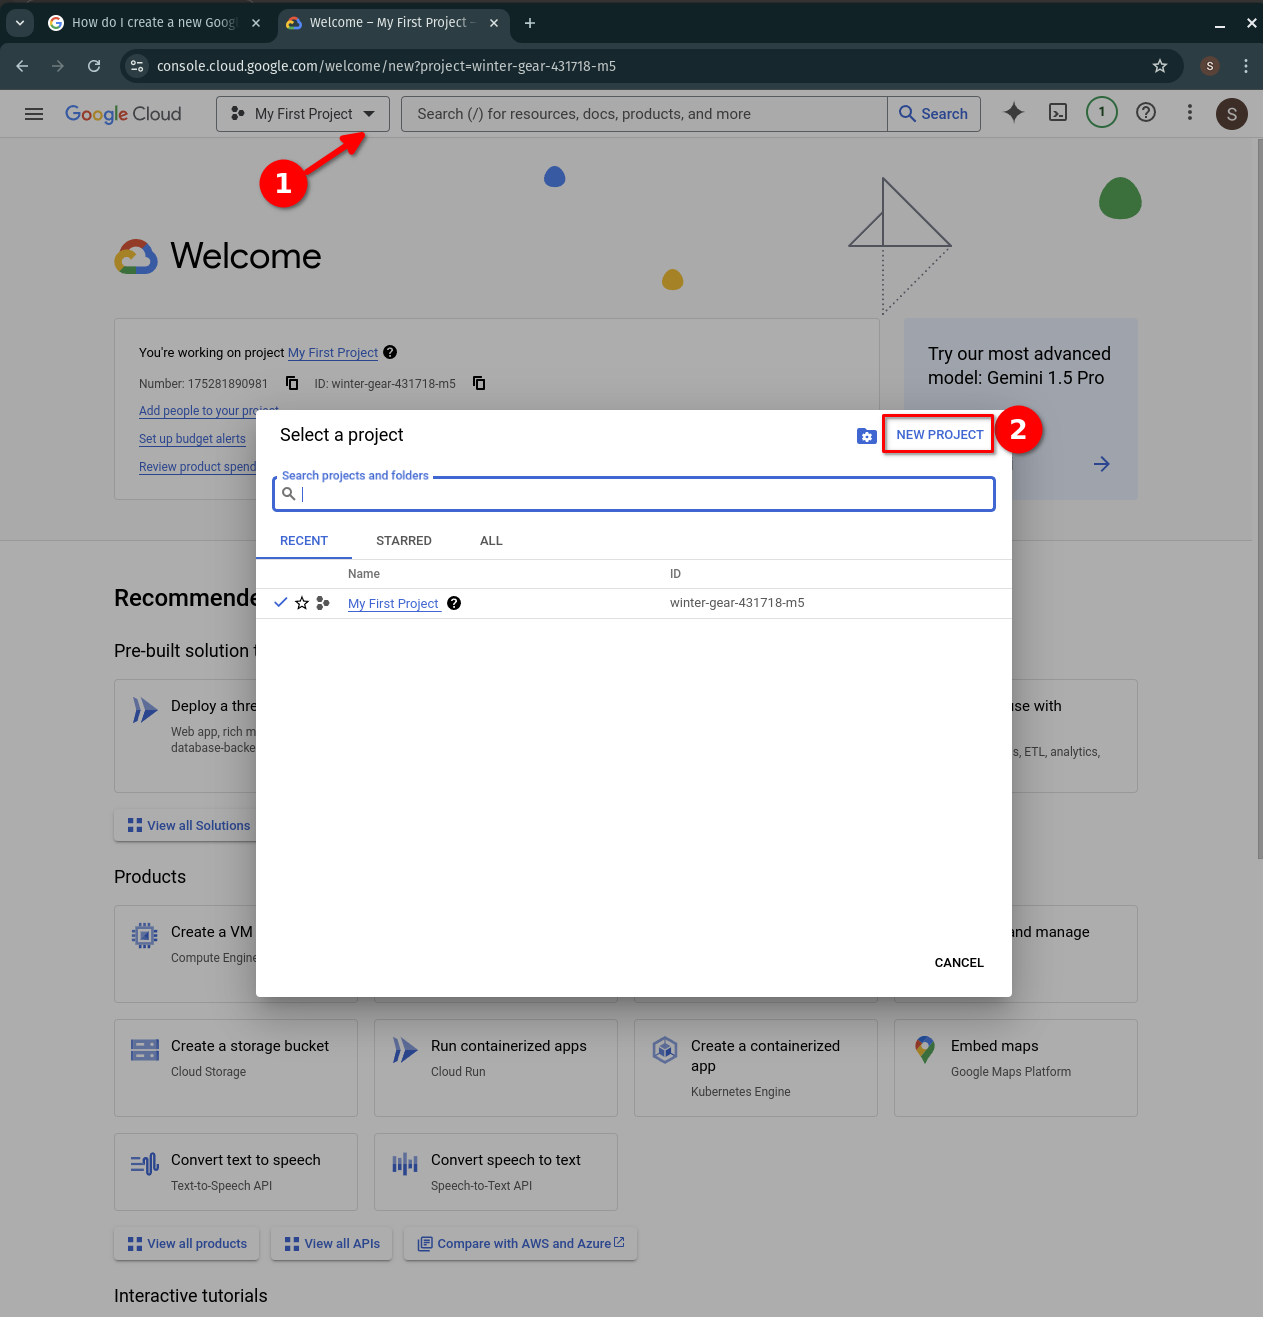
Part 3.1: Create a new project
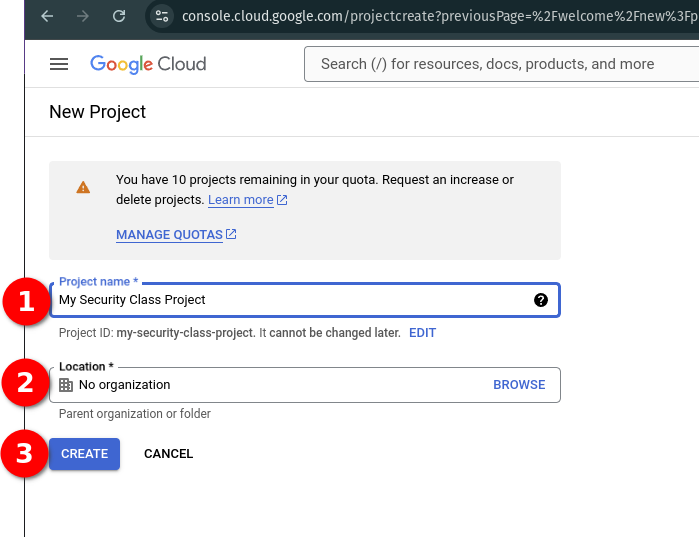
- Create a new project which will house all of the material for this class.
- Click “New Project”
- Choose a name for your project, and for the “Location,” choose “No Organization”.

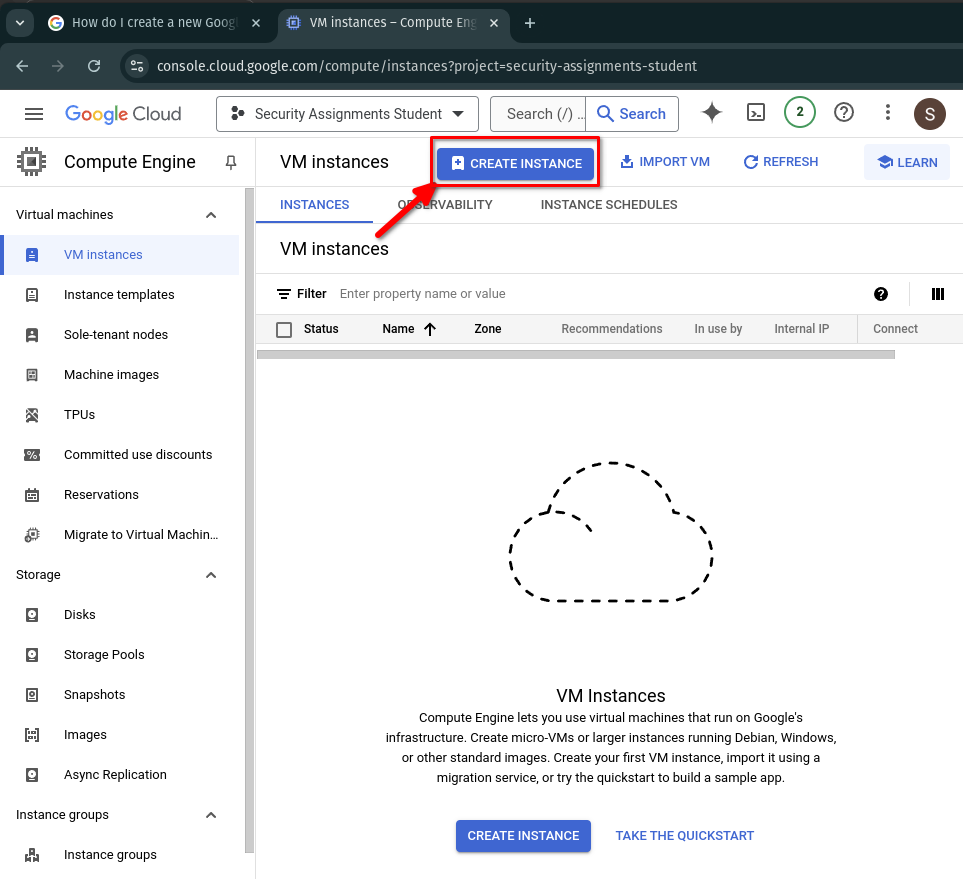
Part 3.2: Enable the Compute Engine API
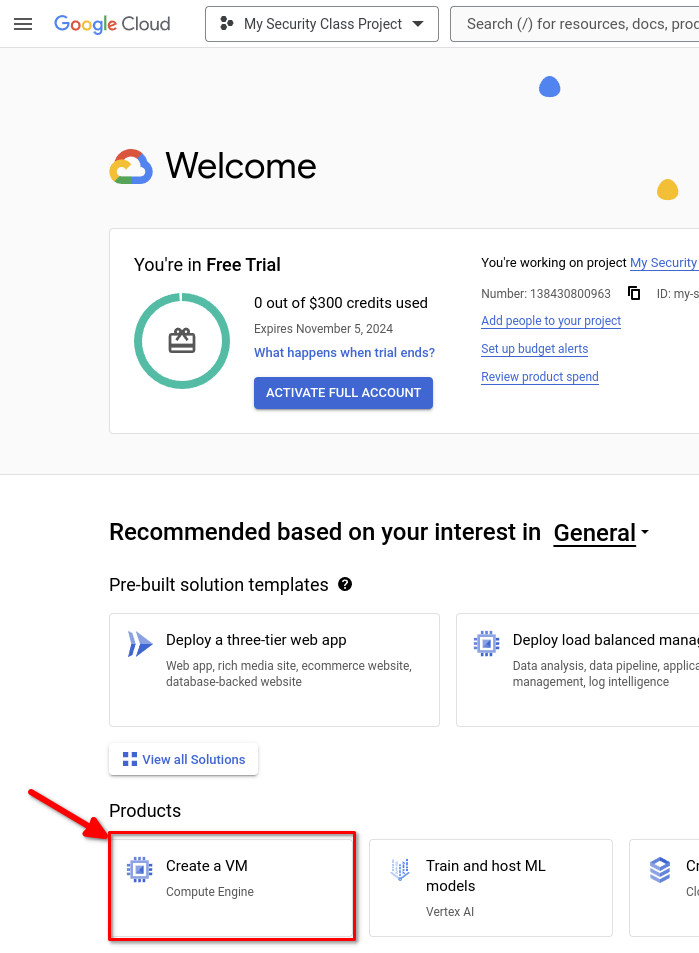
- Click “Create a VM” to navigate to the “Compute Engine” area.
- Click “enable”. Wait a few minutes for Compute Engine to set up.

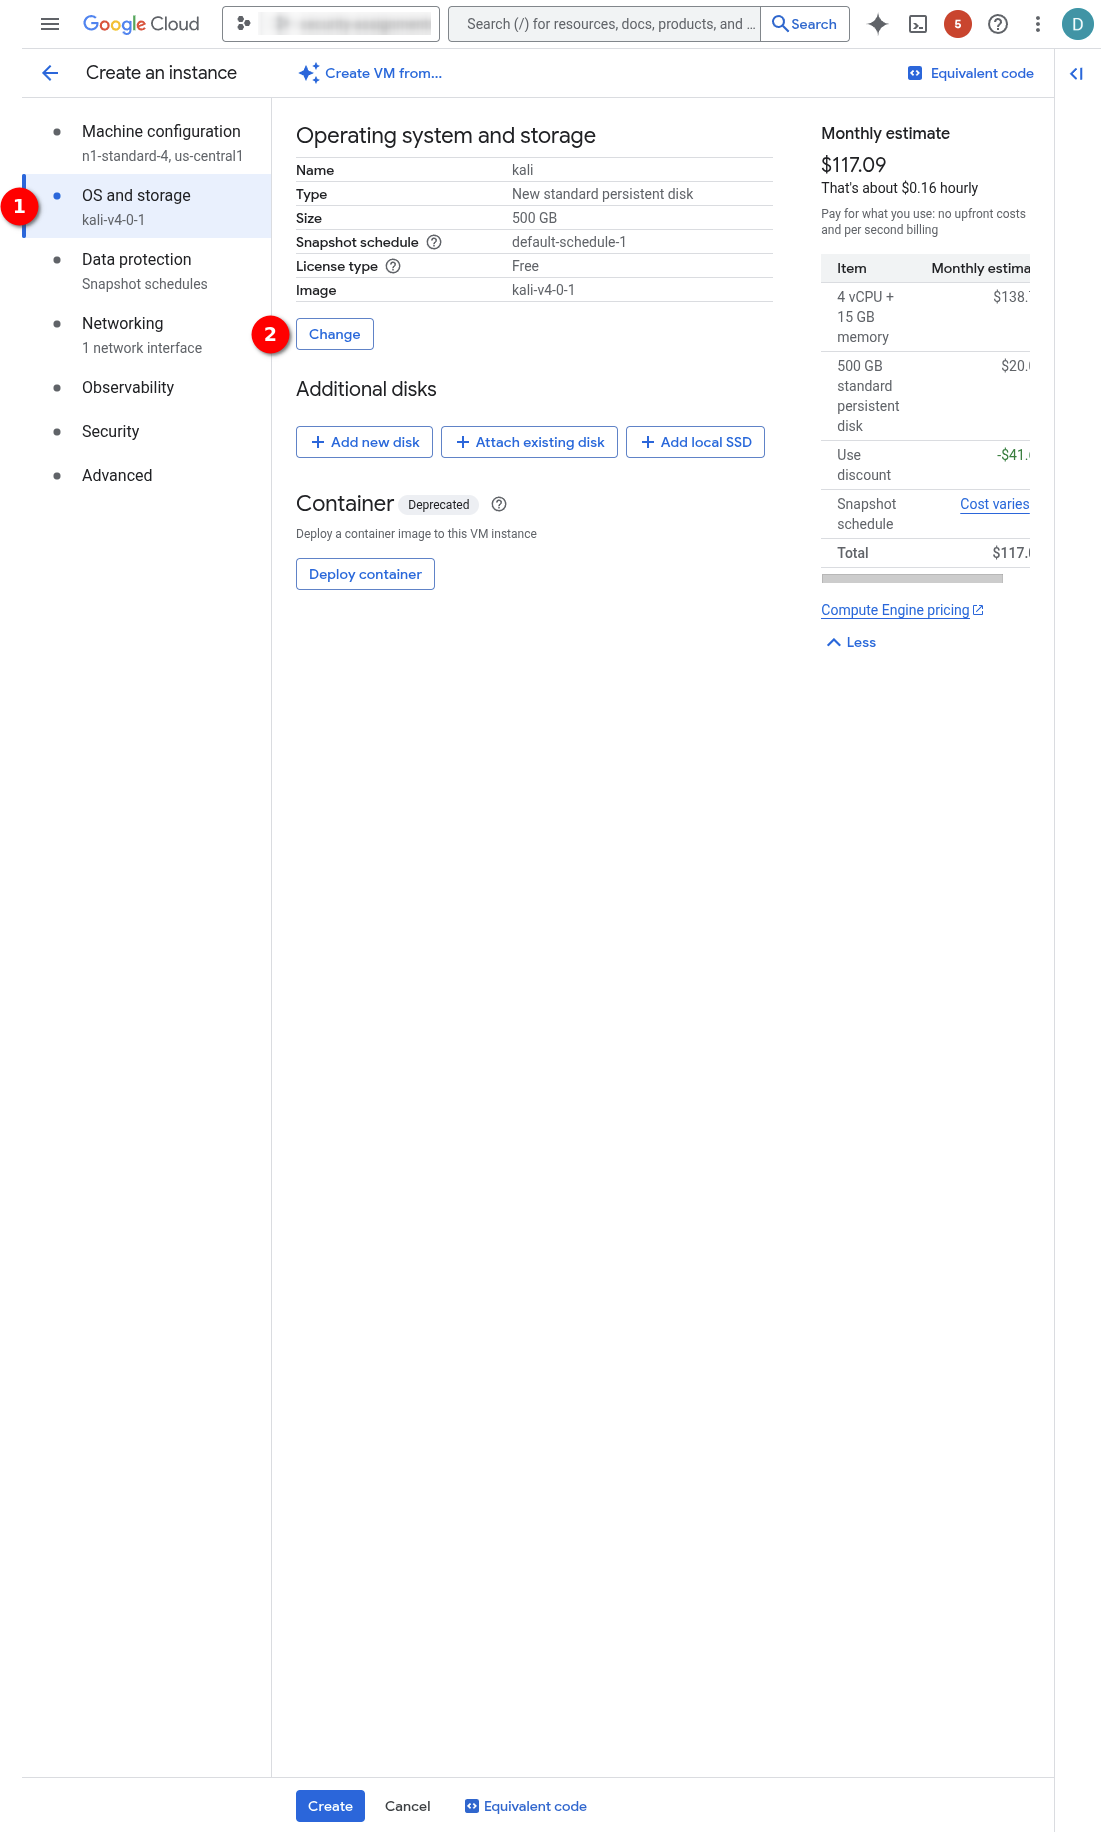
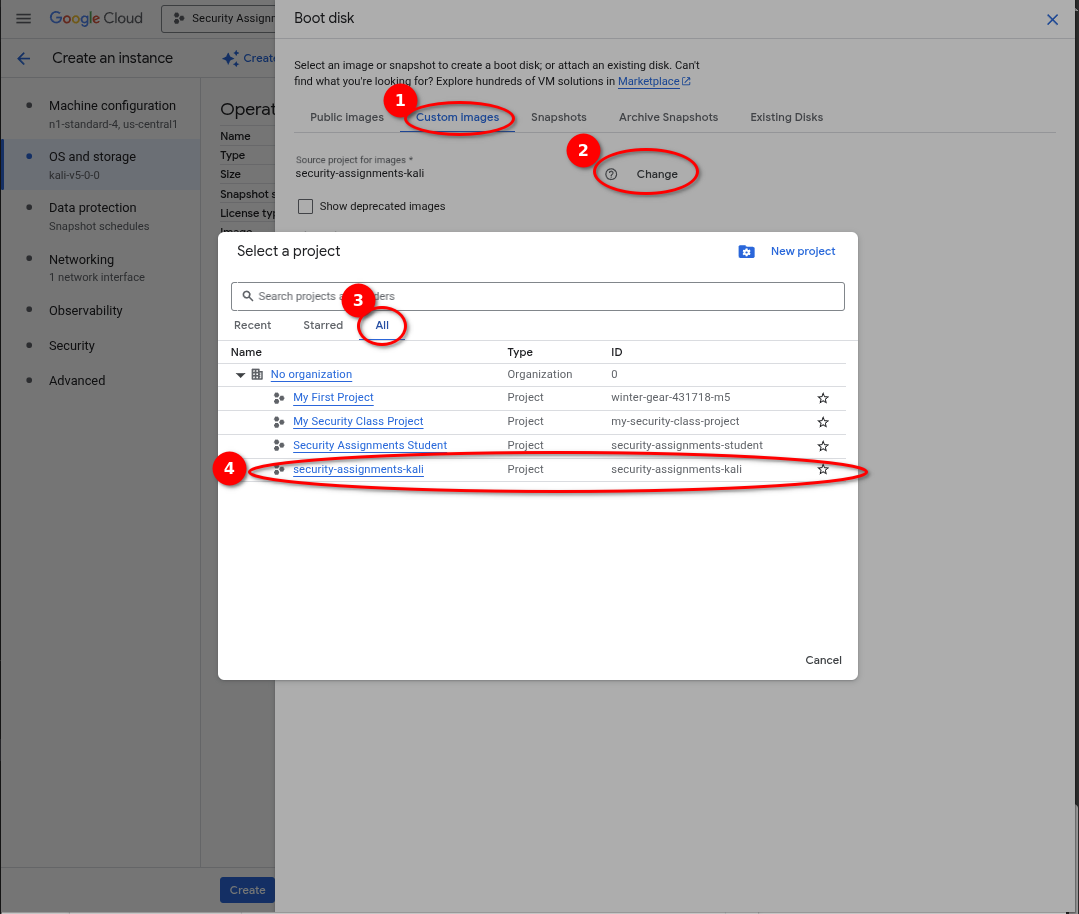
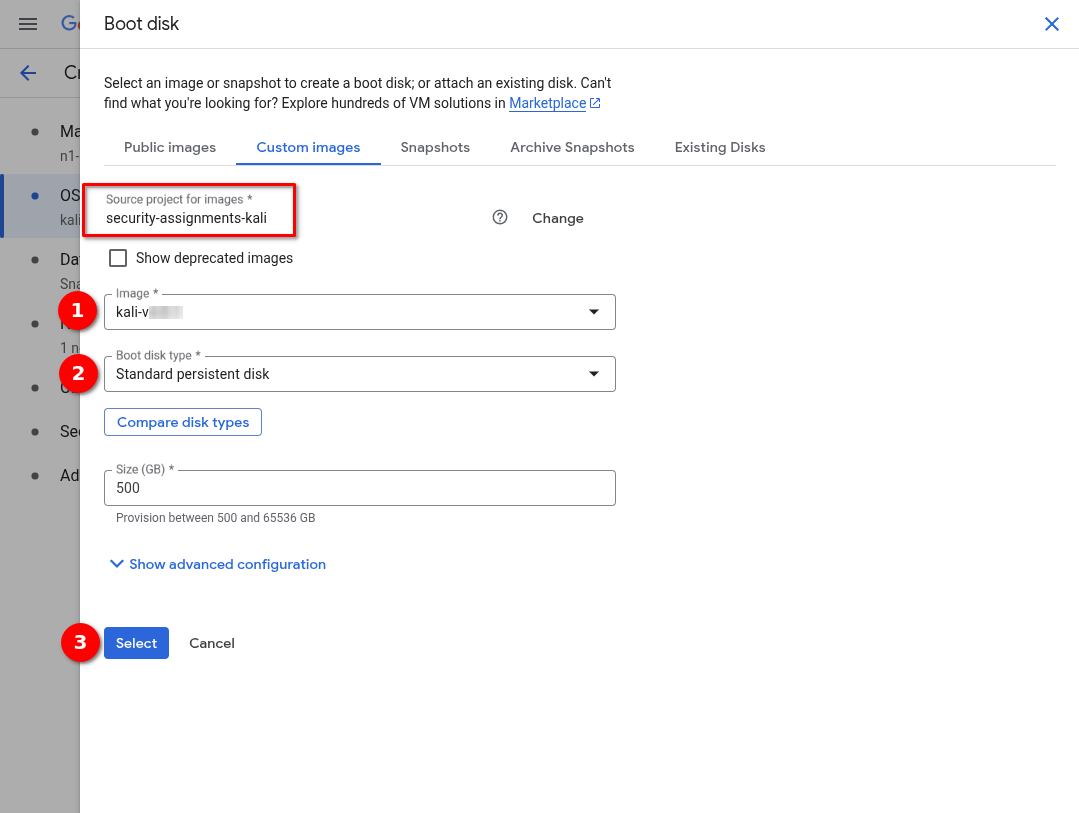
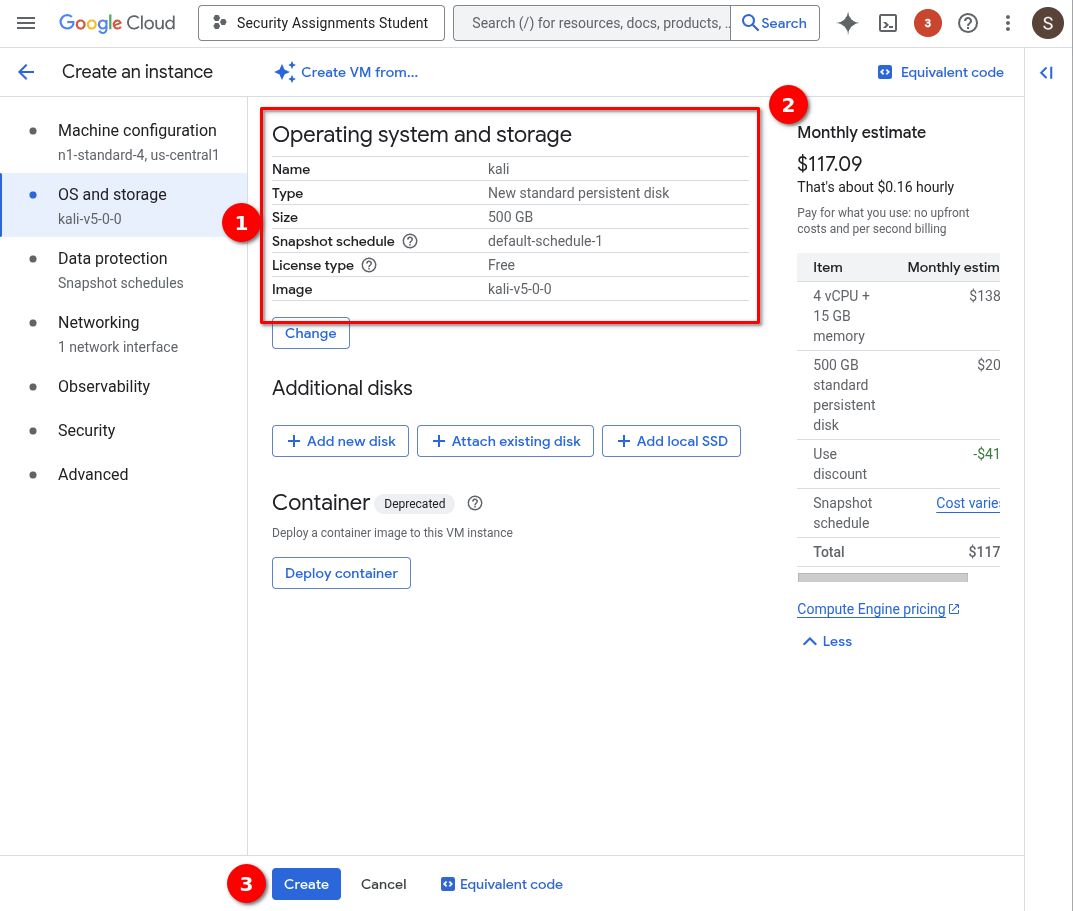
Part 3.3: Create your Kali Compute Instance
Follow the steps in the images and image-captions below.

Failed to start kali, A n1-standard-4-VM instance is currently unavailable in [your regional zone]. Alternatively, you can try your request again with a different VM hardware configuration or at a later time. If you get this error message, first try a different regional zone. Then, you can check a different N1-series machine type for availability, such as n1-standard-2. Or you could try an N2-series instance, with machine-type n2-standard-4, and with CPU platform AutomaticPart 3.4: Connect to your instance via SSH-in-browser
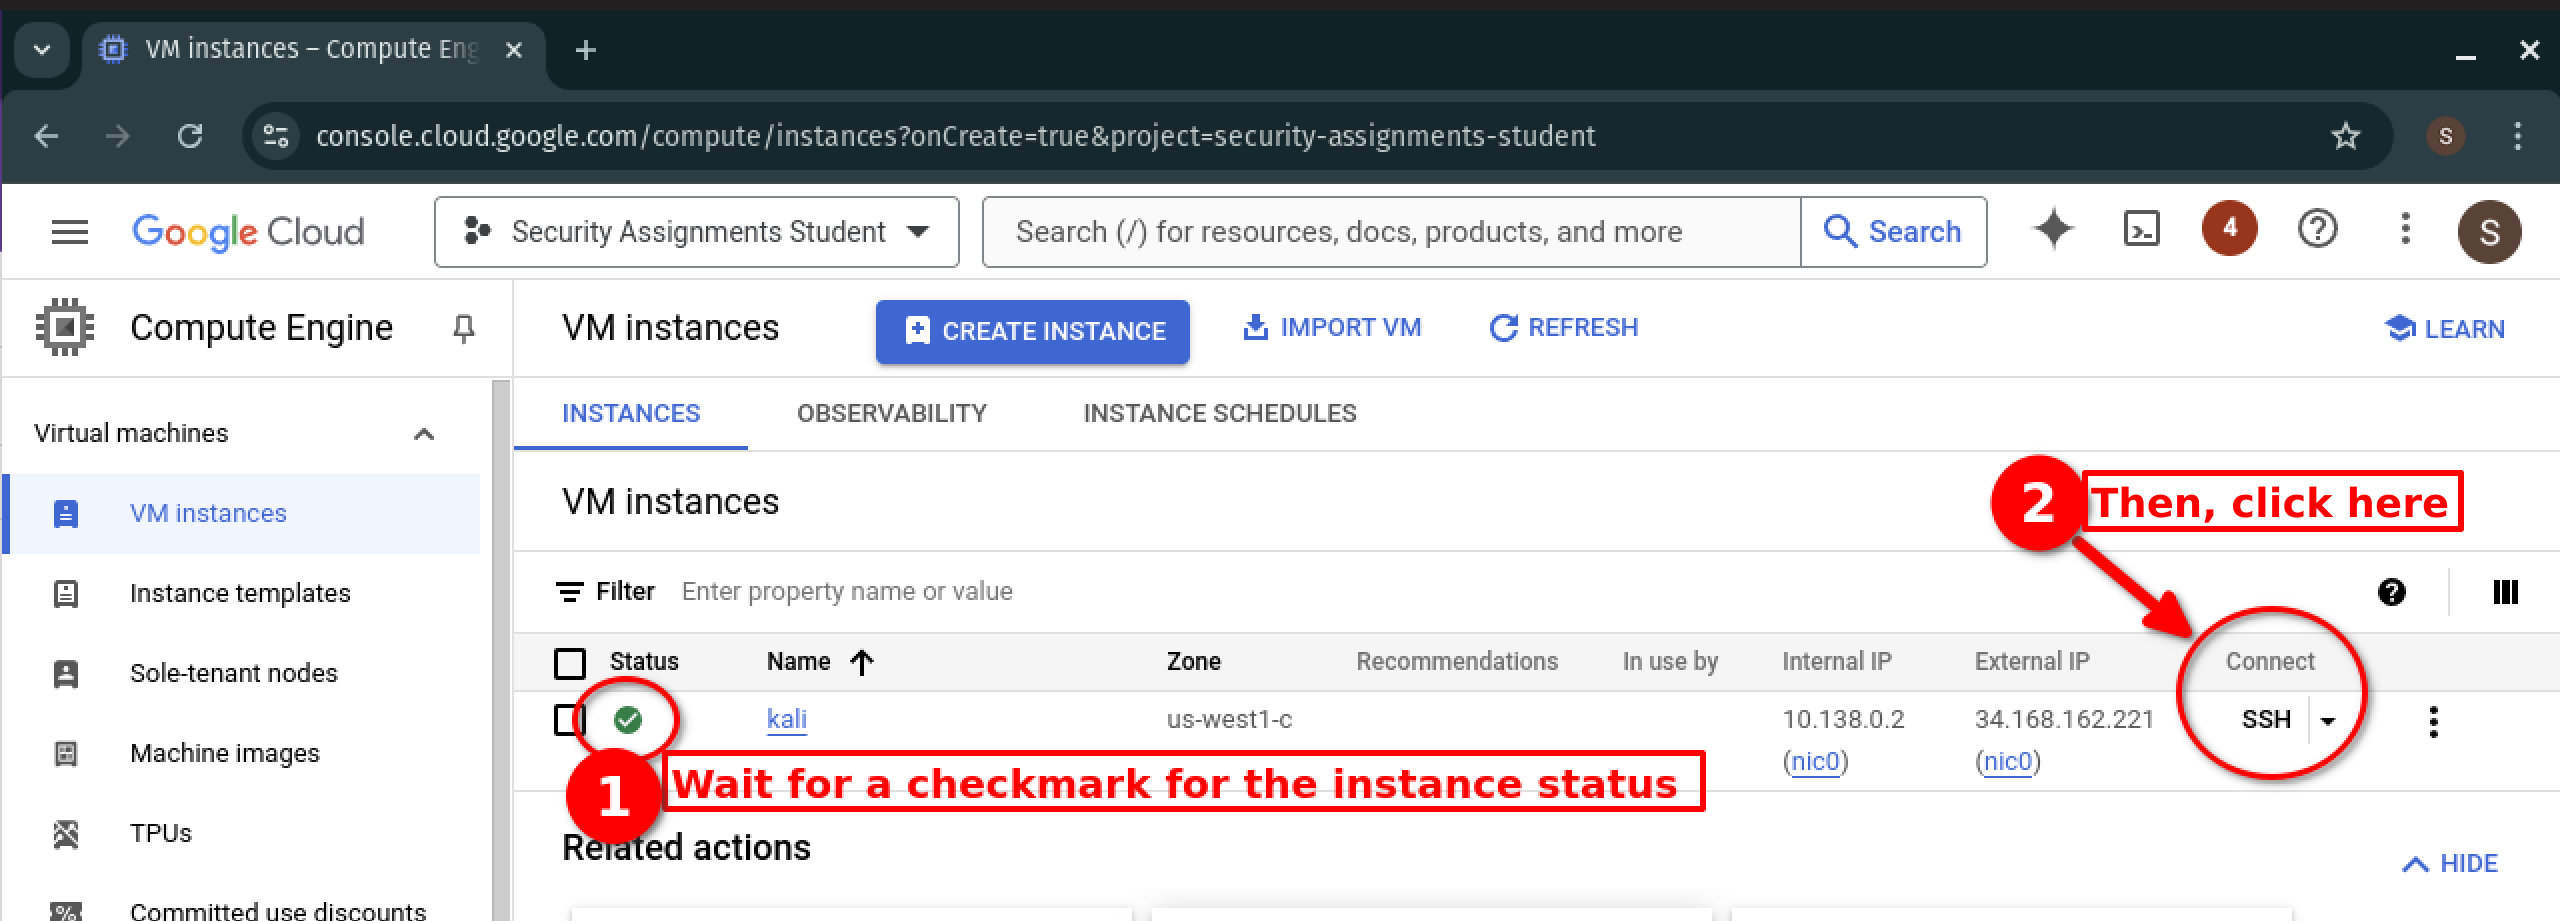
- Wait a few minutes for your image to boot. Once it has booted, it will show a checkmark.
-
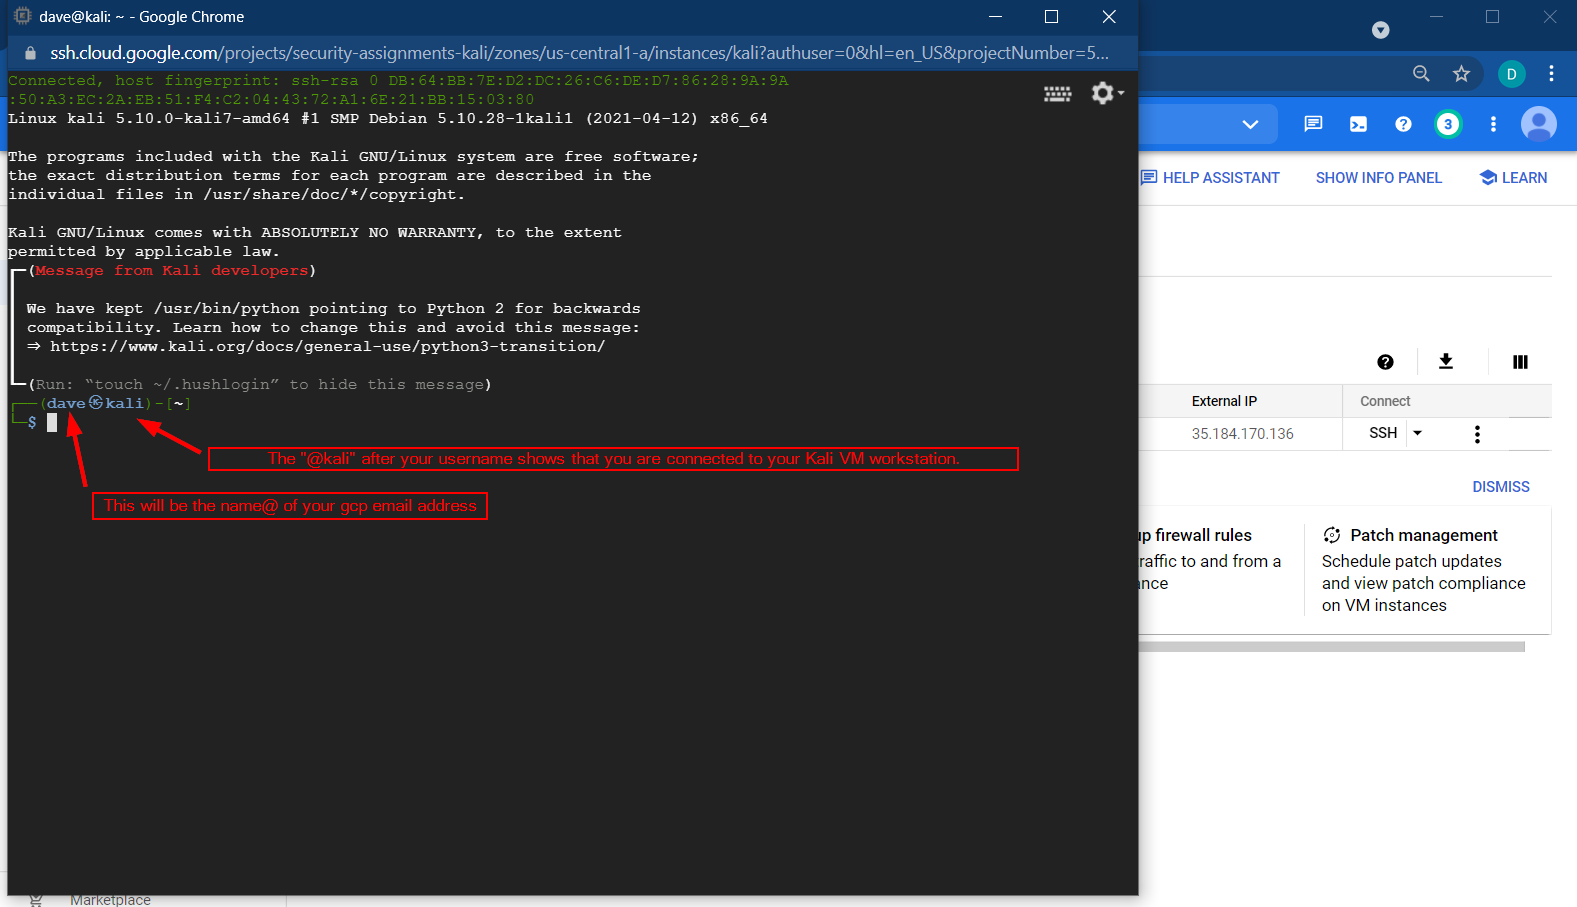
Connect to your instance via
ssh.If it fails to connect, try again (the system may not have finished booting).
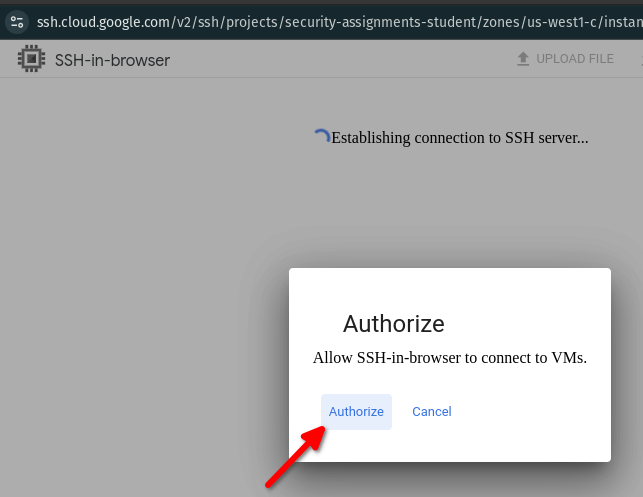
You should see a browser window pop up that looks like the following image. Leave this popup open – you will need it for the next step.
Part 4: Connect to your Kali Linux VM using Chrome Remote Desktop
Setting up Chrome Remote Desktop (CRD) will enable you to graphically connect to your Kali instance, from your browser, using a Google account to authenticate. You should be able to access your instance from anywhere as long as your Kali instance is running on GCP, and as long as your traffic is not blocked by a local firewall, such as may happen on university Guest WiFi networks.
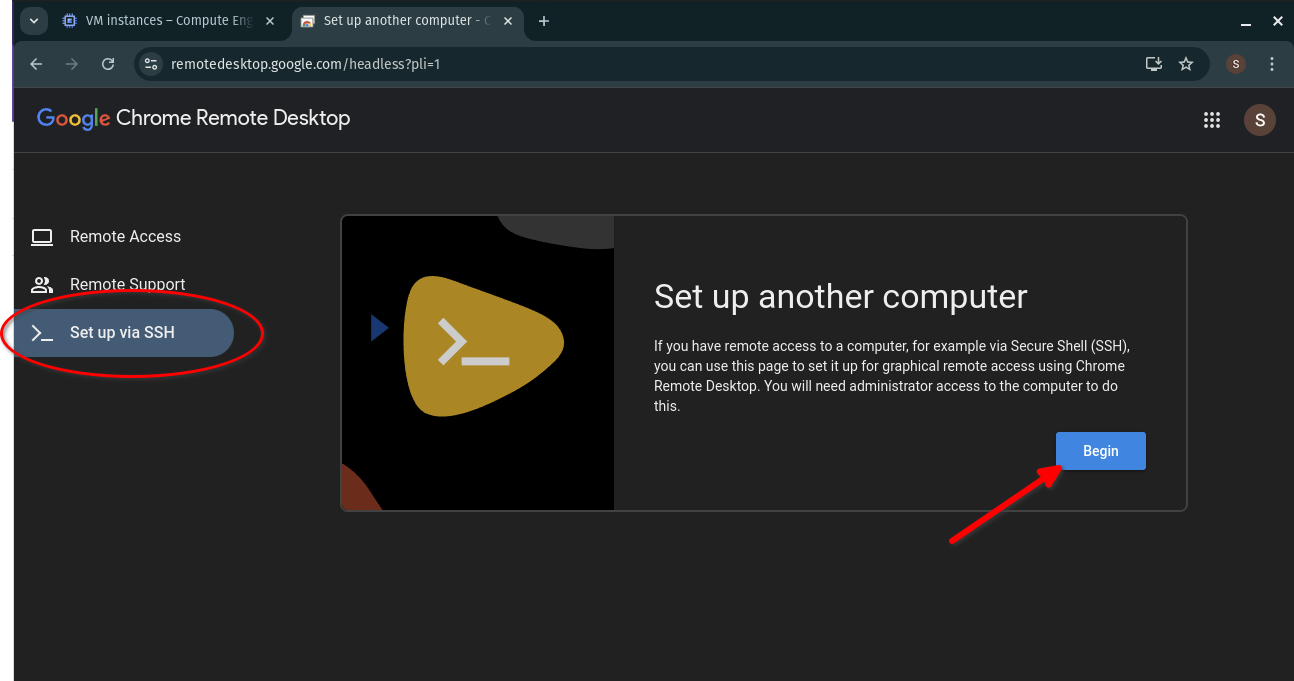
- Open another browser window, and visit https://remotedesktop.google.com/headless.
- Click the “Begin” button.
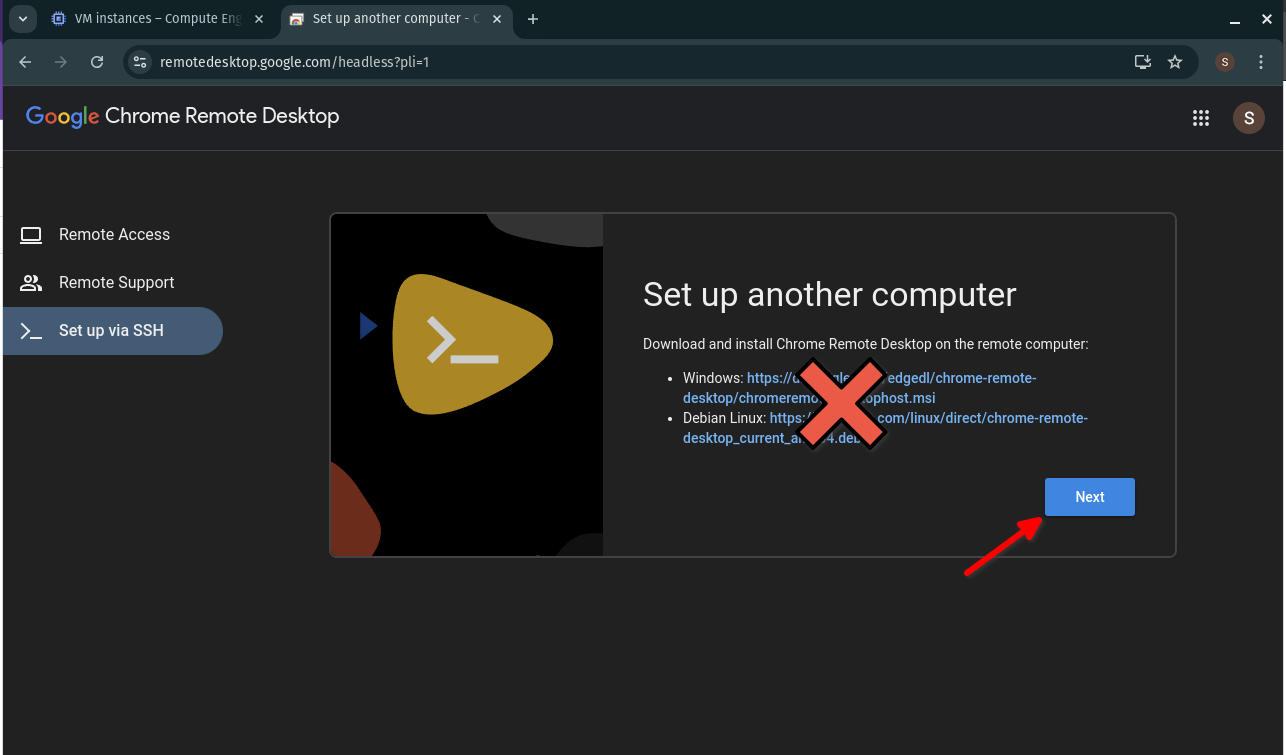
- On the “Download and Install” page, click the “Next” button. (Chrome Remote Desktop is already installed on Kali).
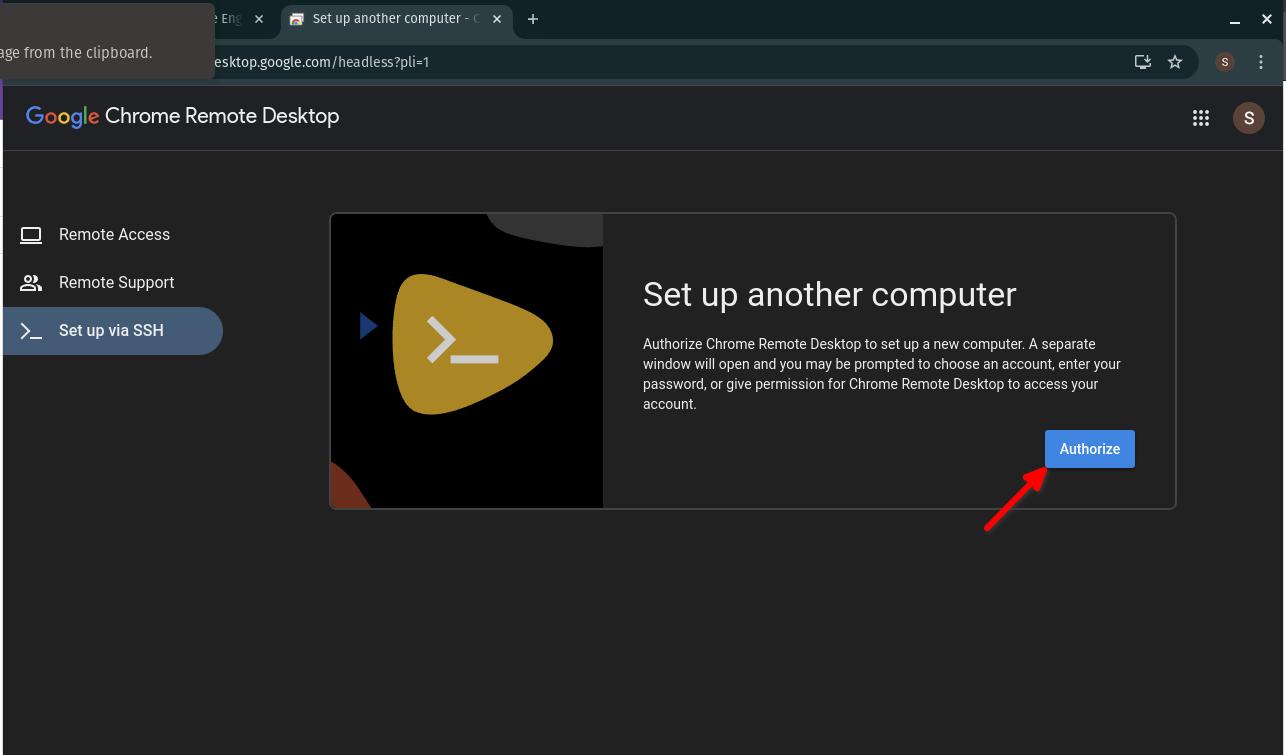
- Click the “Authorize” button.
- Select your personal Google account and click the “Allow” button.
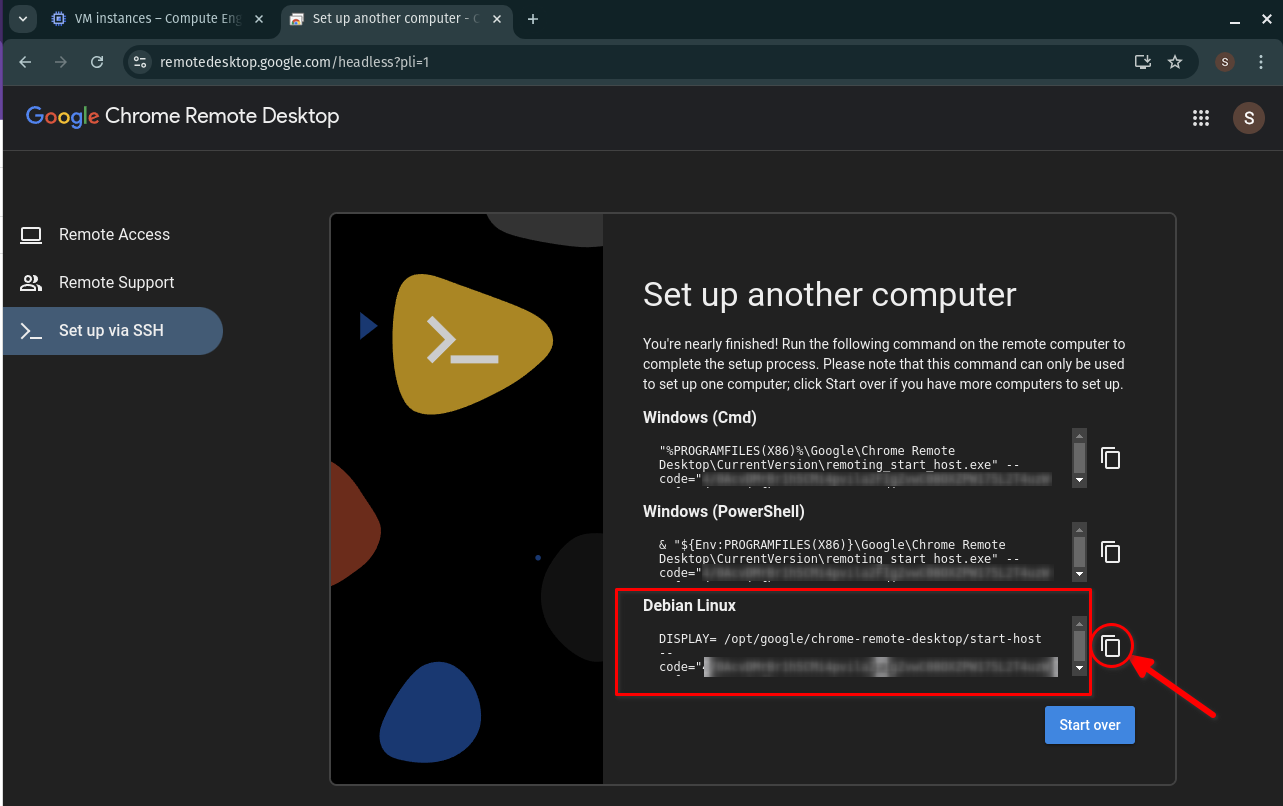
- Click the “copy” icon to the right of the Debian Linux command to copy the command.
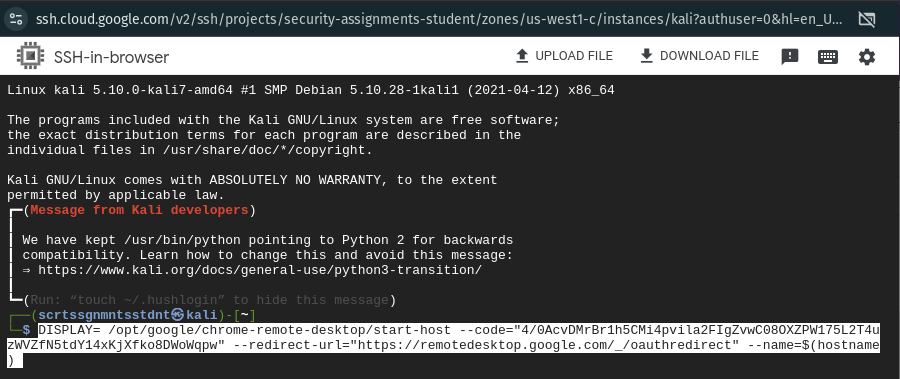
- Switch to your browser window with the ssh connection to Kali, paste in the command you copied into the Kali Linux command line. Press
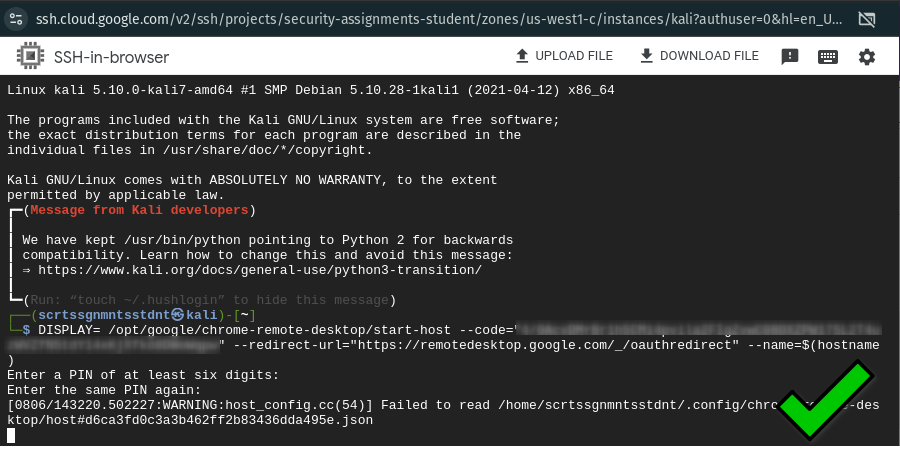
enter. - Enter and re-enter a six-digit pin. Press enter.
- You will not see any visual feedback as you enter a pin. This is normal.
Did you get an OAuth error? This may happen if something went wrong when you ran the command copied , and if you tried to run it again. The copied command is only valid for one attempt. You will need to start this section over again, to obtain another authorization url, which will have a new auth token embedded. - Switch back to the window with remotedesktop.google.com open. Click the “Remote Access” link at the top or visit https://remotedesktop.google.com/access.
- Click on your Kali instance.
- Type in your six-digit pin, and check the box so that your browser remembers the pin.
Can't get to the pin-entry screen? Try a different web browser, such as Google Chrome. Also try disabling any browser extensions that may be interfering.
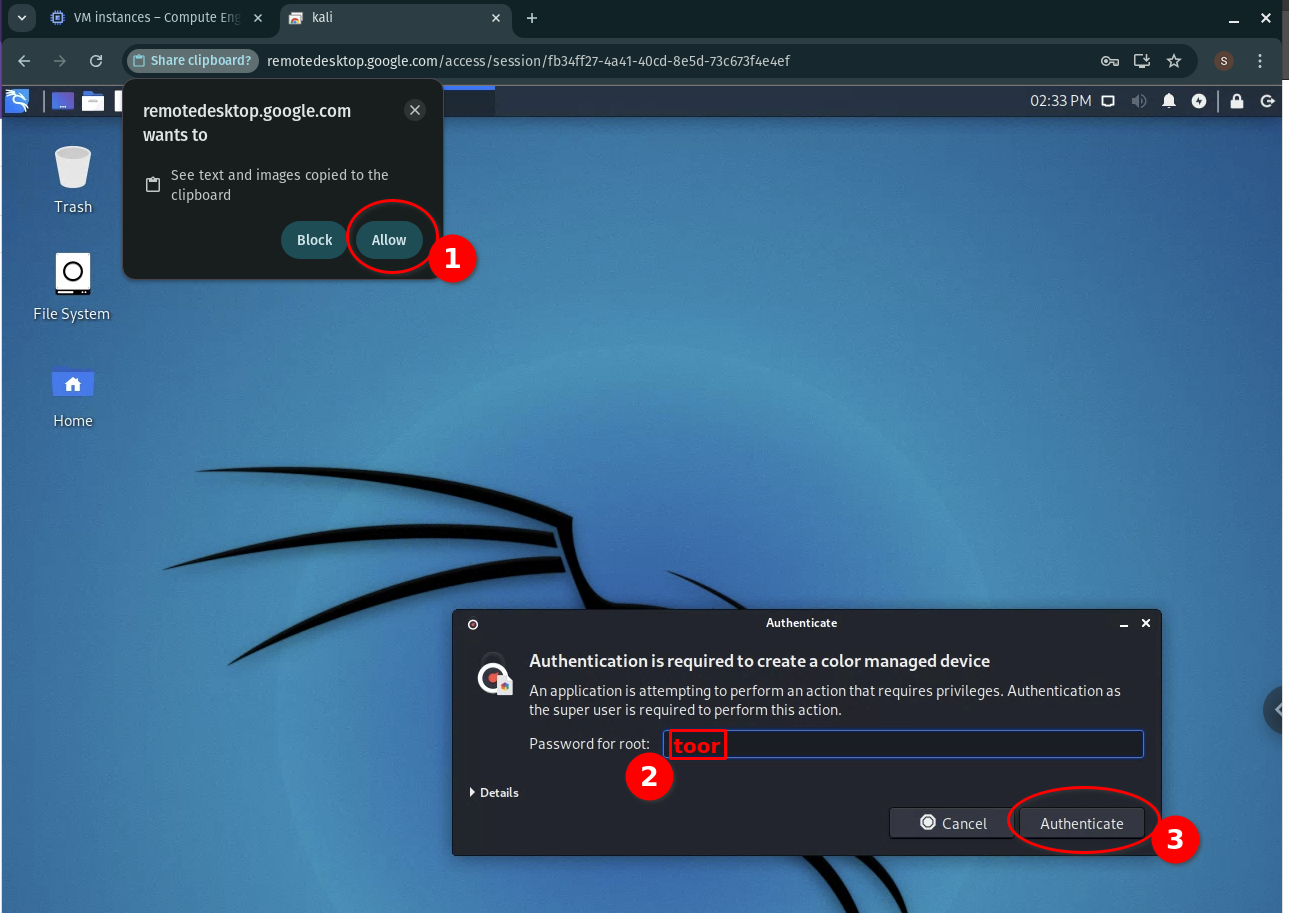
- Next, if you are prompted to enter a password to create a “color managed device”, type in the password
toor, and clickauthenticate. - After you finish logging in, you should see the Kali Desktop screen.
-
Enable copy-paste across your remote desktop session.
- Click the blue arrow tab on the right hand of the screen to open additional options in Chrome Remote Desktop.
-
Look for an option to “Enable clipboard synchronization.” Follow prompts in your browser to grant permission. See this example.
The specific method to enable copy-paste changes from time to time, but is usually accessible through the sidebar.


Part 5: Set up budget alerts
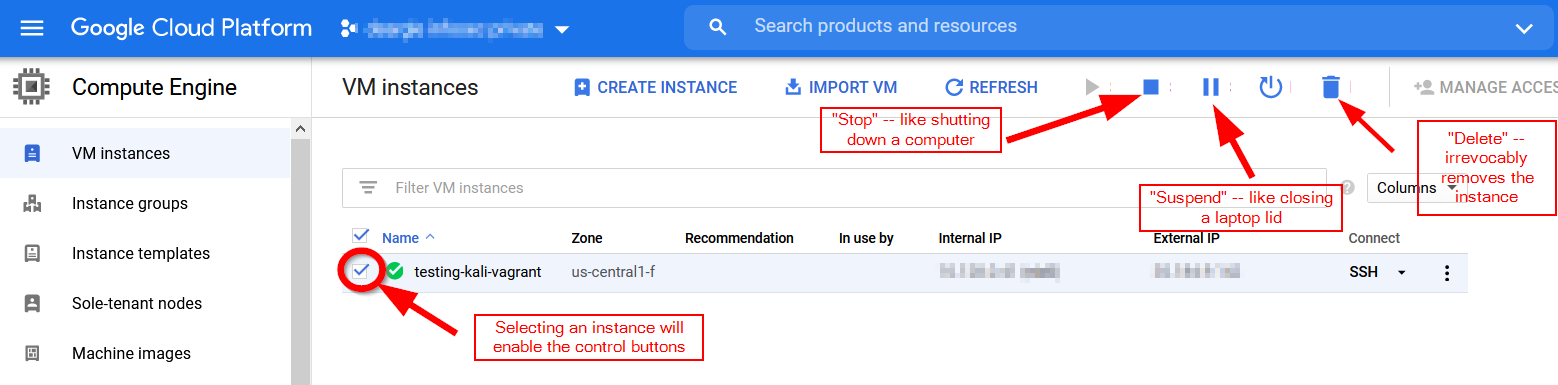
You get $300 in free credits when you sign up for google cloud platform. As of 8/27/2019, the Kali instance that you launch will cost almost $200 per month if you run it continuously. So do not run it continuously. Shut down the instance when you are not using it. You are only billed by GCP for time that your instance is running.
You can either suspend, shut down, or delete an instance. Which you choose will depend on your needs, but be aware that suspended instances still incur some costs. (See figure.)
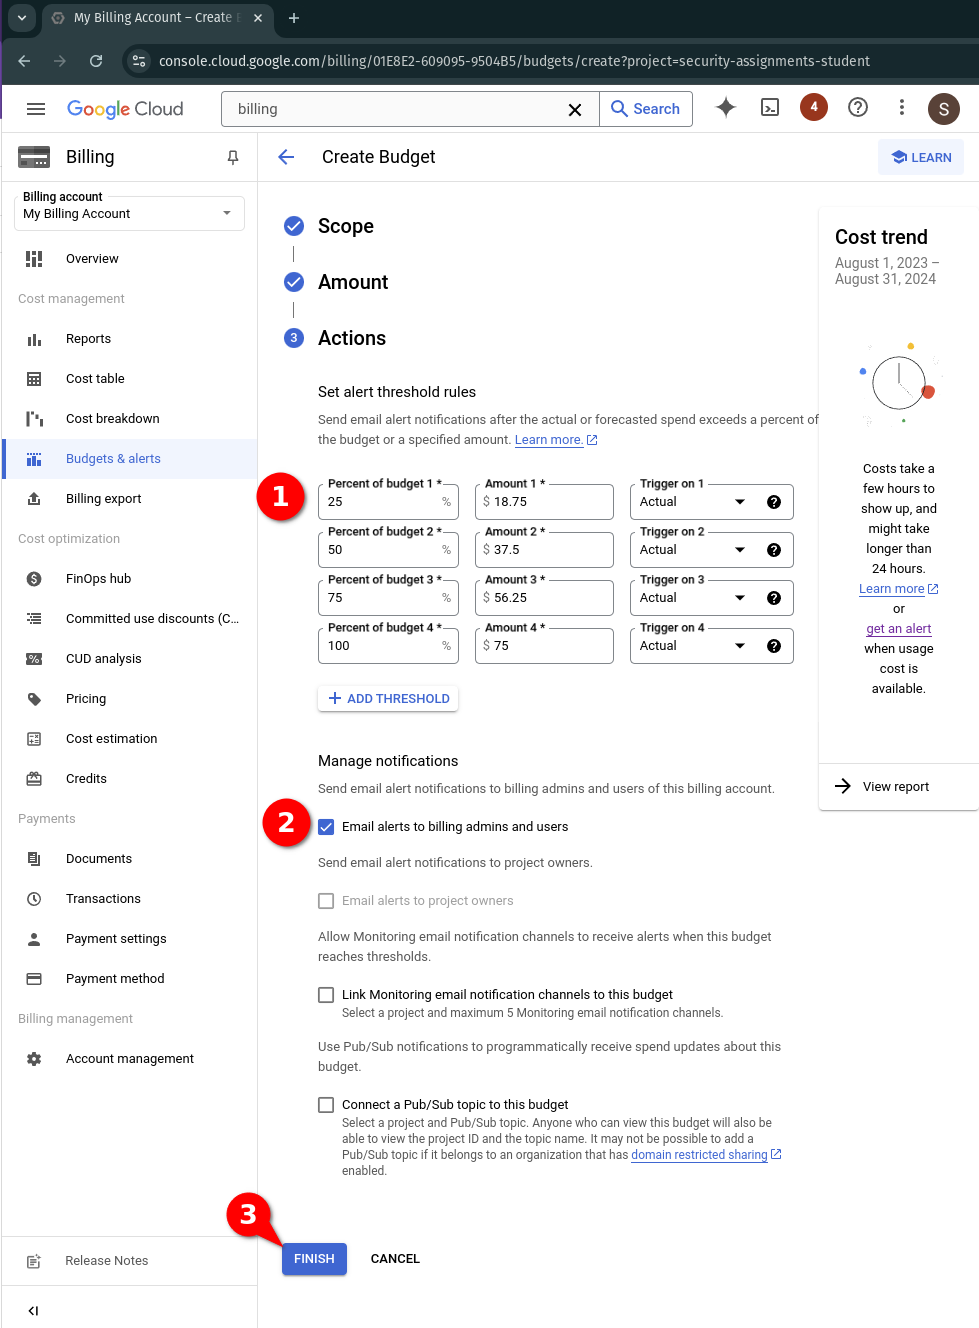
Set up a budget planning to spend (no more than) $75 per month. To do so:
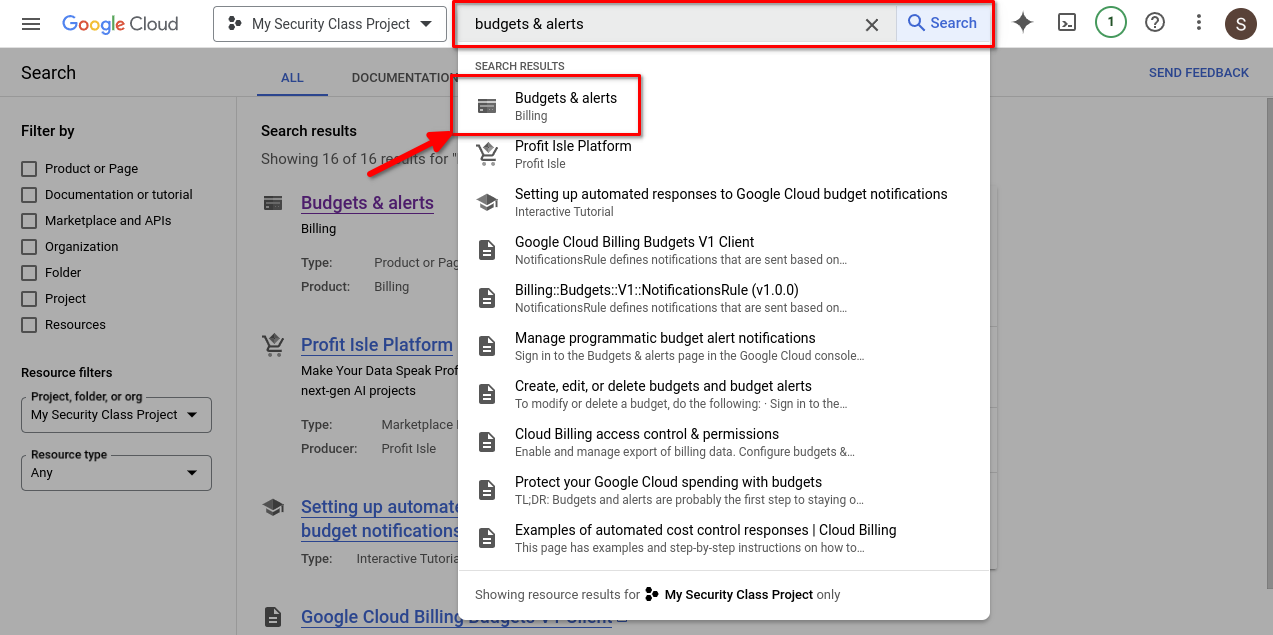
- Use the search bar at the top of the page to find the
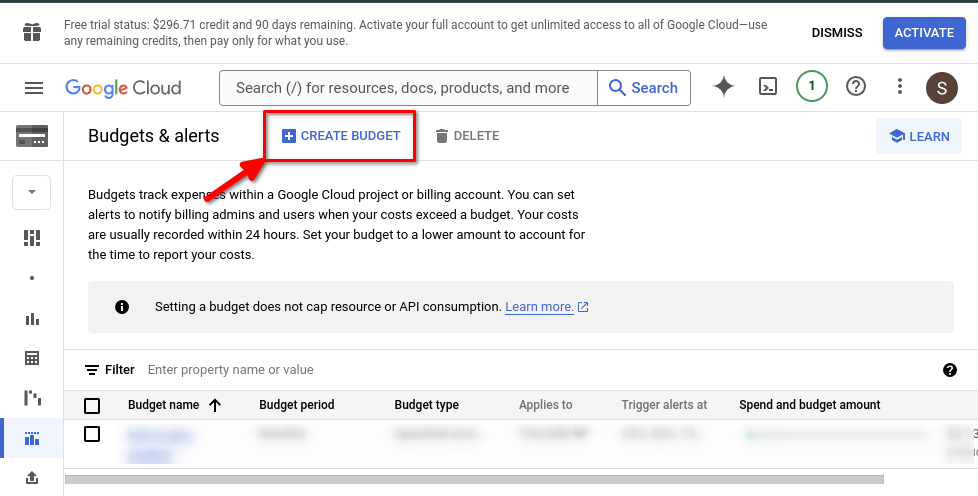
Budgets & alertspage. - Click
Create Budget - Use the following configuration:
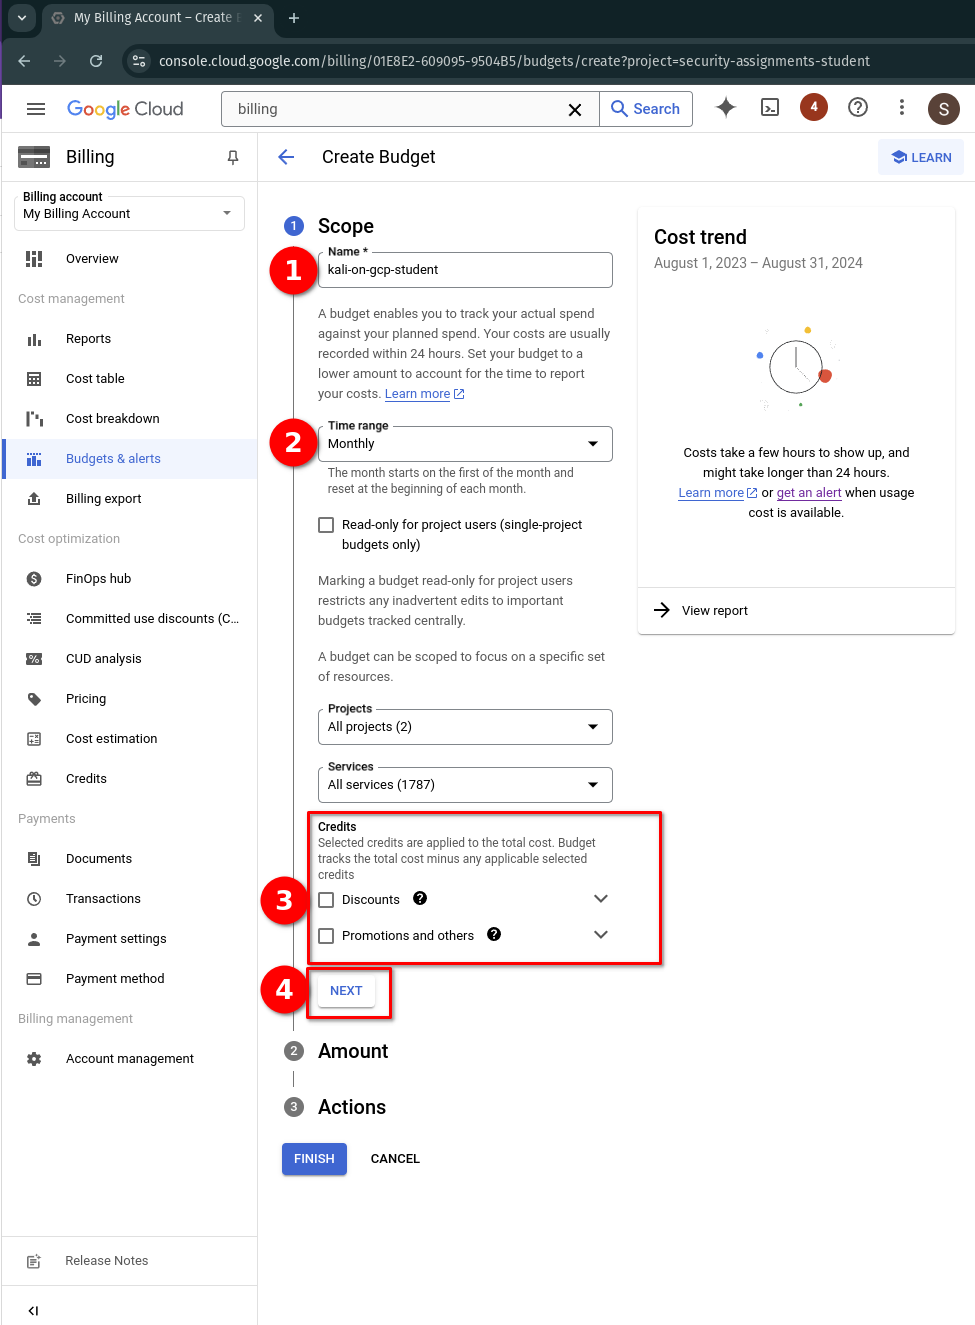
(1) ScopeProjects=> “All projects”Services=> “All services”- uncheck “Discounts” and “Promotions and others”
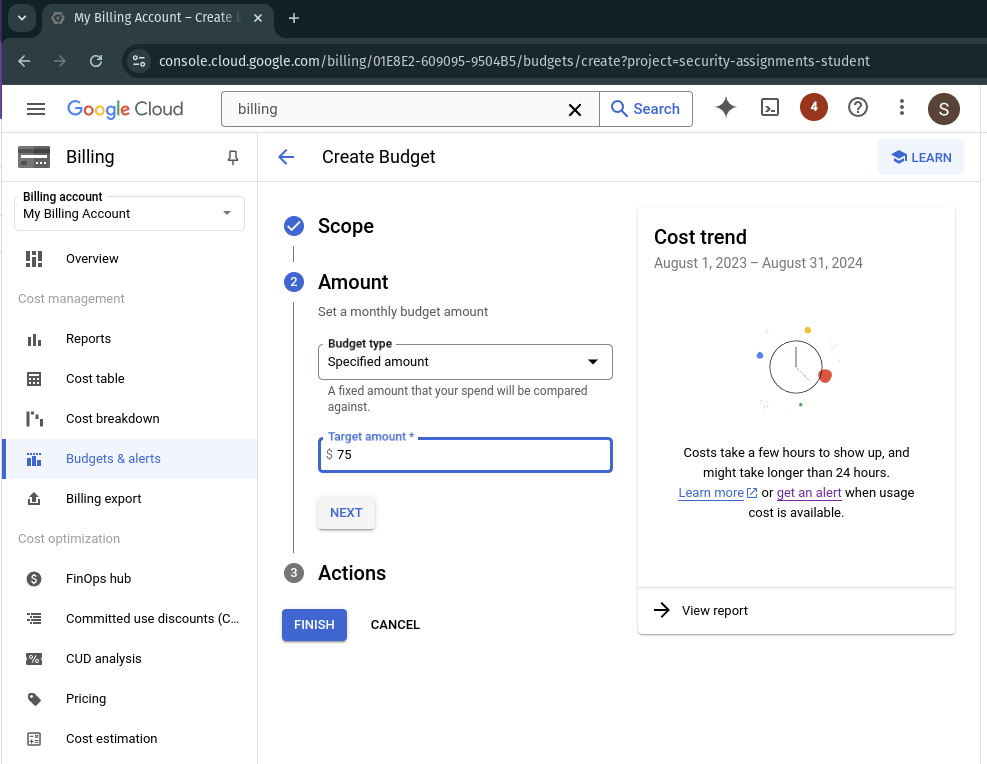
(2) AmountBudget type=> “Specified amount”Target amount=> $75
(3) Actions- Set four thresholds, at 25%, 50%, 75%, and 100%. When you have hit these thresholds within a month, you will receive a budget notification email.
These budget reminders will help you to keep an eye on your costs, and will help remind you to shut down an instance that could otherwise cost you a lot of money.
Part 6: Install a GCP Console app on a mobile device
You can manage your GCP instances from the Cloud Console Mobile App. This can be handy if you realize that you have accidentally left an instance running – you can easily shut it down from the app.
Part 7: Complete the Introduction to Linux Tutorial
Complete this introduction to Linux tutorial. Then, come back and complete the deliverable for this tutorial.
Deliverable
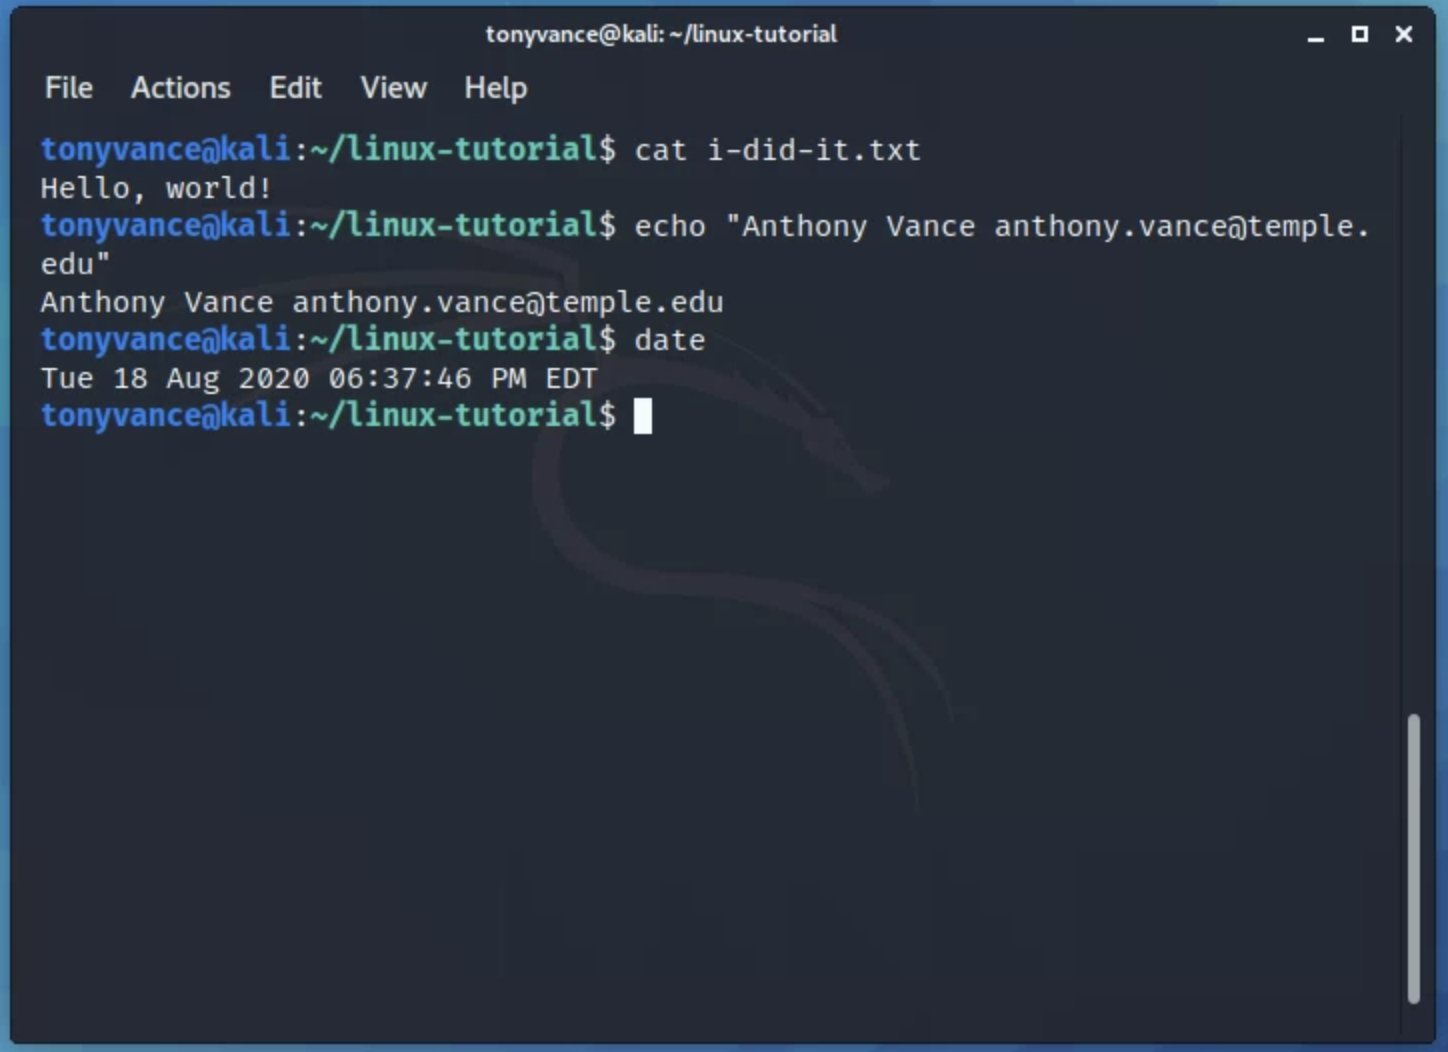
Using the Kali VM for the steps below shows both that you got your Kali VM up and running, and that you have basic skills with the Linux terminal. You must use your Kali GCP instance for the following.
- Using a terminal,
- make a directory called
linux-tutorial - In that directory, create a file called
i-did-it.txtwith the following contents:Hello, world!
- make a directory called
- Submit a screenshot showing:
- The browser tab address showing that you are connected via chrome remote desktop to your kali instance
- The terrifying kali dragon desktop
- A terminal window, showing:
- The contents of
i-did-it.txt - A string with your name and uni email, e.g.,
echo "Anthony Vance [email protected]" - Output of the
datecommand
- The contents of
For example: