Virtual Machines for the Security Labs
This page documents virtual machines that I have prepared for students in my class to use to complete the labs.
Setting up your virtual lab
I have created a Kali virtual machine image on Google Cloud Platform which is using nested virtualization to host within it several virtual machines:
a Windows instance, a Metasploitable2 instance, and a security onion instance. They are hosted using kvm and libvirt and accessed using virt-manager.
Read these instructions to get oriented to and set up on Google Cloud Platform, and to get access to the Kali virtual machine. Anyone should be able to see and use the custom class kali image if they join this Google Group (public access):
infosec-net Network Map
The network map is as follows:
| IP Address | Machine | Login | Password | Notes |
|---|---|---|---|---|
| 192.168.56.101 | Kali (the host) | root |
toor |
|
| 192.168.56.100 | Windows VM | Labuser |
Passw0rd! |
This VM is memory-intensive! Will probably freeze and not launch if your GCP instance doesn't have at least 8 GB memory. |
| 192.168.56.102 | Metasploitable2 VM | msfadmin |
msfadmin |
|
| 192.168.56.103 | Security Onion VM | securityonion |
Password1 |
This VM is memory-intensive! |
IPv4 network block in CIDR block notation: 192.168.56.0/24
Using the virtual machines within Kali
-
The virtual machines are accessed using
virt-manager. First, you should make sure that your user account is a member of thelibvirtgroup.sudo usermod -a -G libvirt $(whoami)Heads up! This will need to be run each time you create a new Kali instance.Alternatively, log in as root (password
toor):su root -
Then, from a terminal, run
virt-managerto get an interface such as the following: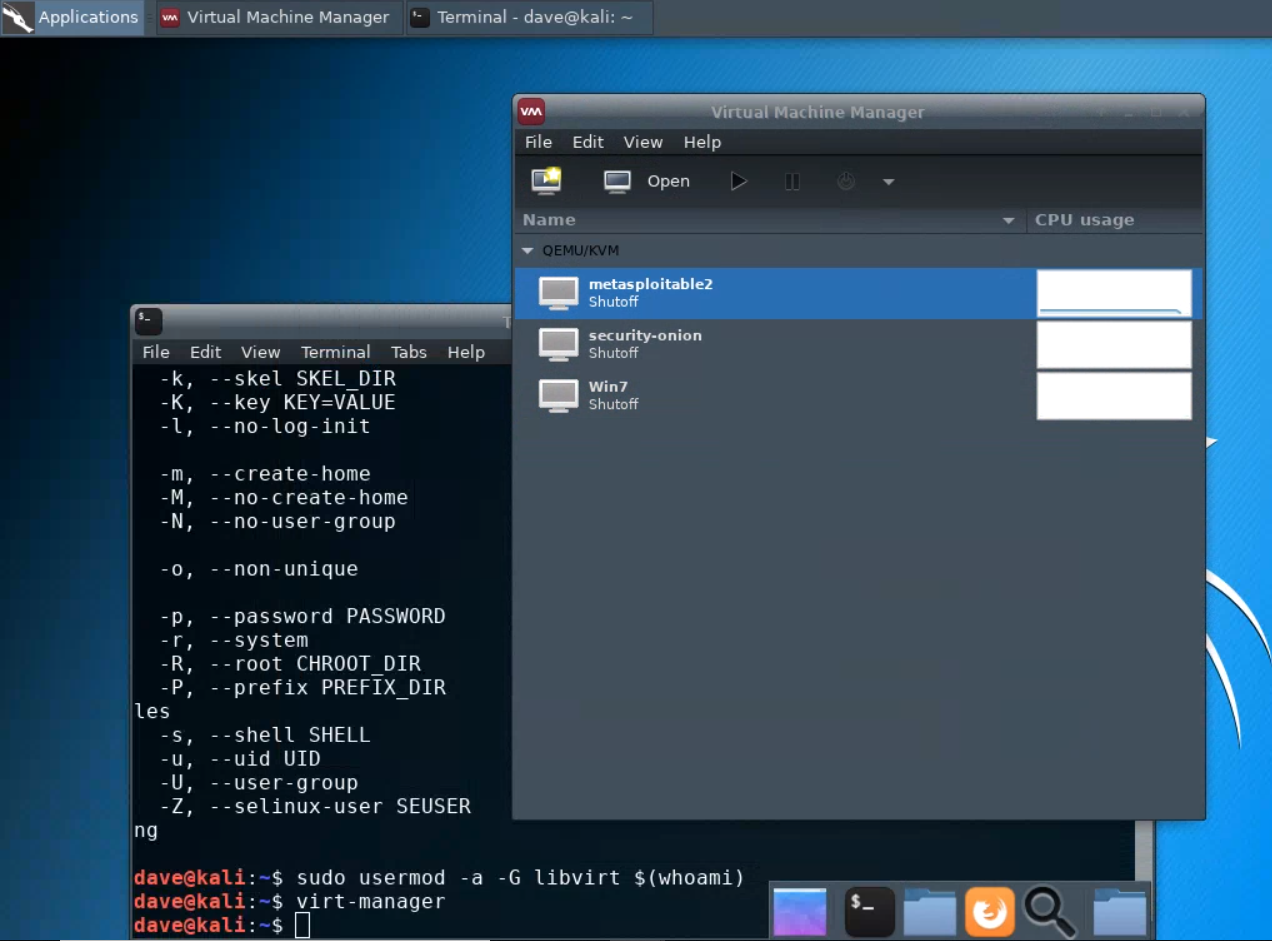
This shows that three virtual machines are available, but that none are running.
Virt Manager interface shows no vms?In the
virt-managerinterface, try running:FileAdd Connection...Connect (accept defaults)
Starting and accessing virtual machines
-
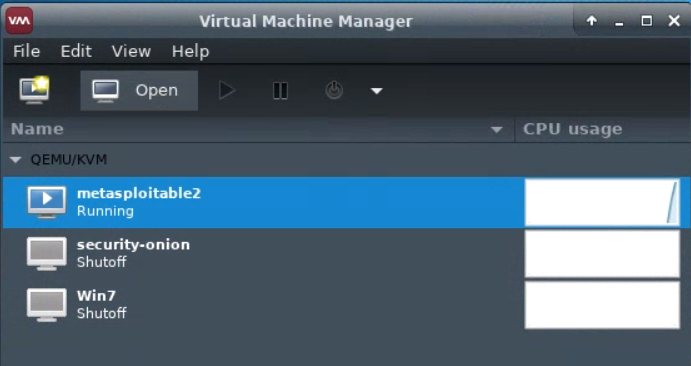
Start a virtual machine by selecting it, and pressing the “play” icon. The virtual machine should then update to show that it is running.
-
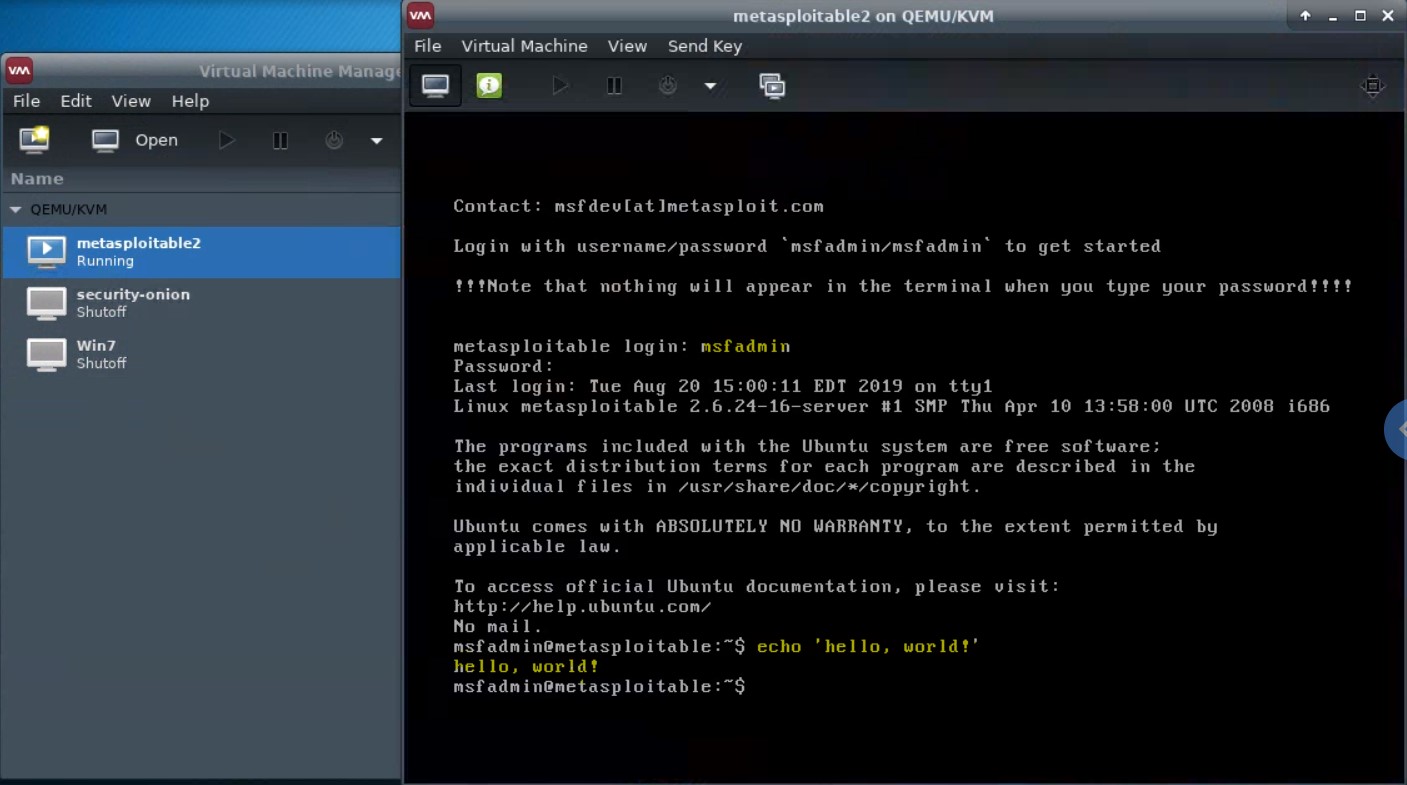
To view the running virtual machine, highlight it and click “Open”. A new window will appear.
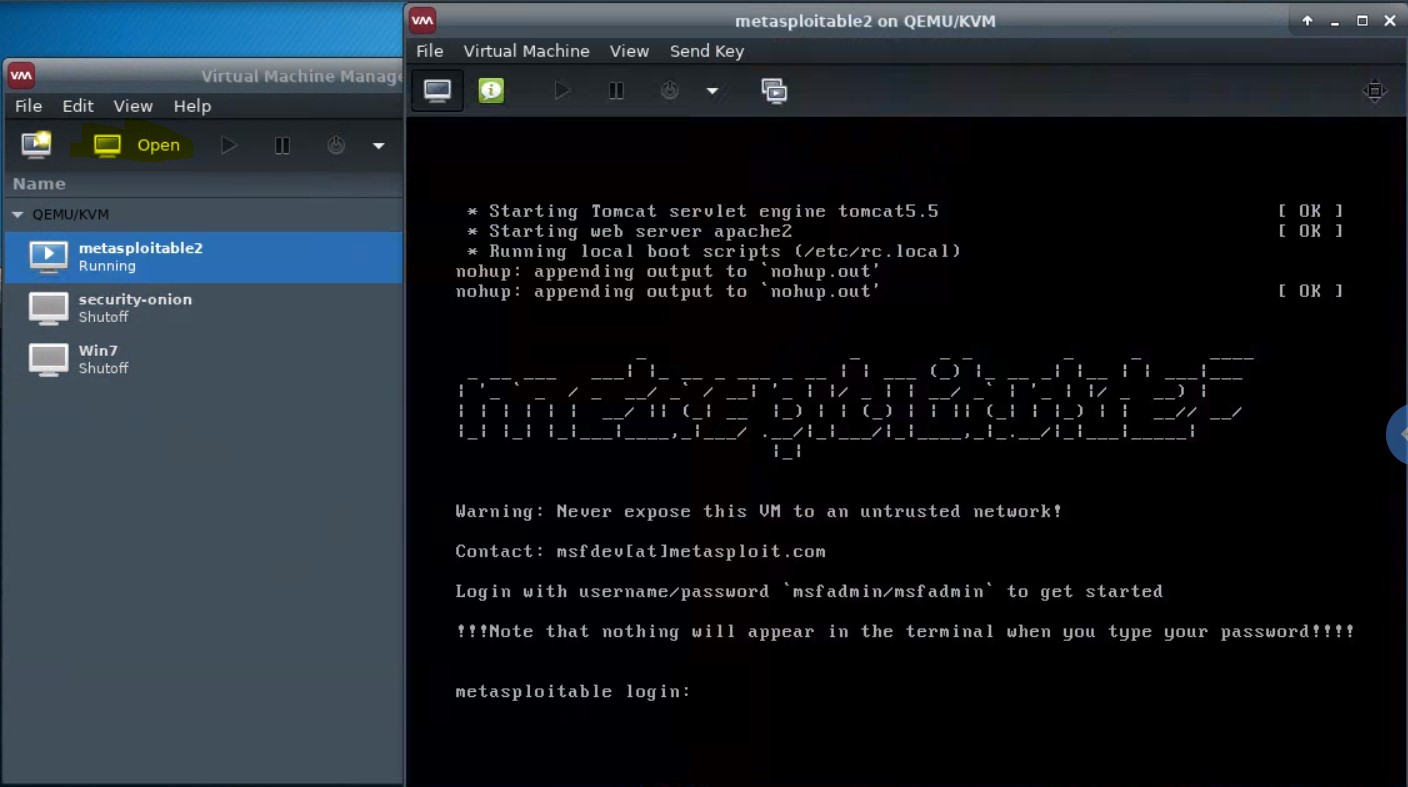
You can click into this window and interact with it via keyboard, and mouse if it has a GUI.
-
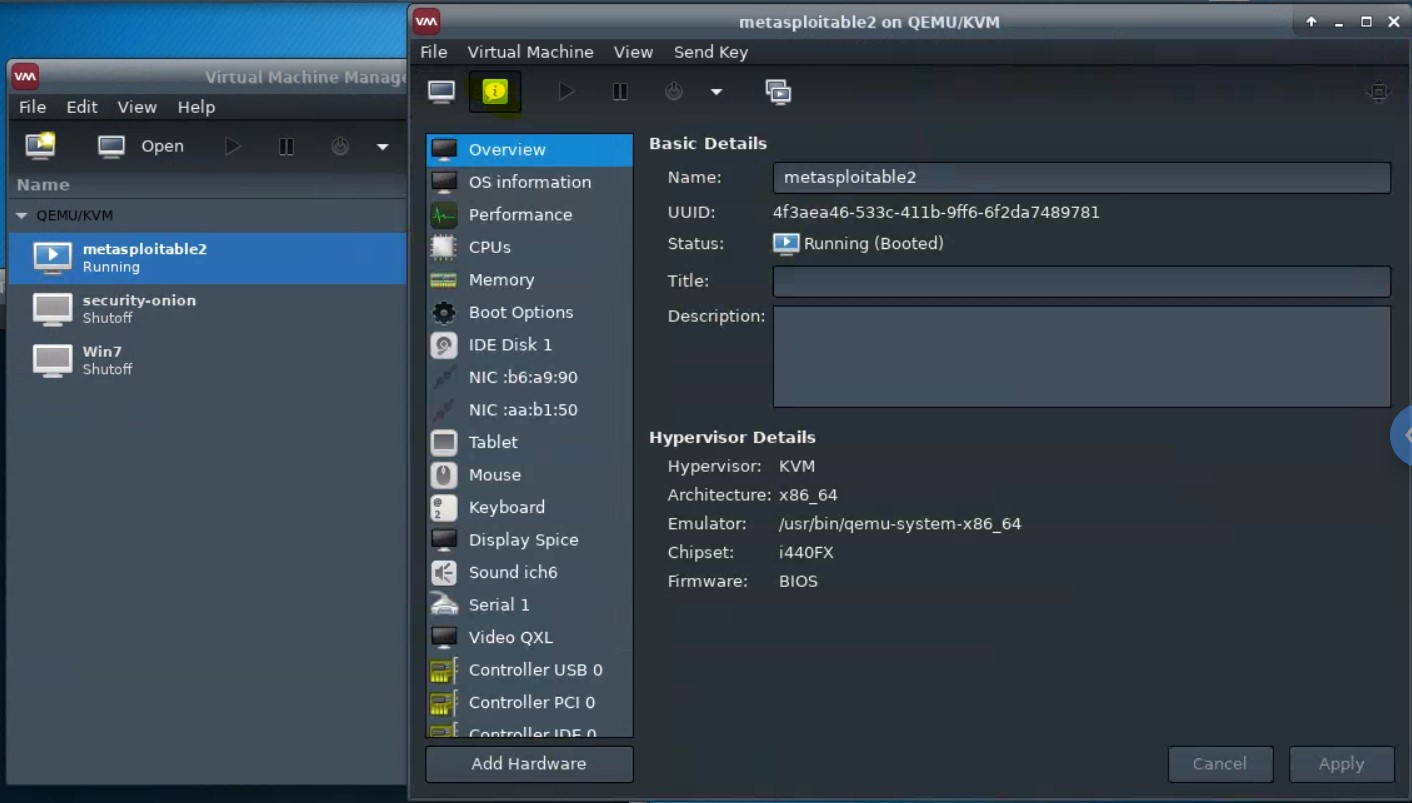
Details of a virtual machine can be viewed and edited from the “details” pane.
-
A network is set up to enable the host (Kali) and the guests (e.g., Metasploitable2, Windows 7) to network with one another. Try
pinging metasploitable2 from Kali, and Kali from metasploitable2, using the network map ip addresses above.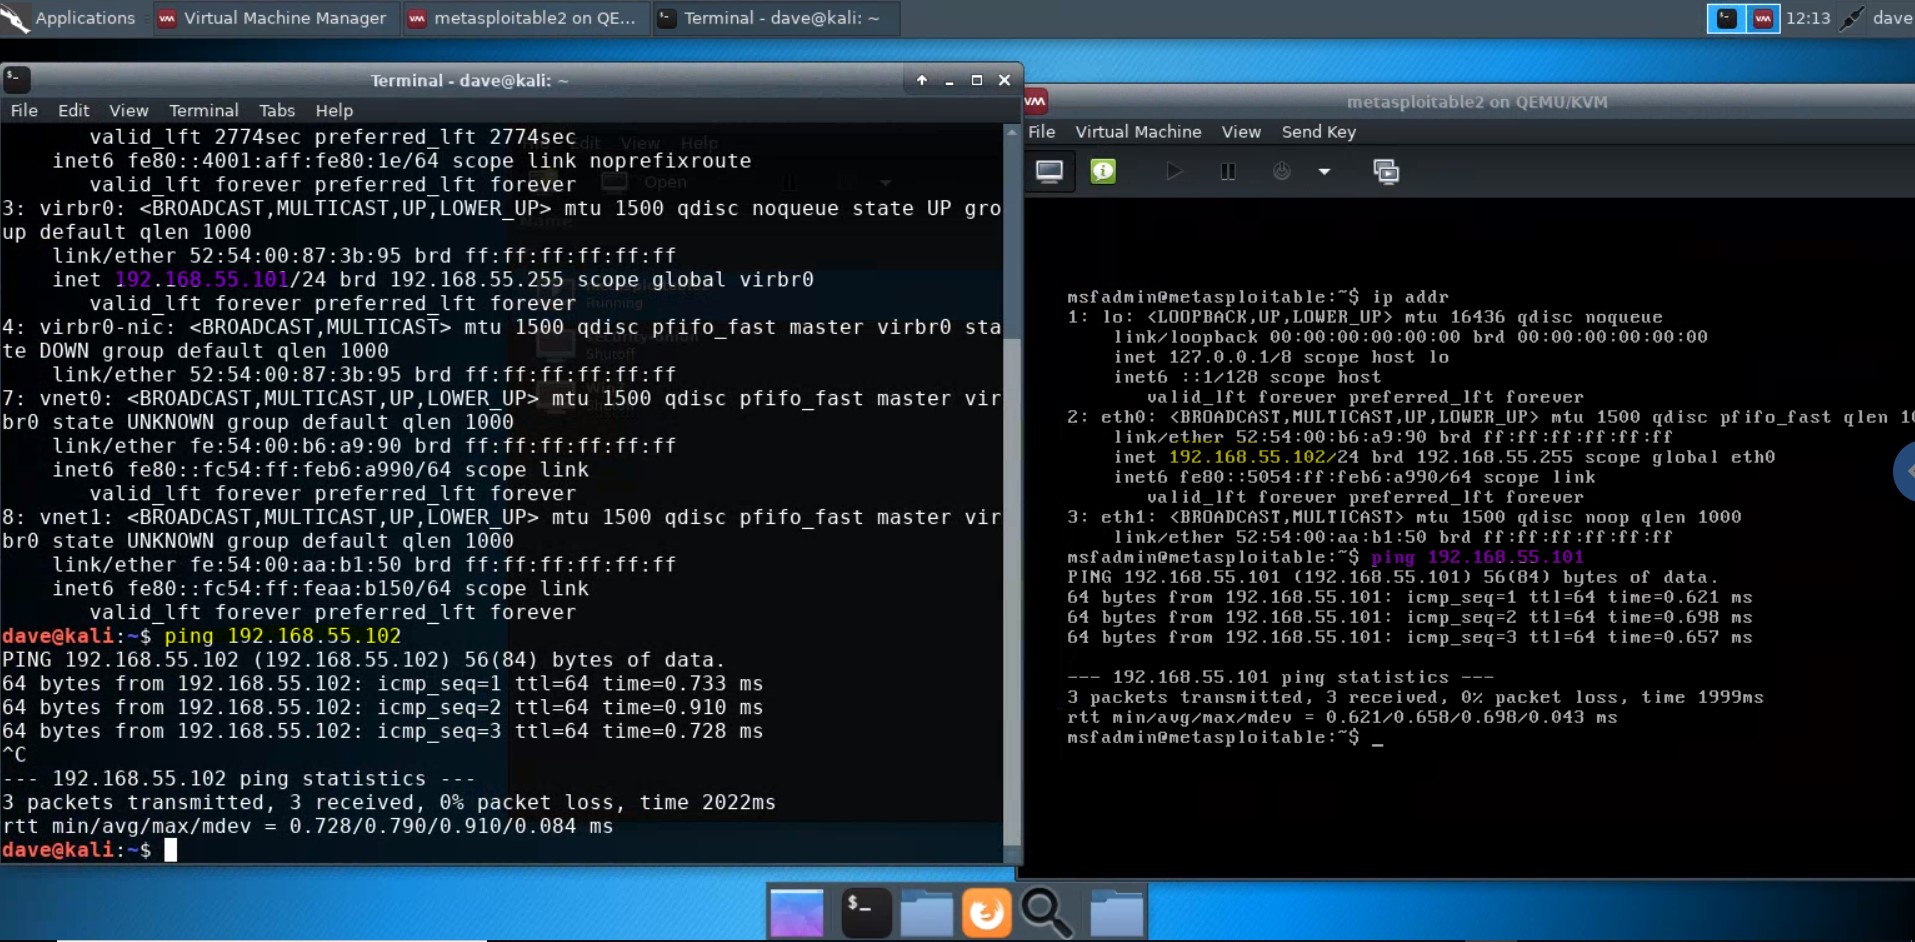
Updating the virtual machines
The following scripts will update the respective lab virtual machines installed on the kali pentest lab image.
Update SecurityOnion
To update Security Onion, run the following:
wget -O - https://raw.githubusercontent.com/deargle/kali-xfce-gcp-qemu-packer/master/kali-pentest-lab/update-securityonion.sh | sudo bash
Update Windows Server 2019
To update Windows Server 2019, run the following:
wget -O - https://raw.githubusercontent.com/deargle/kali-xfce-gcp-qemu-packer/master/kali-pentest-lab/update-server2019.sh | sudo bash
Update Metasploitable2
To update Metasploitable2, run the following:
wget -O - https://raw.githubusercontent.com/deargle/kali-xfce-gcp-qemu-packer/master/kali-pentest-lab/update-metasploitable2.sh | sudo bash
Using snapshots
Virtual machines in virt-manager can be “snapshotted”, which lets you restore the virtual machine to a previous state if you mess it up by doing something such as deploying malware to it.
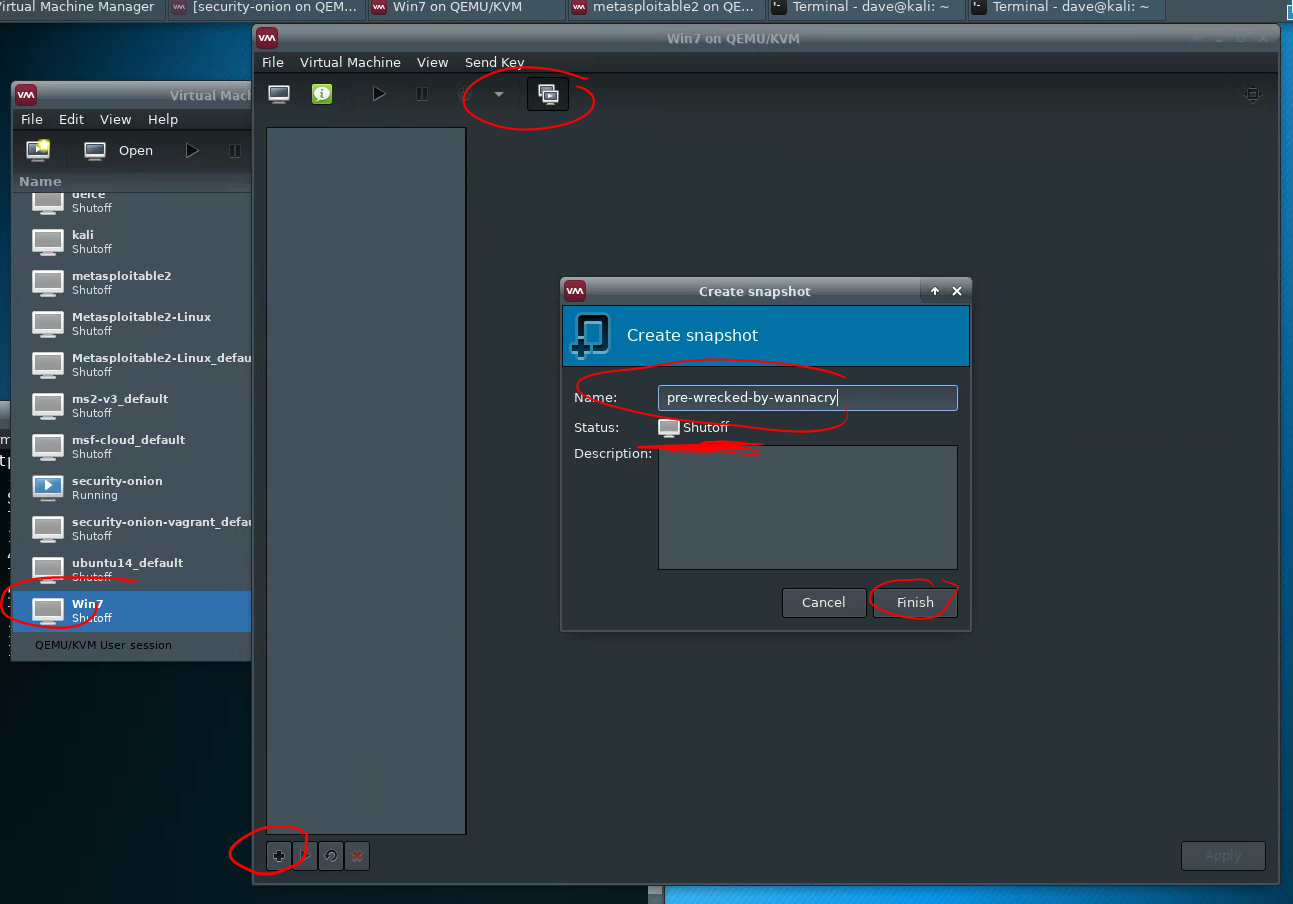
Creating a snapshot
To create a snapshot, first, shut down the virtual machine. Then, click the “snapshot” button on the virtual machine pane, then +, then set a name, and “Finish.”
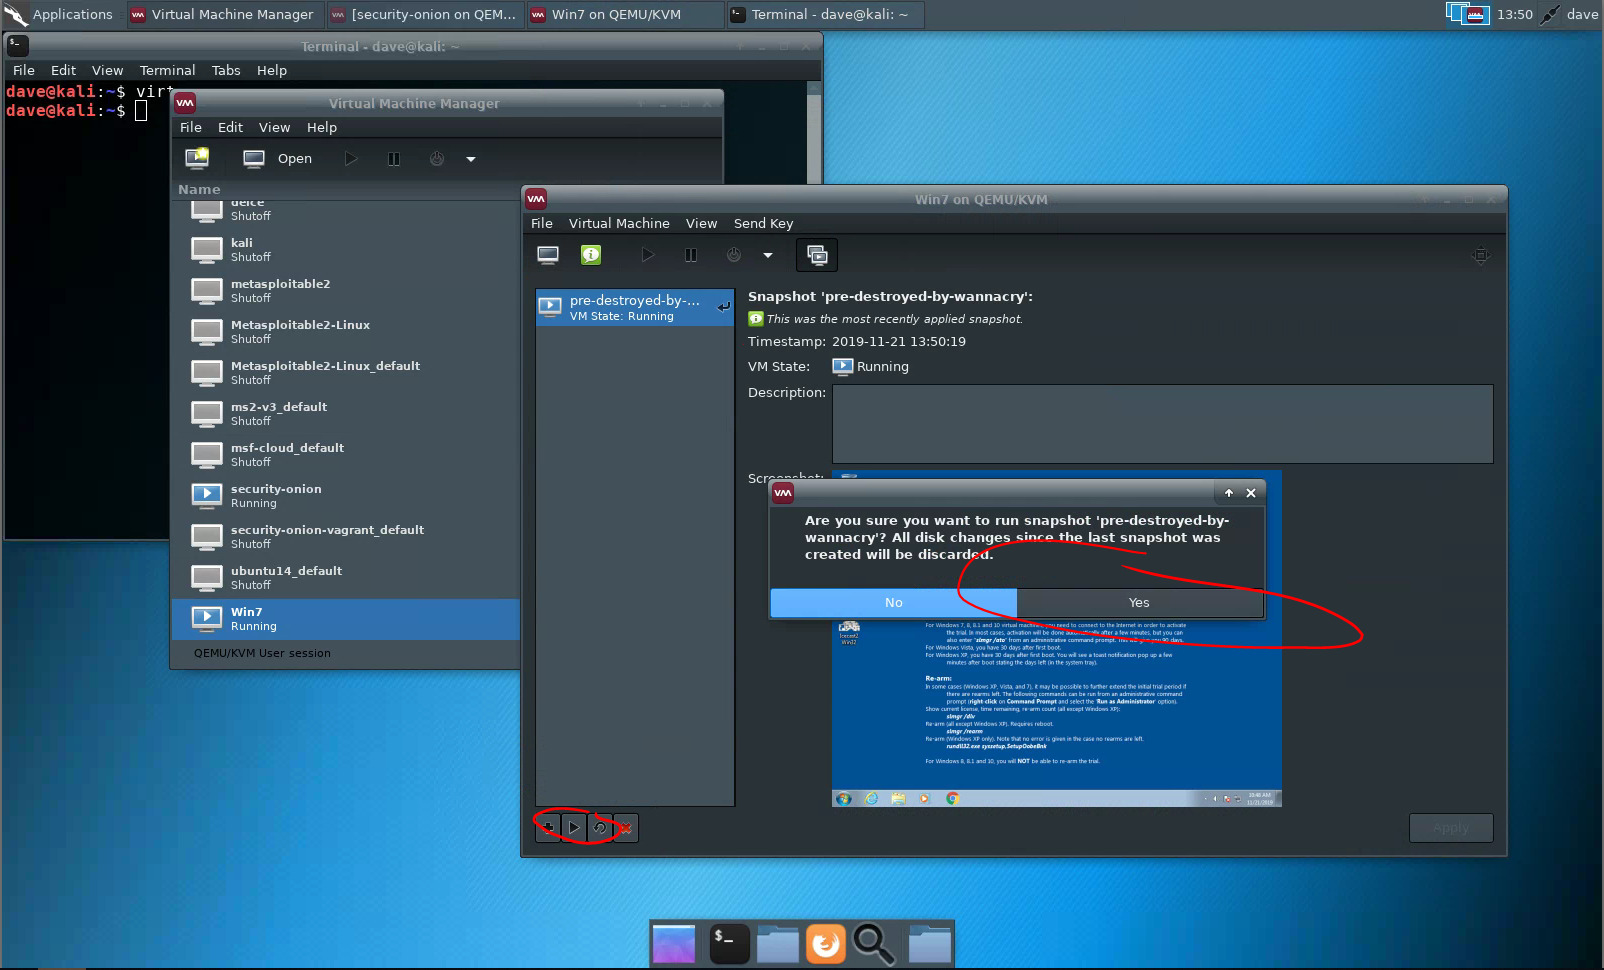
Restoring a snapshot
To restore to a snapshot, select your snapshot, and then “play” it. You do not need to shut down the virtual machine before restoring a snapshot.
How I created the virtual machines
If you are curious how the lab was set up, then browse this github repository.
Extra VMs and apps
De-ICE VulnHub
A fun hack-the-box challenge. From https://www.vulnhub.com/entry/de-ice-s1100,8/.
See deargle/lab-de-ice-s1-100 for instructions.
WebGoat
From https://github.com/WebGoat/WebGoat:
WebGoat is a deliberately insecure web application maintained by OWASP designed to teach web application security lessons.
The easiest way to run WebGoat is to run it as a Docker container:
docker run -it -p 127.0.0.1:80:8888 -p 127.0.0.1:8080:8080 -p 127.0.0.1:9090:9090 webgoat/webgoat:v2023.8
DVWA directly on Kali
There is already an older version of a DVWA server running on the metasploitable2 VM bundled with Kali, but the below instructions will run the latest DVWA directly on Kali as a containerized process and not in a virtual machine.
$ mkdir DVWA && cd DVWA
$ cat << "EOF" > compose.yml
volumes:
  dvwa:


networks:
  dvwa:


services:
  dvwa:
    build: .
    image: ghcr.io/digininja/dvwa:1232568
    # Change `always` to `build` to build from local source
    pull_policy: always
    environment:
      - DB_SERVER=db
    depends_on:
      - db
    networks:
      - dvwa
    ports:
      - 127.0.0.1:4280:80
    restart: unless-stopped

  db:
    image: docker.io/library/mariadb:10
    environment:
      - MYSQL_ROOT_PASSWORD=dvwa
      - MYSQL_DATABASE=dvwa
      - MYSQL_USER=dvwa
      - MYSQL_PASSWORD=p@ssw0rd
    volumes:
      - dvwa:/var/lib/mysql
    networks:
      - dvwa
    restart: unless-stopped
EOF

$ sudo docker compose up -d
$ # now visit localhost:4280 in a kali web browser to access DVWA. Default username:password is admin:password
If you copy-paste everything above into a shell in Kali, DVWA should be accessible from Kali. It does the following:
- First, from whatever starting directory, makes directory
DVWAandcds into it - Then, creates a file called
compose.yml, which specifies a group of docker containers for dvwa: one calleddvwa, and another calleddb. These will be on their own virtual docker network namespace, isolated from other docker containers that might be running on kali. Thecompose.ymlfile is exactly the same as the one in the dvwa gitub repo, except I pinned the dvwa image to tag1232568(which was the most recent tag at time of writing) instead of the ‘latest’ tag, which can migrate and potentially break things unexpectedly, which is Bad Business for teaching. -
The last command,
docker compose up -d, starts the containers. The dvwa web application interface will be accessible from Kali at127.0.0.1:4280Note that because of the
restart:unless-stoppedconfiguration, the docker daemon will always run this container, even after a reboot, until the user runssudo docker compose downfrom within the DVWA directory.