Lab: Physical Security Scavenger Hunt
There can be no cybersecurity without physical security
Note: This lab can be completed in a group of up to four members. Before you make a submission on Canvas, all of your team members should join one of the already-existing “Physical Security” groups on Canvas.
To earn full credit for this lab, your team must complete 6 of the 12 items below.
Deliverable
Submit one single solitary pdf with documentation of all completed items for your team.
For each accomplished item in your single solitary pdf, include:
- Prominent header-text indicating which item you have completed
- Conclusive photo-documentation of completion.
- A sentence or more describing the feat.
The individual items will describe any additional documentation requirements.
Item 1: Open one of my locks via bumping and locking picking (either lifting or raking)
You need to show me or the TA, and you have to do each method twice. This demonstrates that you know what you are doing and it wasn’t just luck.
Item 2: Take a photo of screen
Do either 2a or 2b, but not both.
Note: You must take a legible photo of the contents of the screen, not just a photo of the monitor.
Item 2a: Photograph an unlocked, unattended terminal
Example:

Item 2b: Shoulder-surf to get a legible photo of a screen in use
Example:

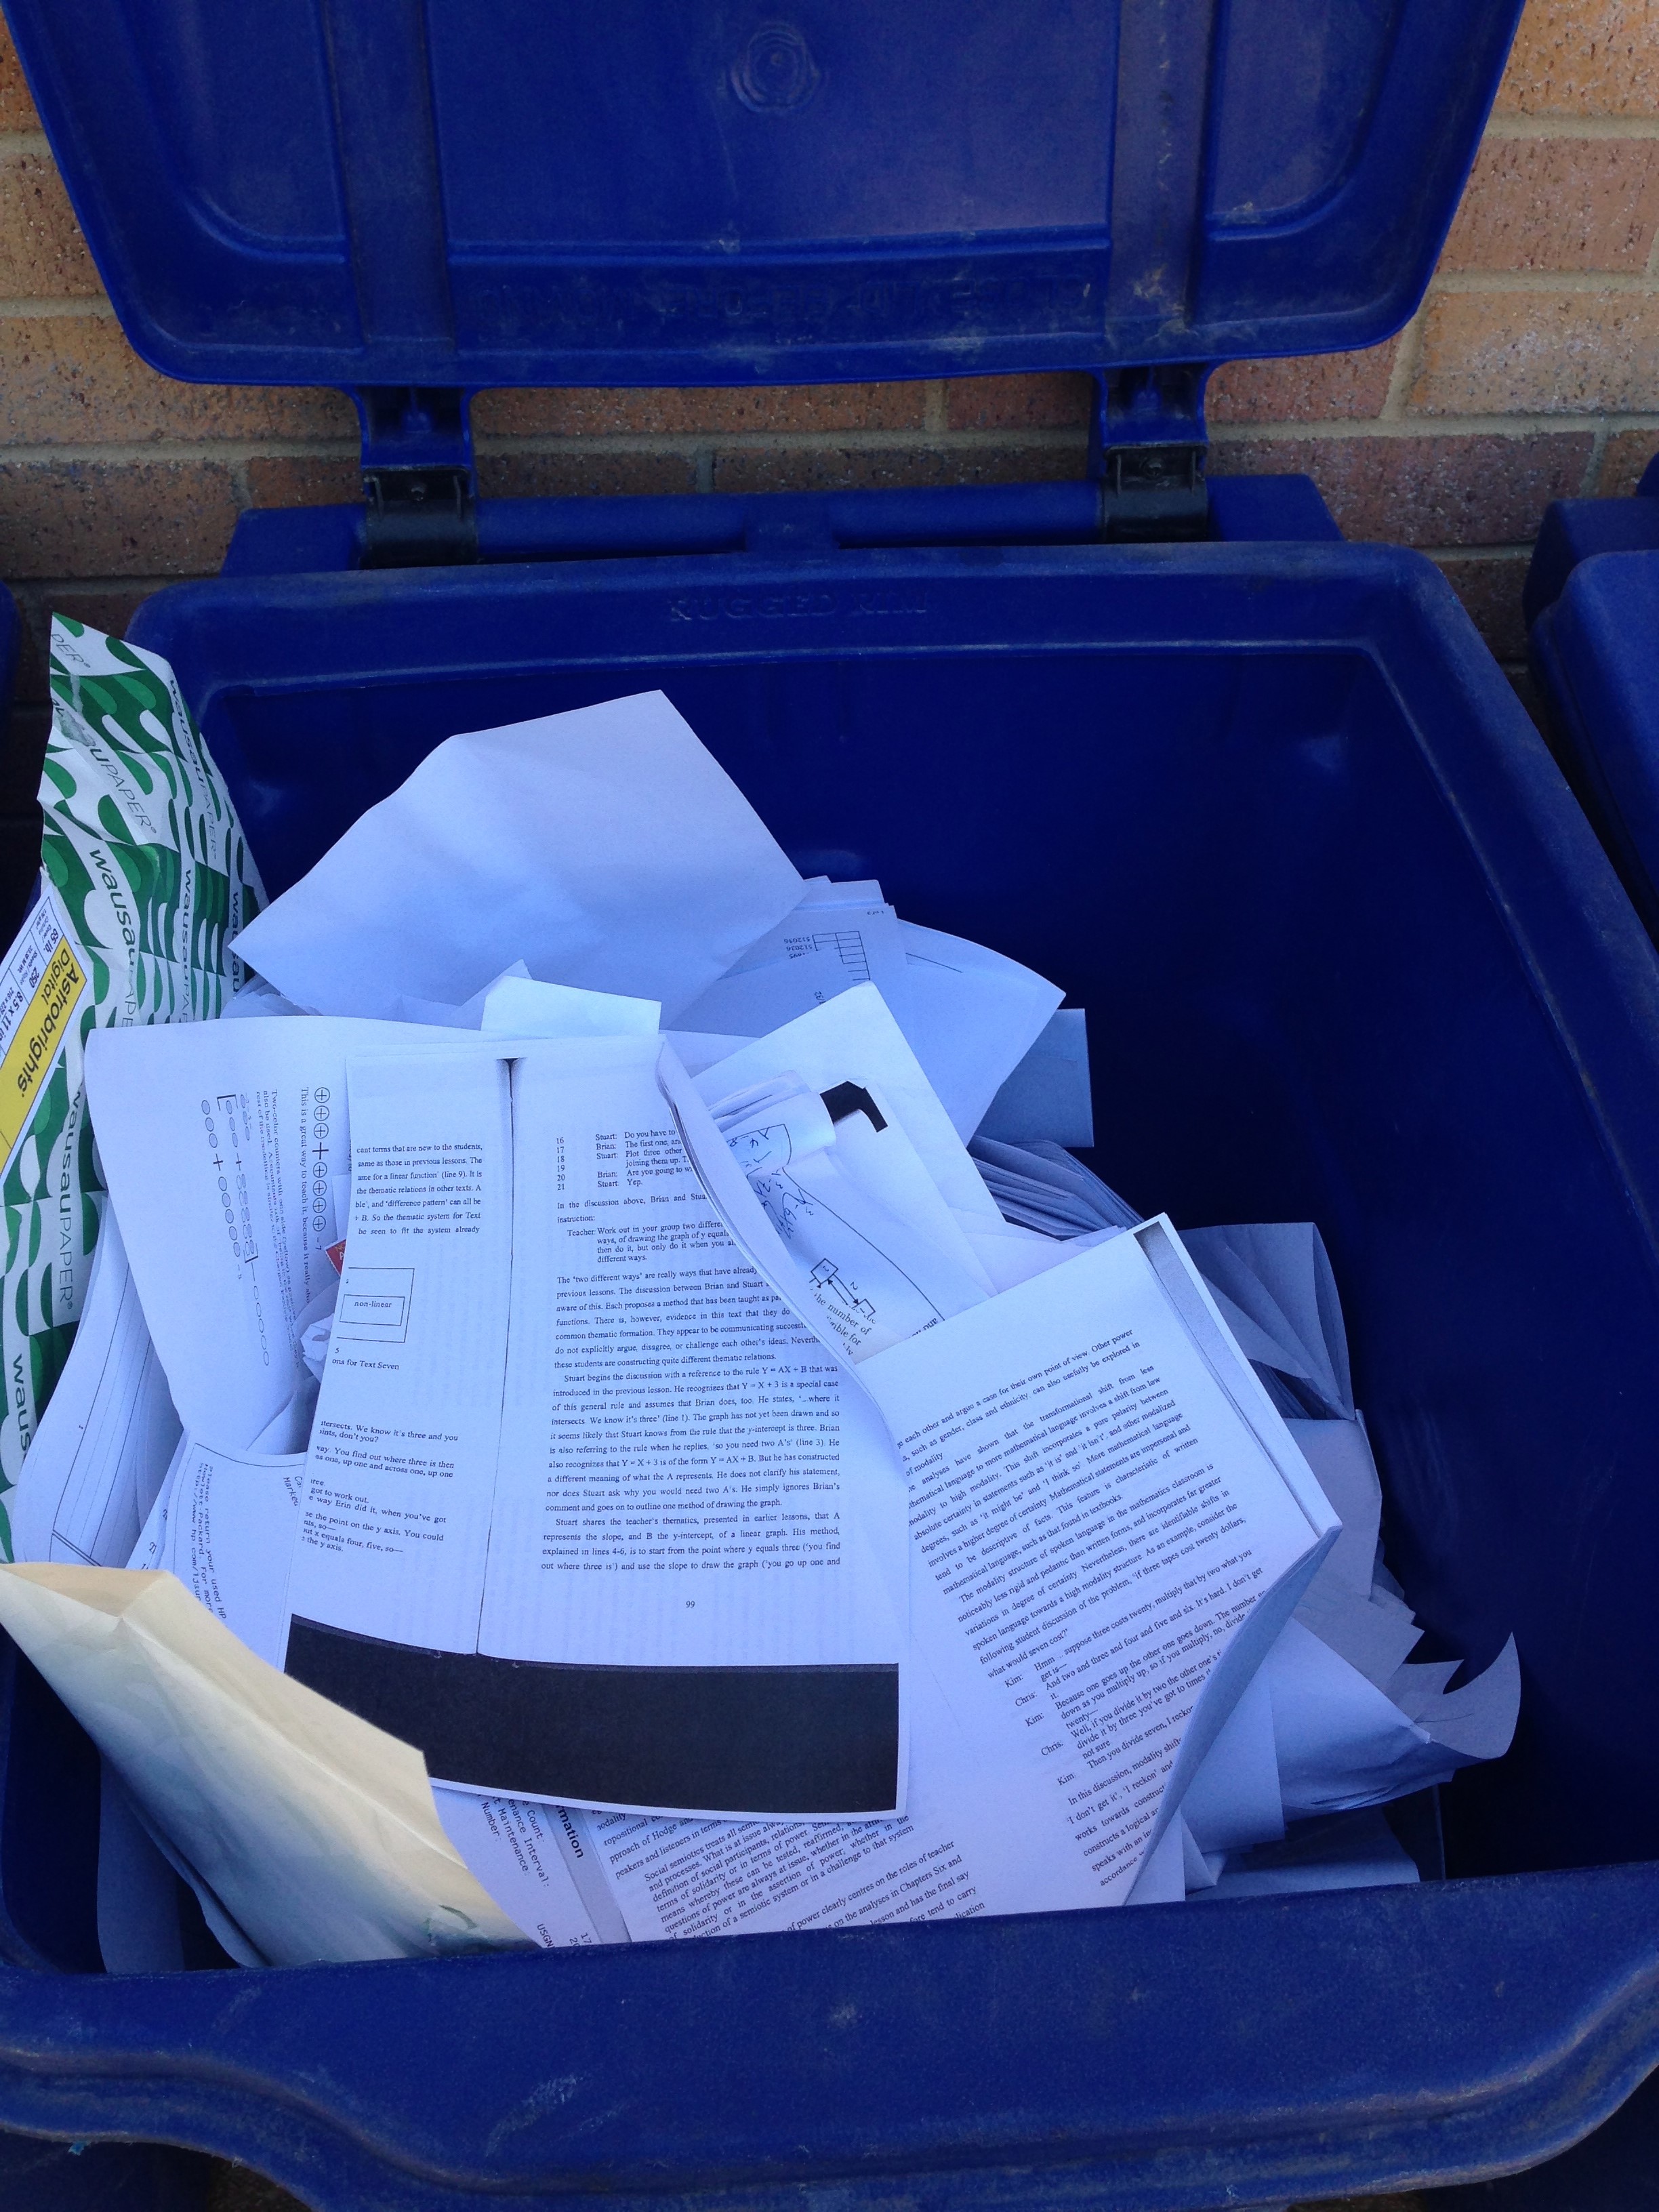
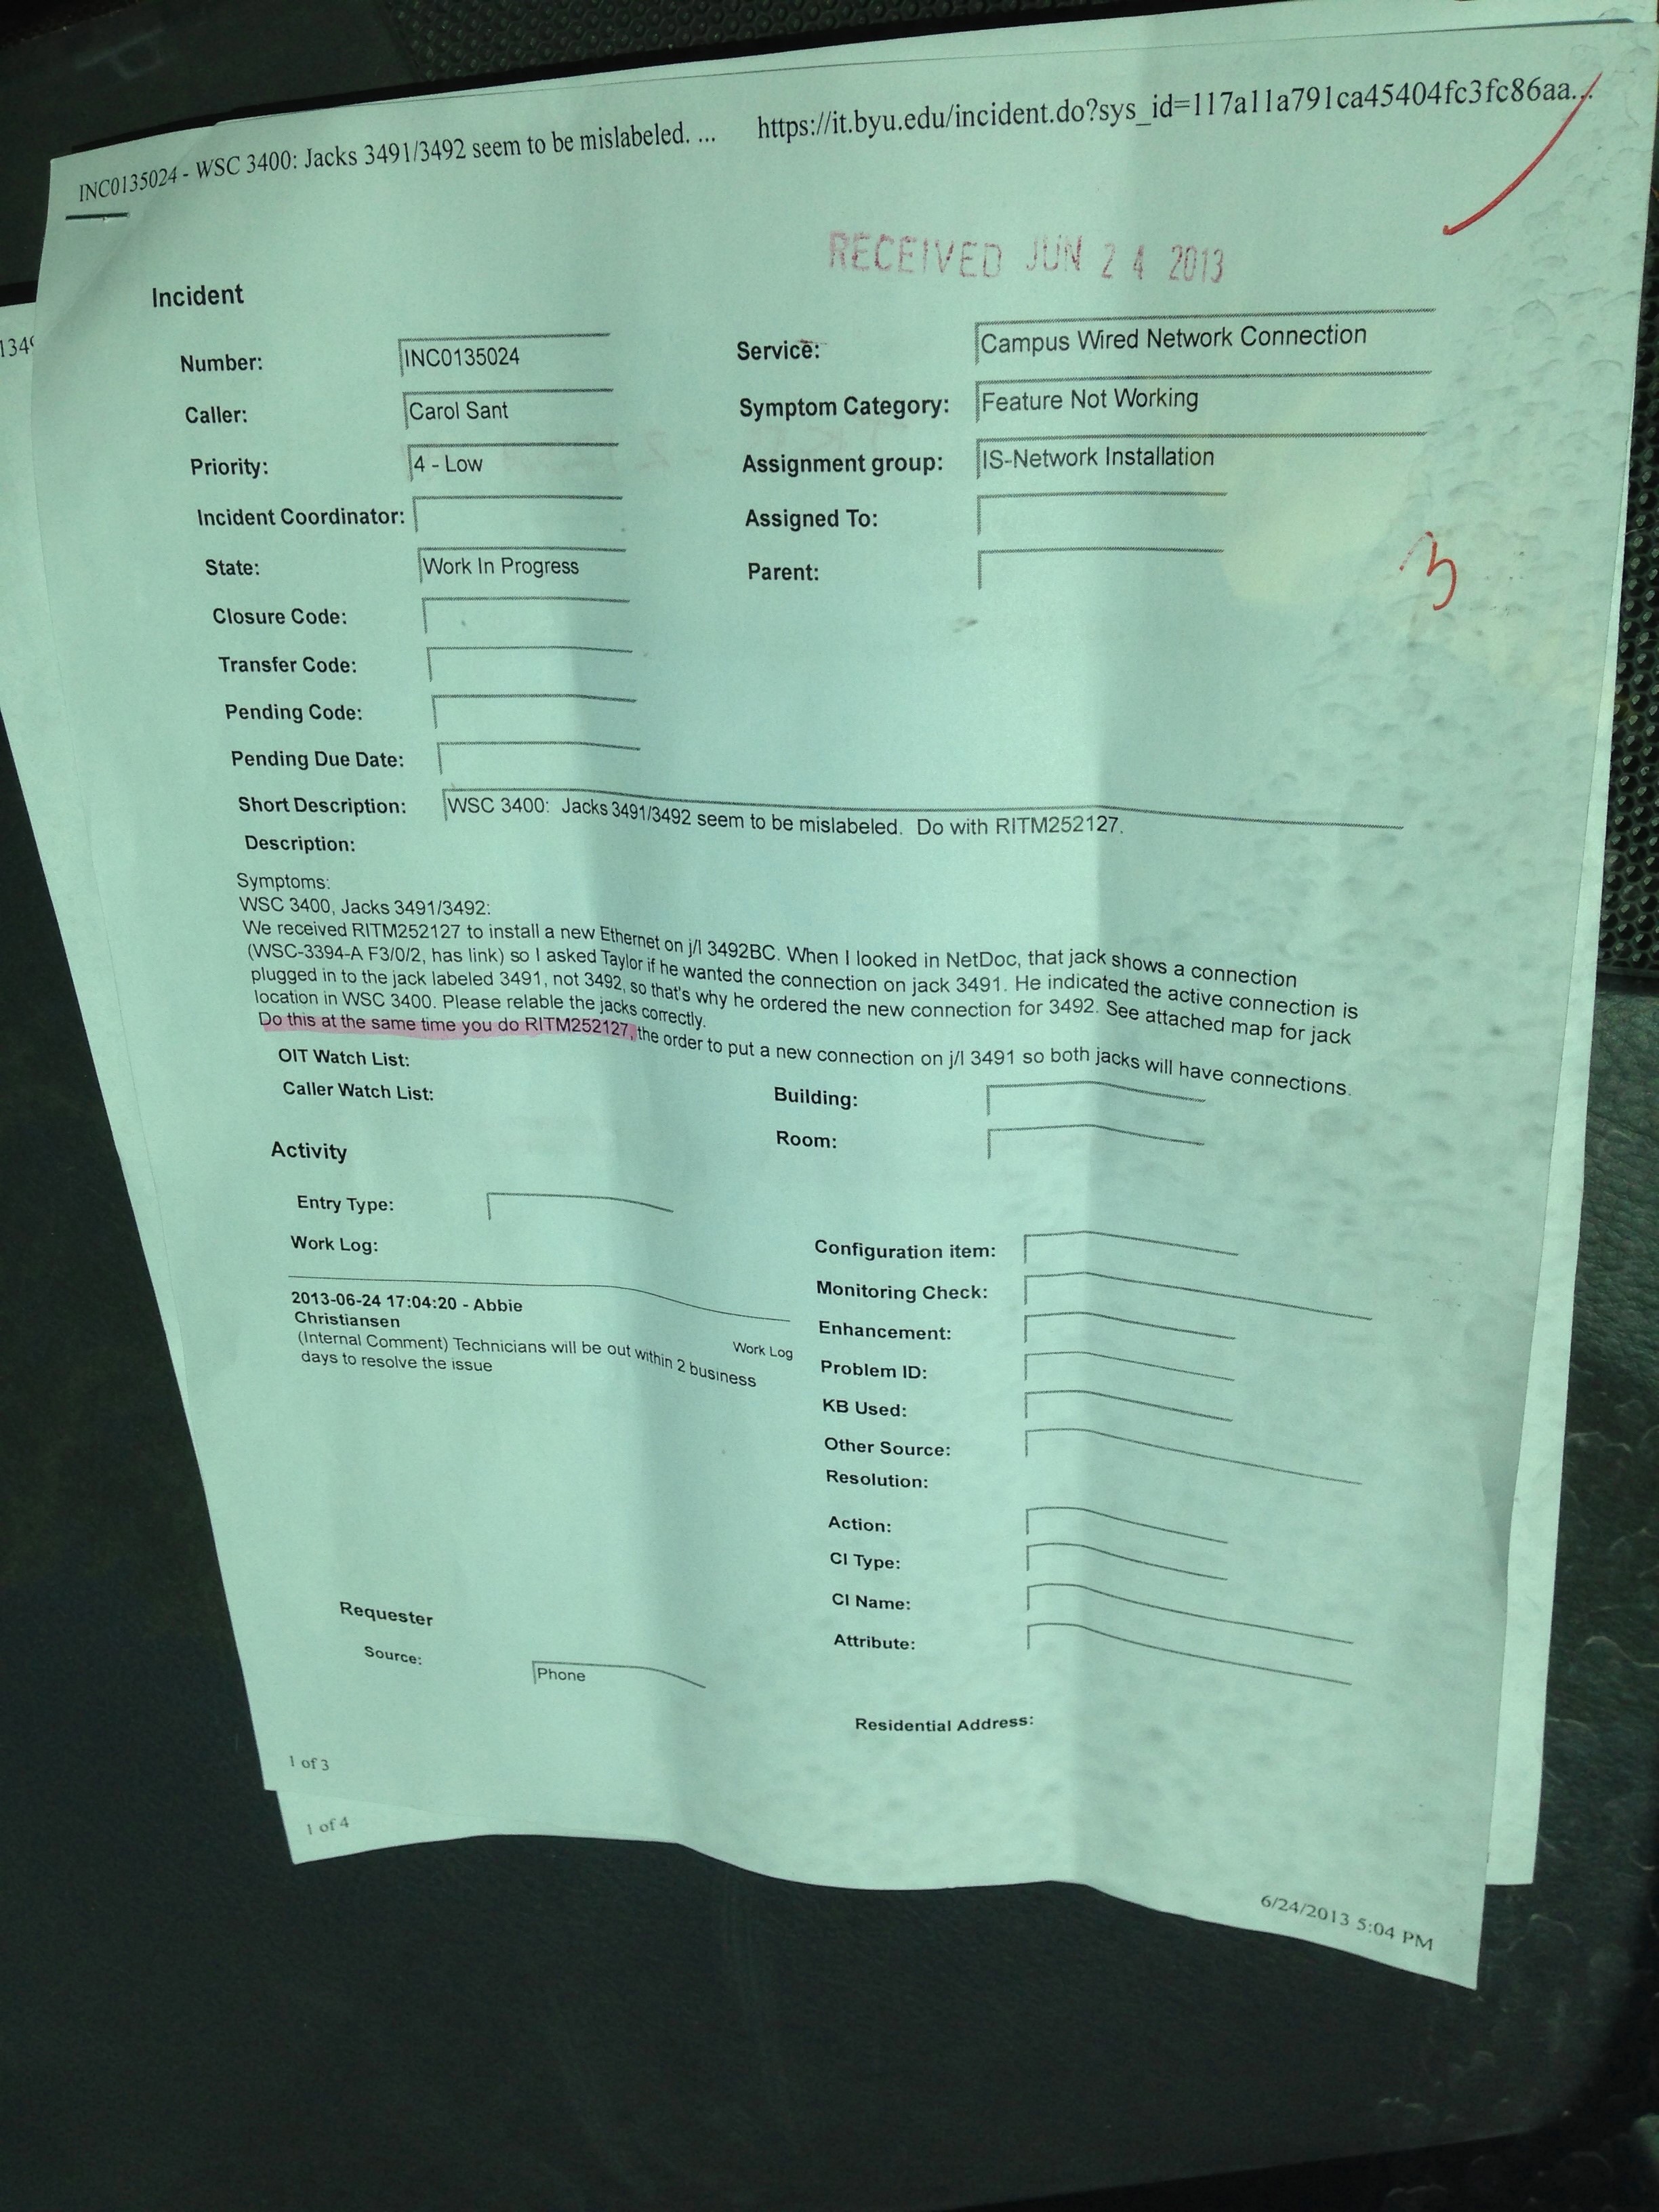
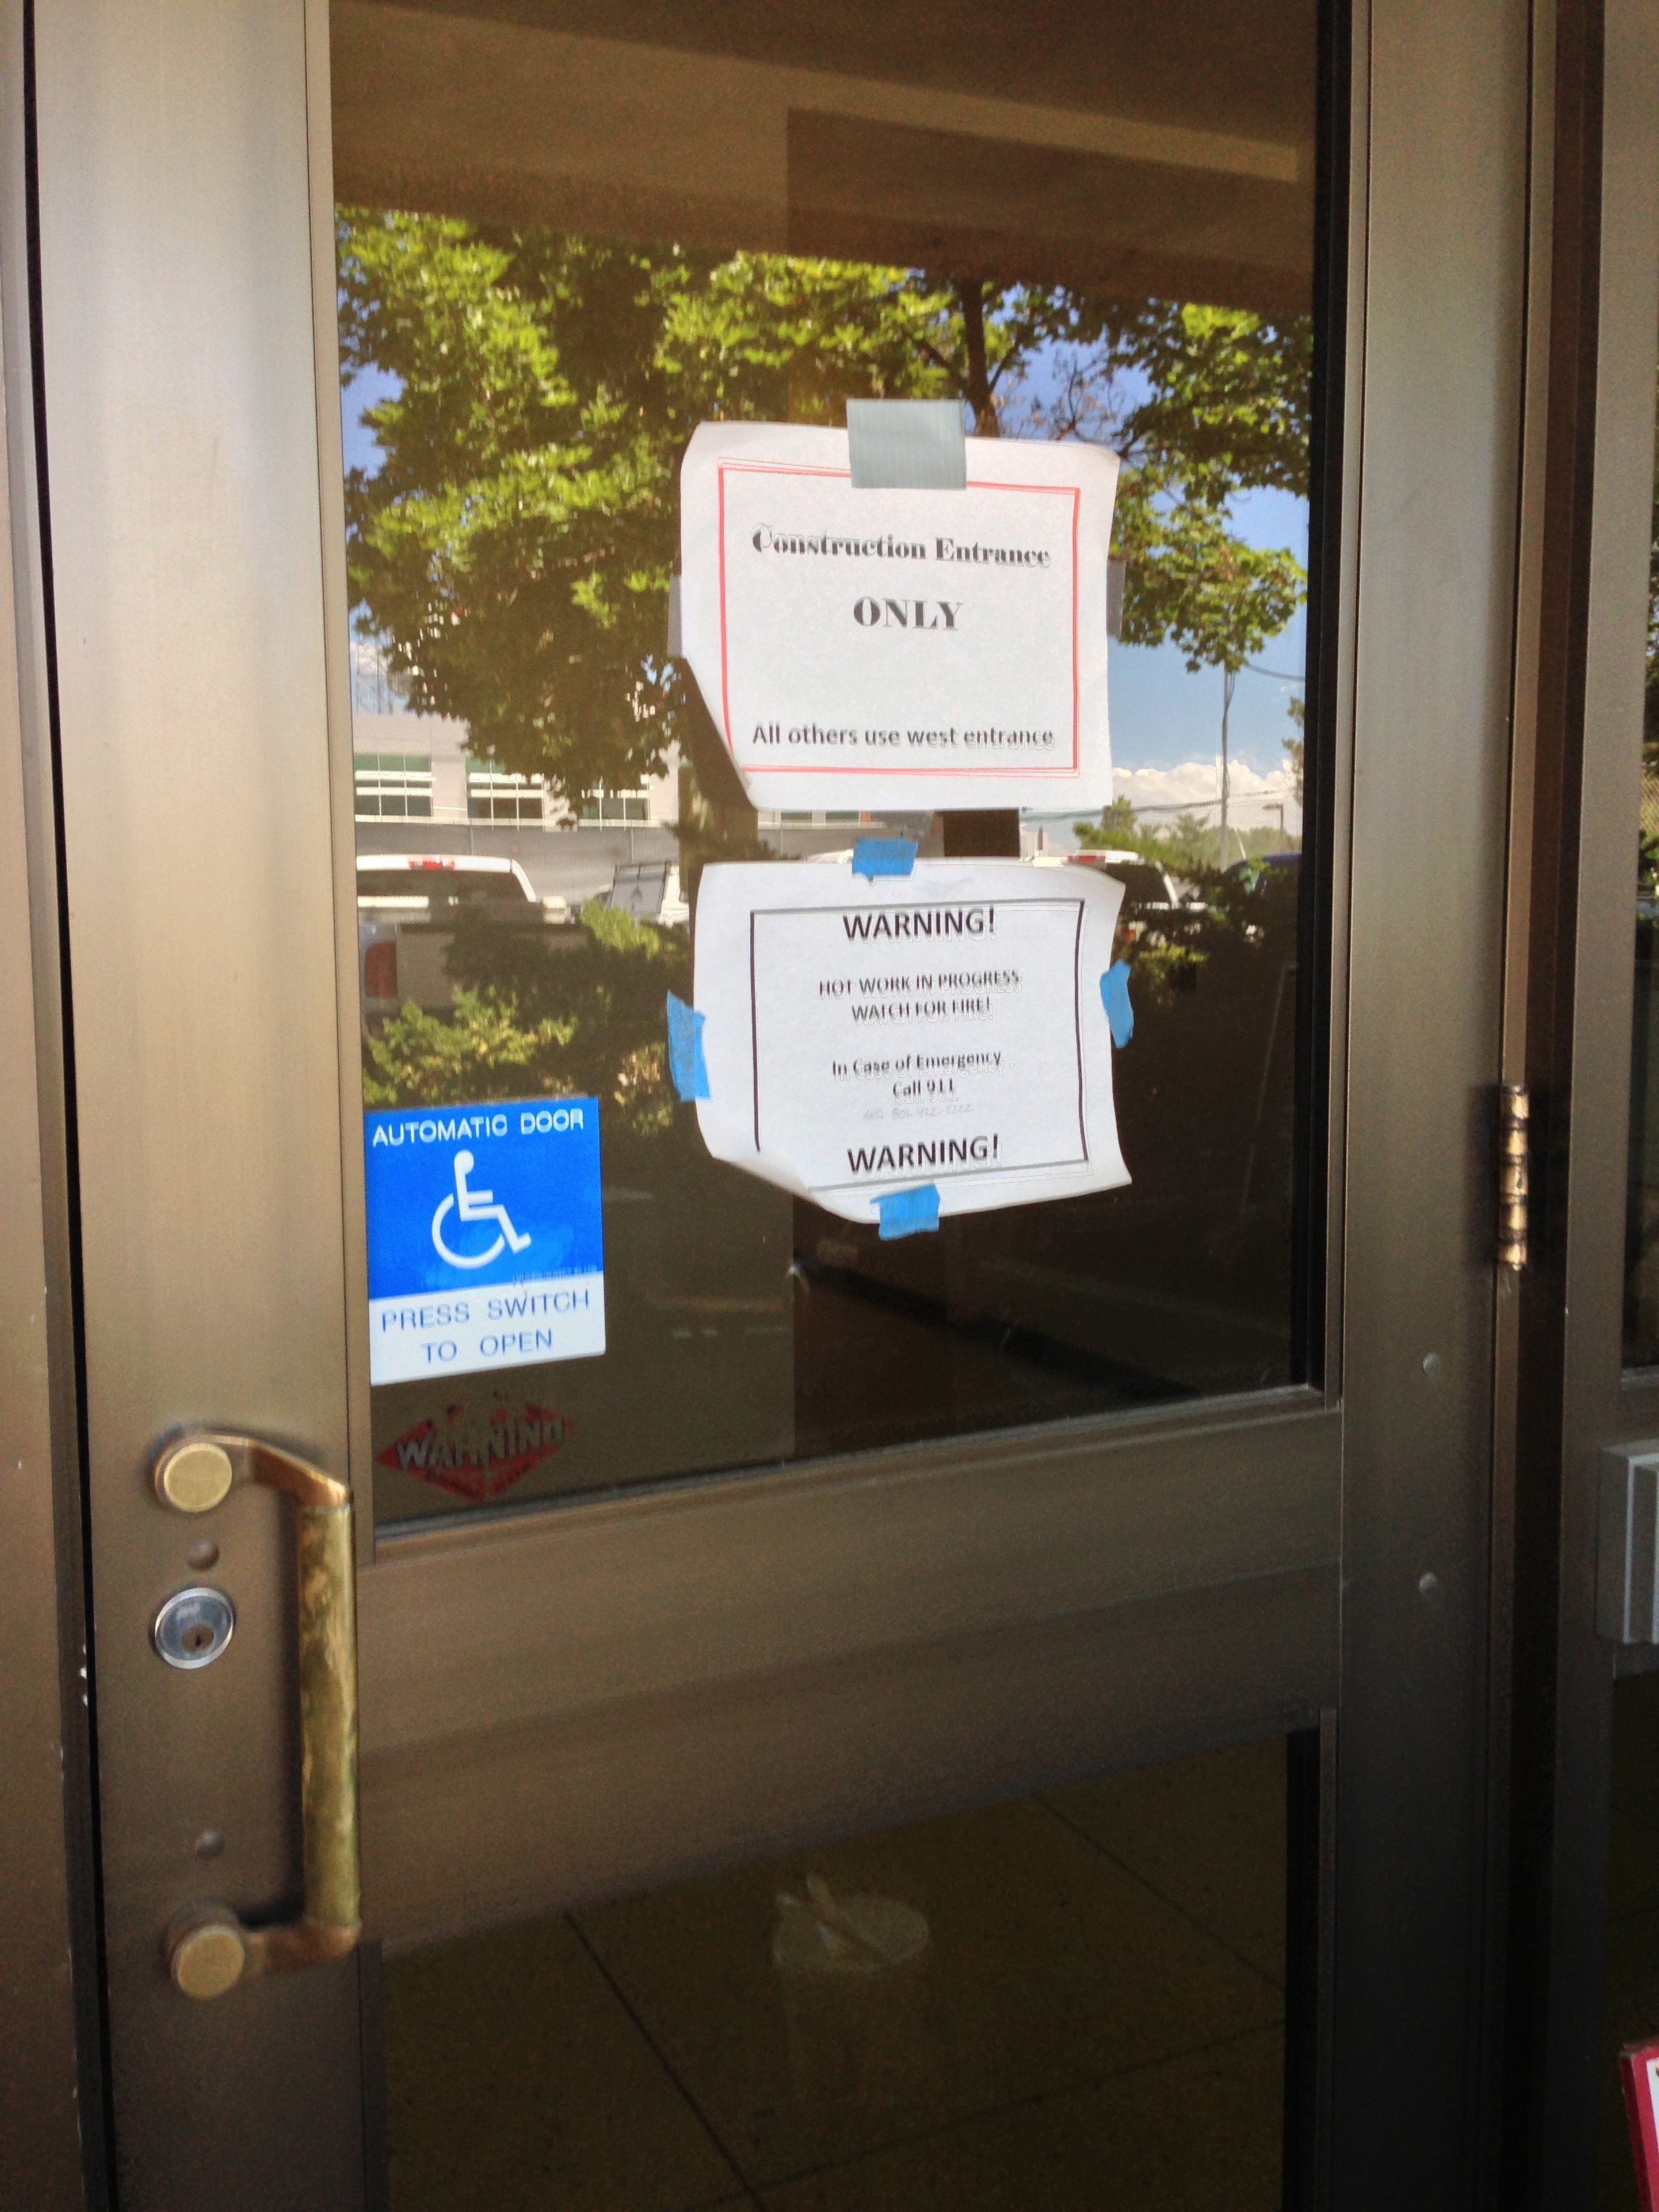
Item 3: Go dumpster diving to obtain a photo of sensitive and/or potentially valuable information
Note: Please specify the information, but redact the information in the attached photo.
Example:

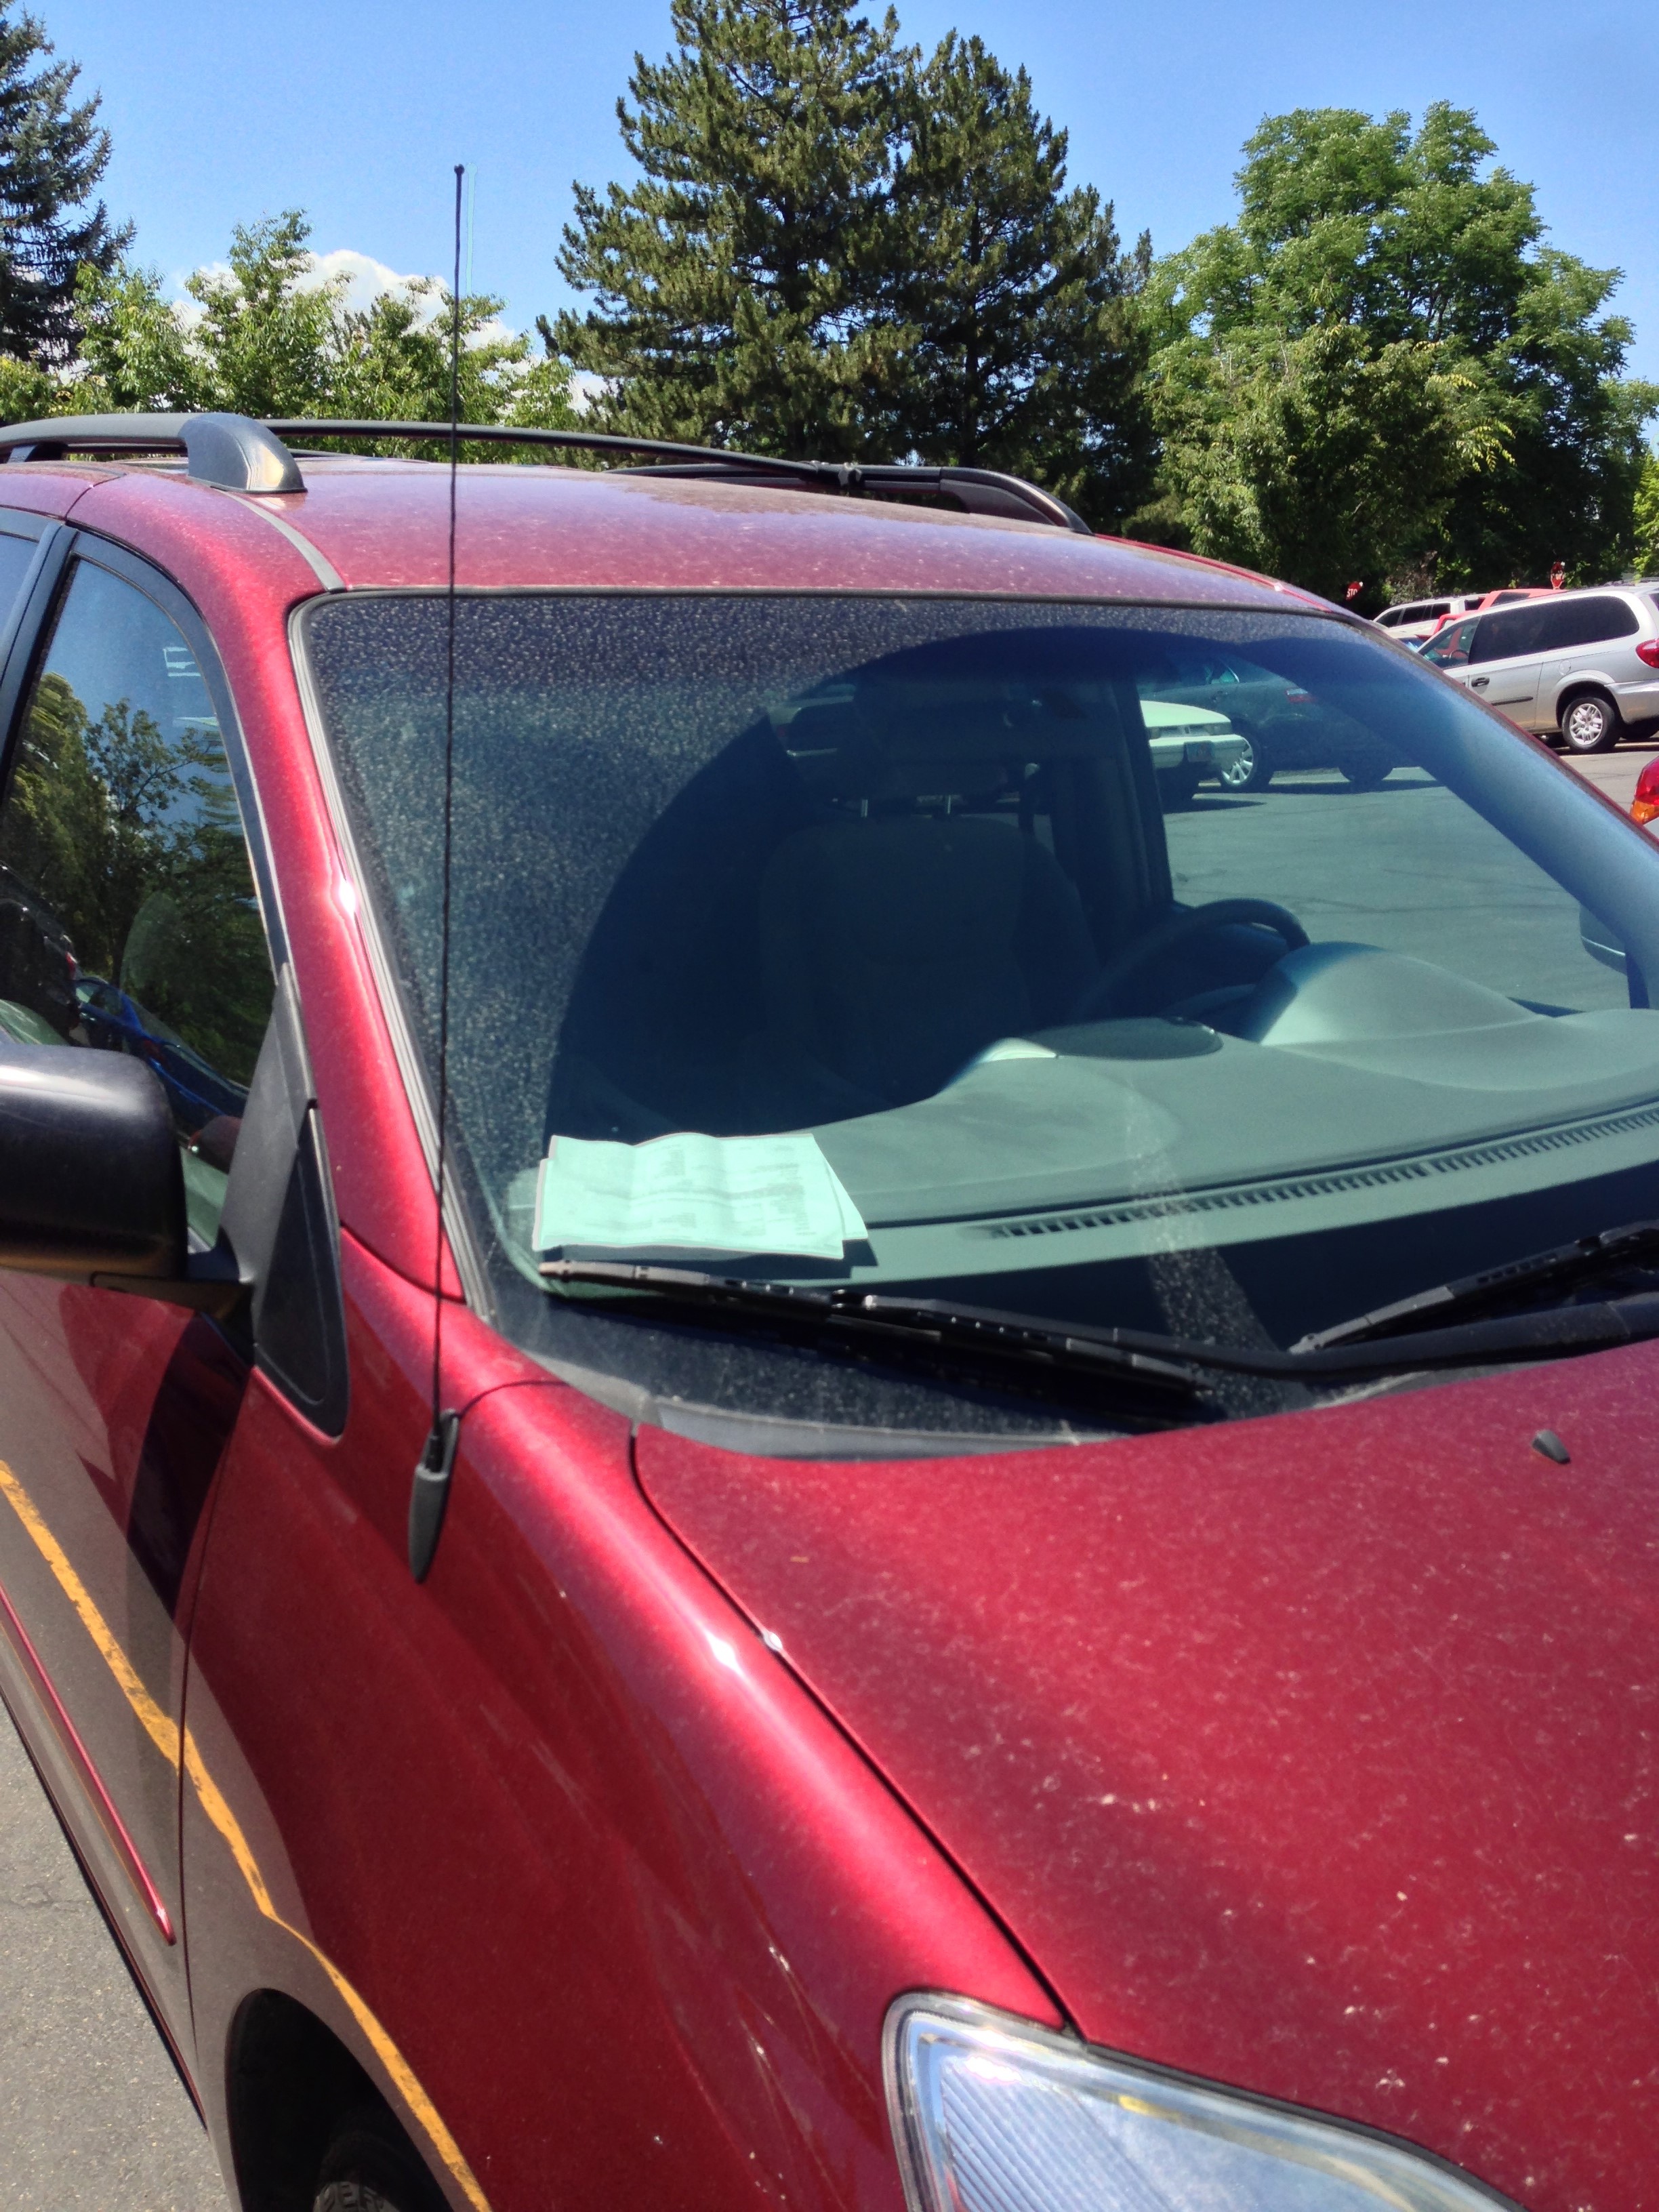
Item 4: Take a picture of sensitive/potentially valuable information left in someone’s car
Example:
Item 5: Gain access to a pre-approved restricted area
Take a picture of yourself in the restricted area and document how you did it (e.g., tailgaiting). Get permission from a manager or owner, etc., before entering the restricted area. For example, you might explain to a manager that you are doing a class assignment and you would like to test whether their employees will prohibit you from entering the restricted area. Only proceed with the test with the manager’s approval.
Example:
Item 6: Enter a pre-approved restricted area by disguise
For example, use a clipboard or fake ID. You can double-count this one with #5.
Item 7: Get a photo of an ID badge that is good enough to make a duplicate, and make a duplicate
Note: Bonus points if you actually make a passable counterfeit badge.
Item 8: Photo document the security cameras in a building and establish a route through the building without being recorded
The route-map can be drawn out, but it’s cooler if you video-record yourself doing it.
Item 9: Install a false keylogger on a public computer
Pretend that a USB drive is a keylogger. Plug it into the back of a public computer, and leave it there for a day. Retrieve it later. Take a picture of when you leave it and when you retrieve it.
Important: Do not use an actual keylogger unless you have prior approval from the device owner.
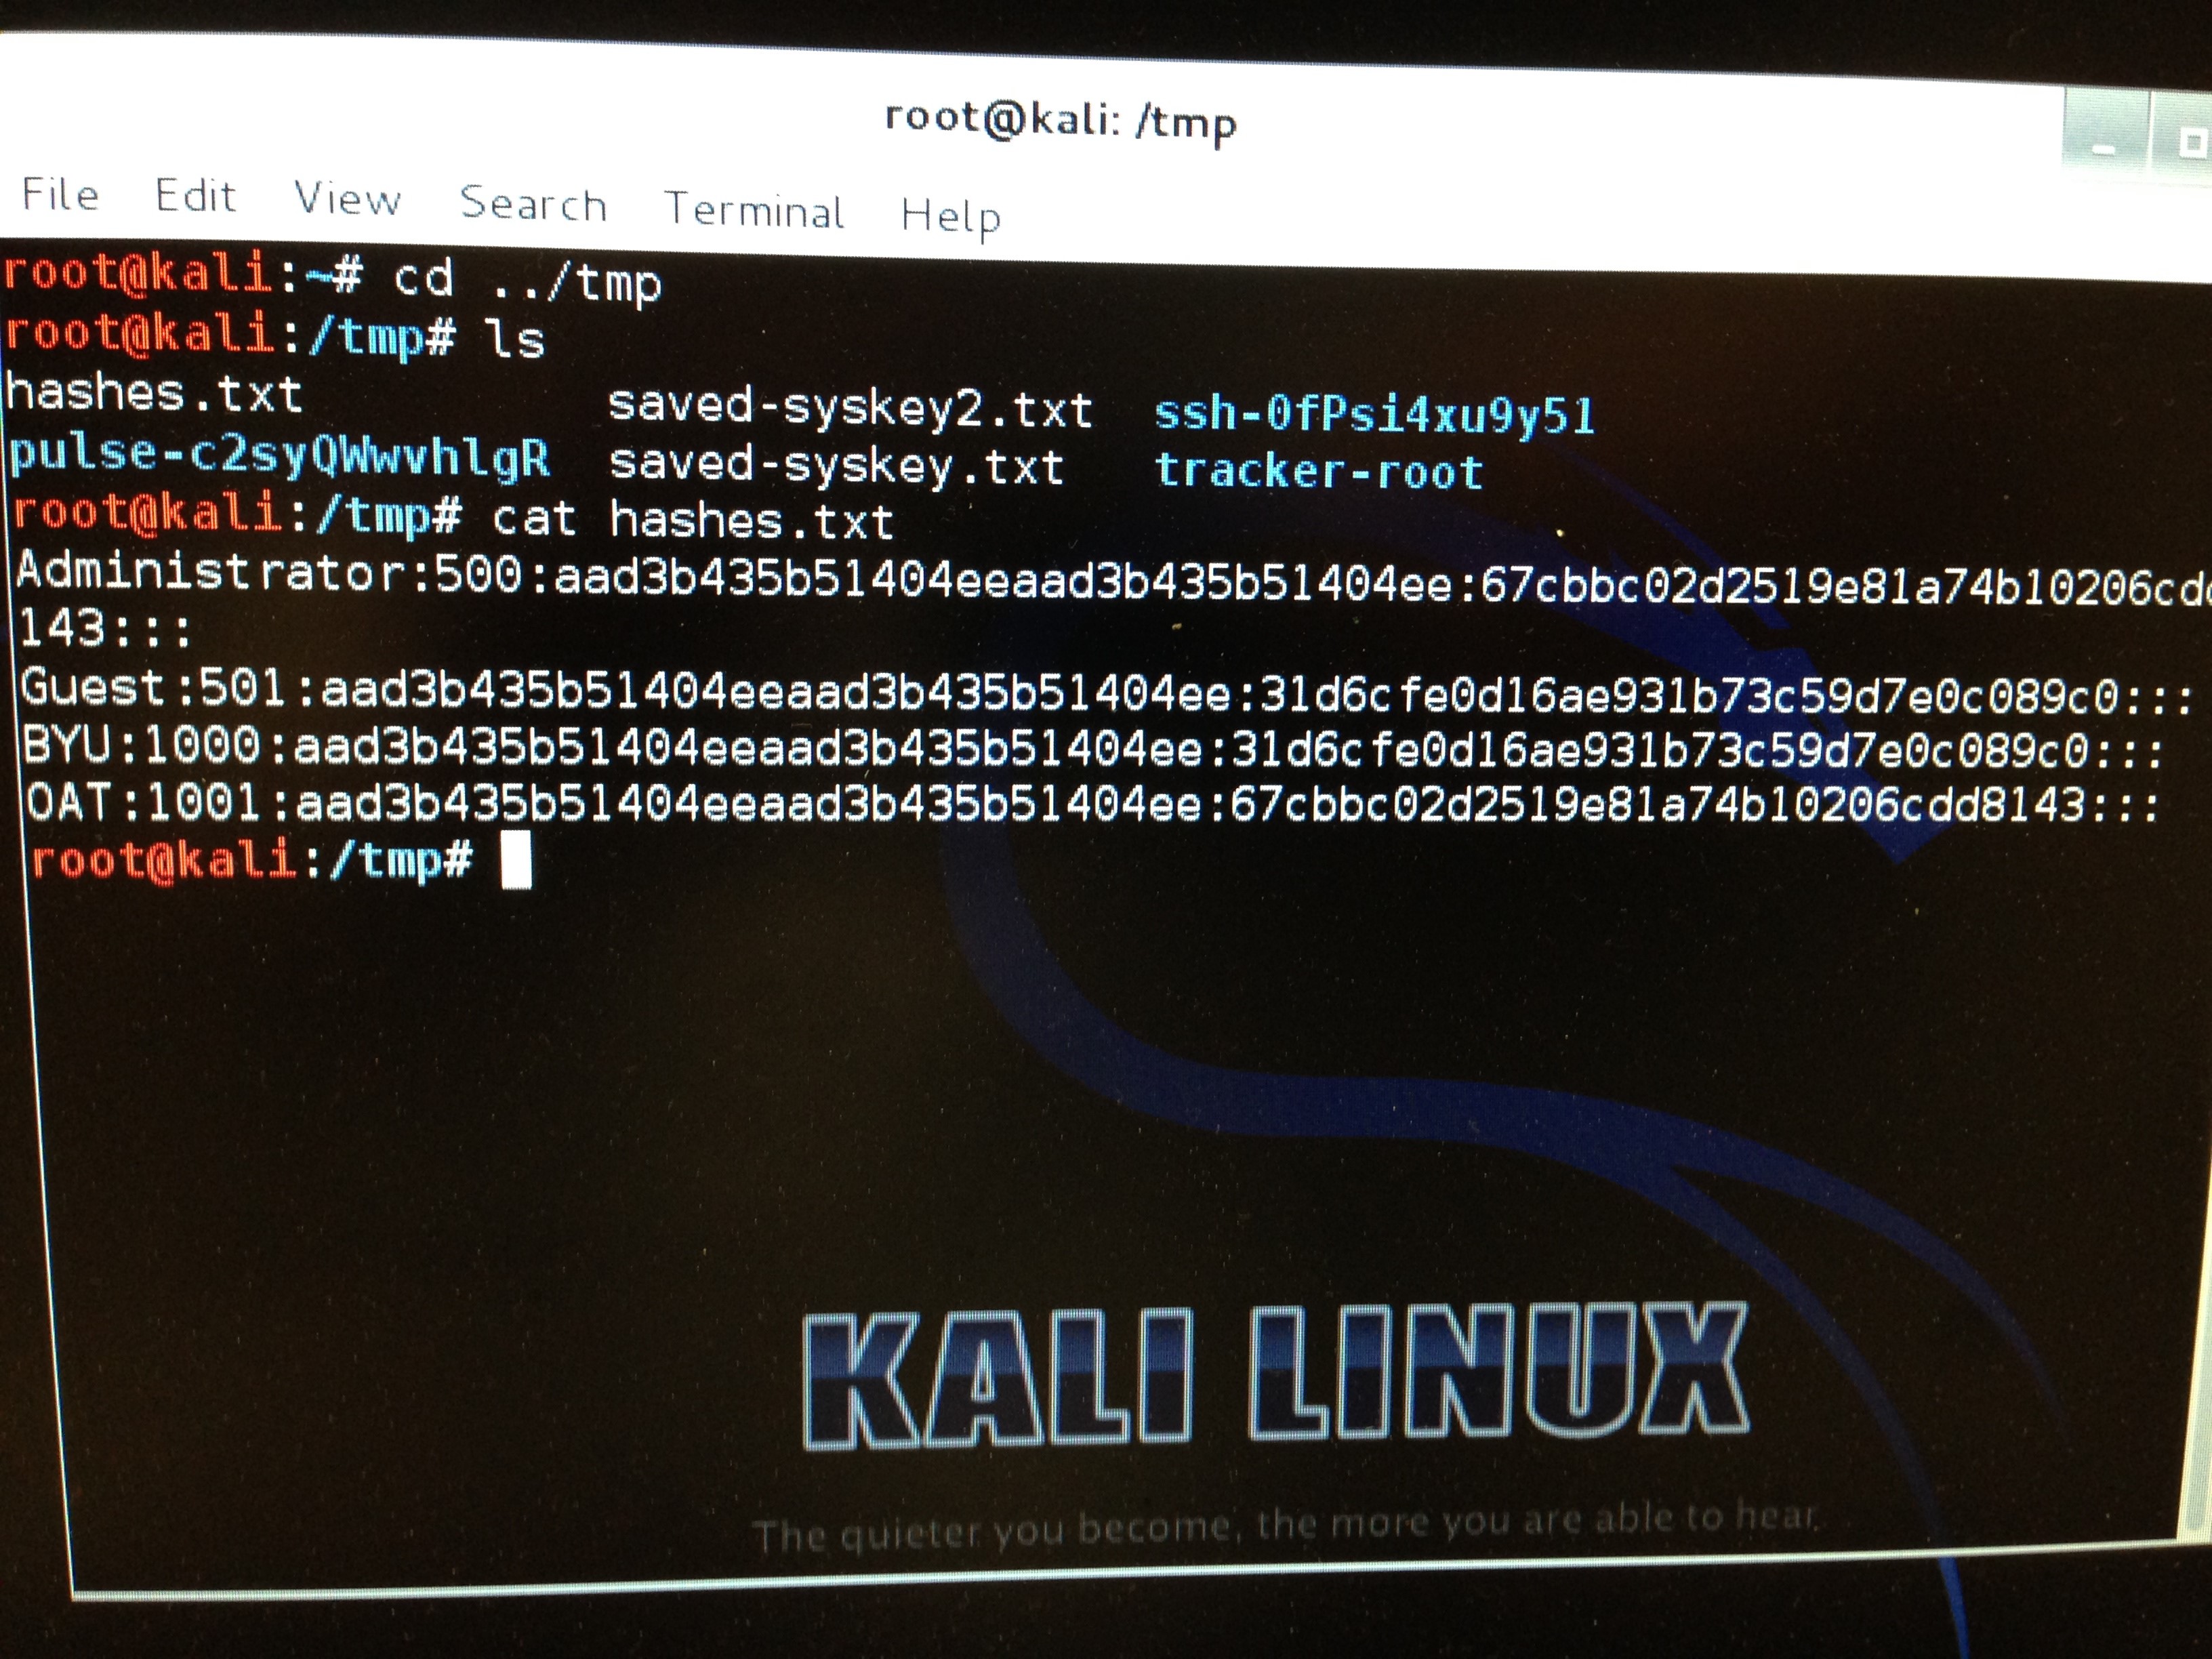
Item 10: Obtain the password hashes from an unattended public computer
Note: This Item uses Cain. It can be downloaded from www.oxid.it. However, this file will set off all sorts of virus detection alarms and warnings, both in the browser and on your computer. Cain is not a virus, and www.oxid.it is the official site to obtain the file from. But you can use Cain to do suspicious things, so it gets flagged.

Obtain the password hashes from an unattended public computer. In Windows 7/10, the password hashes are contained in two files (you’ll need both):
C:\Windows\system32\config\SAM
C:\Windows\system32\config\system
Since these files are protected by the operating system, create a Kali bootable USB drive (via Windows, OS X). From within Kali, copy the SAM and system files to a USB stick.
Password hashes can be dumped from the SAM file using a number of tools. For this lab, use Cain.
Run Cain (ignore any messages about the Windows firewall). Click the “Cracker” tab, and click within the right-hand pane to give it focus. Click on the + button in the toolbar and select Import Hashes from a SAM Database. Select the SAM file you obtained. Next to the Boot Key (HEX) field, select the System file you obtained. This will yield a hex string that you must copy and paste into the Boot Key (HEX) field.
Include a screen shot of the hashes below to prove that you’ve done it.
Note: Include a photo of the hashes, but don’t actually crack the hashes.
Example:
Item 11: Boot a Macintosh or Linux computer in single user mode and dump the hash
Note: You must own the computer or have permission from the owner to do this.
Boot a Mac or Linux computer (or VM) in single user mode and dump the password.
On Linux (such as your Metasploitable VM), enter the keyword “single” at the end of the kernel boot options.
On a Mac, you can boot into single user mode by holding down the keys “⌘” and “s”.
Search online for how to dump the hash for your particular operating system. List your operating system, the commands you ran, and the password hash below.
Note: You won’t be able to enter single user mode on a Macintosh or Linux computer if full disk encryption is enabled. On a Mac, you can check to see whether FileVault is enabled by issuing this command from the terminal:
fdesetup status
Item 12: Install a reverse shell payload on a powered-off Windows computer
Note: You must own the computer or have permission from the owner to do this.
Follow the instructions below to install a reverse shell payload on a power-off Windows computer:
Take a video of the Windows computer booting up and show the established Meterpreter session on your Kali VM.
Item 13: More Unattended-Computer Mischief – Install a nuisance-yet-benign browser extension into the web browser of an unattended computer
Stealthily install a nuisance browser extension onto someone else’s computer. Perhaps wait until they have left their computer unattended and unlocked. Install an extension such as the following: